
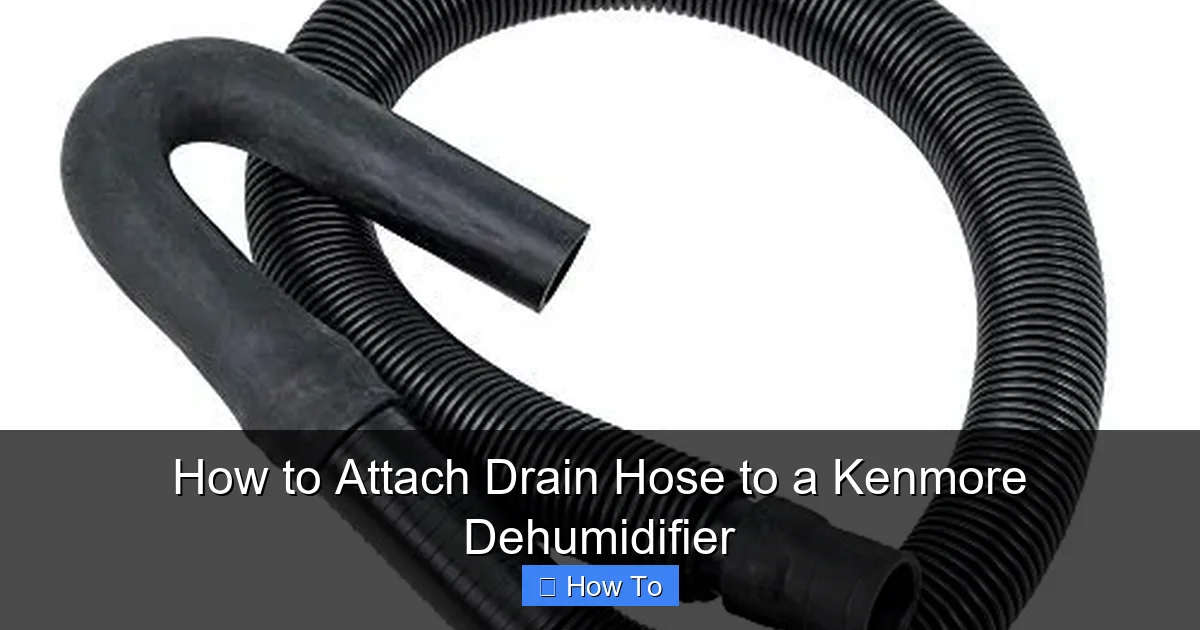
Attaching a drain hose to your Kenmore dehumidifier allows for continuous drainage, eliminating the need to manually empty the water tank. This guide walks you through the entire process—from choosing the right hose to securing a leak-free connection—so you can enjoy hassle-free dehumidification.
Quick Answers to Common Questions
Tip/Question?
Can I use a garden hose instead of a dehumidifier hose?
No, garden hoses are too stiff and may not fit the drain port properly. They can also kink easily, blocking water flow. Always use a flexible vinyl or reinforced hose designed for dehumidifiers.
Tip/Question?
Do I need a pump to drain my dehumidifier?
Only if the drain point is higher than the dehumidifier’s drain port. Gravity drainage works best when the hose slopes downward. For upward drainage, a small condensate pump is necessary.
Tip/Question?
How often should I clean the drain hose?
Clean it every 1–2 months to prevent mold and clogs. Use a mixture of water and white vinegar, then rinse thoroughly.
Tip/Question?
What if my Kenmore dehumidifier doesn’t have a drain port?
Some older or compact models lack a built-in port. In that case, you may need to modify the unit or use a continuous drainage kit designed for your model. Check with Kenmore support for compatibility.
Tip/Question?
Can I run the drain hose outside?
Yes, but only if it’s directed to a suitable outdoor drain or gutter. Avoid letting water pool near your home’s foundation, as this can cause moisture problems.
Introduction: Why Attach a Drain Hose to Your Kenmore Dehumidifier?
If you own a Kenmore dehumidifier, you already know how effective it is at pulling excess moisture from the air. But if you’ve ever woken up to a full water tank—or worse, a puddle on the floor—you understand the hassle of manual emptying. That’s where a drain hose comes in. By attaching a drain hose to your Kenmore dehumidifier, you enable continuous drainage, so the unit can run 24/7 without supervision. This not only saves you time but also improves efficiency, especially in damp basements, laundry rooms, or crawl spaces.
In this comprehensive guide, we’ll walk you through every step of attaching a drain hose to your Kenmore dehumidifier—from identifying the right equipment to securing a leak-free connection. Whether you’re a DIY beginner or a seasoned home improver, this guide is designed to be simple, clear, and practical. We’ll also cover troubleshooting tips, maintenance advice, and answers to common questions so you can get the most out of your dehumidifier with minimal effort.
What You’ll Need Before You Start
Before diving into the installation, gather all the necessary tools and materials. Having everything ready will make the process smoother and prevent unnecessary trips to the hardware store.
Visual guide about How to Attach Drain Hose to a Kenmore Dehumidifier
Image source: cdn.shopify.com
Essential Tools and Materials
- Drain hose: A flexible vinyl or reinforced rubber hose with an inside diameter of 5/8″ or 3/4″. Length depends on your setup—typically 6 to 20 feet.
- Hose clamps: Stainless steel screw clamps (2–4) to secure the hose to the dehumidifier’s drain port.
- Measuring tape: To determine the correct hose length.
- Scissors or utility knife: For cutting the hose to size if needed.
- Bucket or towel: To catch any residual water during installation.
- Optional: Condensate pump: If you’re draining into a sink or upward, a small pump may be necessary.
- Optional: Hose adapter or coupling: If your dehumidifier’s drain port doesn’t match standard hose sizes.
Most Kenmore dehumidifiers come with a built-in drain port, but it’s always a good idea to check your user manual or inspect the unit before purchasing supplies. Some models may require specific adapters or have unique port designs.
Step 1: Locate the Drain Port on Your Kenmore Dehumidifier
The first step in attaching a drain hose is finding where it connects to your dehumidifier. This port is typically located on the back or side of the unit, near the bottom. It’s often labeled “Drain” or marked with a small hose icon.
How to Identify the Drain Port
- Turn off and unplug the dehumidifier for safety.
- Look for a small, round opening—usually about 1/2″ to 3/4″ in diameter.
- Some models have a removable cap or plug covering the port. Gently twist or pull it off.
- If you can’t find it, consult your user manual or search online using your model number (e.g., Kenmore 580.75201).
For example, the Kenmore 580.75201 dehumidifier has a rear-mounted drain port near the base. Once located, inspect the port for any debris or residue. Clean it with a damp cloth if necessary to ensure a tight seal later.
Step 2: Choose the Right Drain Hose
Not all hoses are created equal. Using the wrong type can lead to leaks, kinks, or poor drainage. Here’s what to look for when selecting a drain hose for your Kenmore dehumidifier.
Hose Material and Flexibility
Vinyl hoses are the most common and affordable option. They’re lightweight, flexible, and resistant to mildew. Reinforced hoses, often made with a wire coil inside, are more durable and less likely to collapse under suction. Avoid garden hoses—they’re too stiff and may not fit properly.
Inside Diameter (ID)
The standard inside diameter for dehumidifier drain hoses is 5/8″ or 3/4″. Measure your dehumidifier’s drain port or check the manual to confirm the correct size. A hose that’s too small won’t fit; one that’s too large may slip off or leak.
Length Considerations
Choose a hose long enough to reach your drain point—whether it’s a floor drain, utility sink, or sump pump—but not so long that it creates loops or sags. Excess length can trap water and reduce flow efficiency. A 10-foot hose is usually sufficient for most home setups.
Special Features
Some hoses come with pre-attached fittings or anti-kink designs. These can make installation easier, especially in tight spaces. If your dehumidifier’s port is recessed, consider a hose with a rigid end or use an adapter.
Step 3: Prepare the Hose for Installation
Once you’ve selected the right hose, it’s time to prepare it for connection. This step ensures a snug, leak-free fit.
Cut the Hose to Length (If Needed)
If your hose is too long, use scissors or a utility knife to trim it. Make a clean, straight cut to avoid fraying. Measure twice, cut once!
Inspect for Damage
Check the hose for cracks, holes, or weak spots. Even small defects can cause leaks under constant water flow. Replace the hose if you find any damage.
Attach a Hose Clamp (Pre-Installation)
Slide a hose clamp onto the end of the hose before connecting it to the dehumidifier. This allows you to tighten it once the hose is in place. Use a stainless steel clamp for durability—plastic ones can crack over time.
Step 4: Connect the Hose to the Dehumidifier
Now comes the main event: attaching the hose to your Kenmore dehumidifier. Follow these steps carefully to ensure a secure connection.
Step 4.1: Insert the Hose into the Drain Port
Push the end of the hose firmly onto the dehumidifier’s drain port. It should fit snugly without forcing. If it’s too tight, try warming the hose end slightly with warm water to make it more pliable.
Step 4.2: Secure with a Hose Clamp
Slide the hose clamp over the connection point and tighten it using a screwdriver. Make sure it’s snug but not over-tightened—this can damage the hose or port. The clamp should prevent the hose from slipping off during operation.
Step 4.3: Double-Check the Fit
Gently tug on the hose to ensure it’s secure. If it moves or feels loose, retighten the clamp or consider using a larger clamp or adapter.
Optional: Use a Hose Adapter
If your dehumidifier’s port is an unusual size, you may need a rubber or plastic adapter. These fit between the port and the hose, creating a bridge for a secure connection. Adapters are inexpensive and widely available at hardware stores.
Step 5: Route the Hose to the Drain Point
Proper hose routing is crucial for effective drainage. Water must flow downward by gravity, so the hose should never rise above the dehumidifier’s drain port.
Choose the Right Drain Location
Common drain points include:
- Floor drain: Ideal for basements or laundry rooms.
- Utility sink: Use a sink adapter or let the hose rest in the basin.
- Sump pump pit: Ensure the hose doesn’t interfere with the float switch.
- Condensate pump: Required if draining upward or to a remote location.
Avoid Common Routing Mistakes
- Don’t let the hose sag or form loops—this traps water and slows drainage.
- Don’t run the hose across high-traffic areas where it could be tripped over.
- Don’t submerge the hose end completely in water—this can cause backpressure and reduce efficiency.
Secure the Hose in Place
Use zip ties, adhesive clips, or hose hangers to keep the hose in position. This prevents kinks and ensures consistent water flow. If routing through a wall or floor, use a grommet to protect the hose from sharp edges.
Step 6: Test the Drainage System
Before leaving your dehumidifier running unattended, it’s essential to test the entire setup.
Run a Test Cycle
Plug in the dehumidifier and turn it on. Let it run for 15–20 minutes while monitoring the hose and connection point. Watch for:
- Leaks at the hose connection
- Water backing up in the hose
- Unusual noises or vibrations
Check the Drain Output
Confirm that water is flowing steadily from the hose into the drain. If the flow is slow or intermittent, check for kinks, clogs, or improper slope.
Adjust as Needed
If you notice issues, turn off the unit, unplug it, and make adjustments. Tighten clamps, reposition the hose, or clear any blockages.
Troubleshooting Common Drain Hose Problems
Even with careful installation, issues can arise. Here’s how to solve the most common problems.
Problem: Water Leaking from the Connection
Cause: Loose hose clamp, ill-fitting hose, or damaged port.
Solution: Turn off the unit, dry the area, and retighten the clamp. If the hose is too loose, use a rubber washer or adapter. Replace the hose if it’s cracked.
Problem: Hose Keeps Slipping Off
Cause: Hose too small or clamp not tight enough.
Solution: Use a larger hose or add a second clamp. Consider a hose with a ribbed end for better grip.
Problem: Water Not Draining
Cause: Kinked hose, clog, or upward slope.
Solution: Straighten the hose and ensure it slopes downward. Flush the hose with warm water to remove debris. If draining upward, install a condensate pump.
Problem: Mold or Algae Growth in Hose
Cause: Stagnant water and humidity.
Solution: Clean the hose monthly with a mixture of water and white vinegar. Run the solution through the hose, then rinse thoroughly.
Maintenance Tips for Long-Term Performance
To keep your drain hose and dehumidifier working efficiently, regular maintenance is key.
Monthly Checks
- Inspect the hose for cracks, kinks, or blockages.
- Clean the dehumidifier’s air filter to maintain airflow.
- Wipe down the exterior and drain port with a damp cloth.
Seasonal Deep Cleaning
- Disconnect the hose and flush it with a cleaning solution.
- Check the drain pan inside the dehumidifier for mold or sludge.
- Replace the hose every 2–3 years or if signs of wear appear.
Winter Storage
If you store your dehumidifier during colder months, drain all water from the hose and unit. Coil the hose loosely and store it in a dry place to prevent damage.
Conclusion: Enjoy Hassle-Free Dehumidification
Attaching a drain hose to your Kenmore dehumidifier is a simple upgrade that makes a big difference. It eliminates the need for constant tank emptying, reduces the risk of overflow, and allows your unit to run efficiently around the clock. With the right hose, a secure connection, and proper routing, you can enjoy a drier, more comfortable home with minimal effort.
Remember to choose the correct hose size, secure it with a clamp, and always test the system before leaving it unattended. Regular maintenance will keep everything running smoothly for years to come. Whether you’re tackling a damp basement or protecting your belongings from humidity, this small change can have a lasting impact.
Now that you know how to attach a drain hose to your Kenmore dehumidifier, you’re ready to take control of your indoor air quality—effortlessly and effectively.