
Discover how to bake a silica safe dehumidifier to restore its moisture-absorbing power using your home oven. This eco-friendly method helps you reuse silica gel beads, saving money and reducing waste. Perfect for protecting electronics, cameras, and stored items from humidity damage.
Quick Answers to Common Questions
Tip/Question?
Can I bake silica gel packets without opening them?
Yes! You can bake sealed packets directly. The moisture will escape through the porous material, though opening them allows faster drying.
Tip/Question?
How often should I reactivate silica gel?
It depends on usage. Check color-changing gel regularly. Reactivate when it turns pink or every 1–3 months for high-moisture areas.
Tip/Question?
Can I use a microwave instead of an oven?
No. Microwaves heat unevenly and can cause hot spots, damaging the gel or creating fire hazards. Always use an oven.
Tip/Question?
Is all silica gel safe to bake?
Most are, but avoid gel with added chemicals or fragrances. Stick to pure, non-indicating or cobalt chloride-free gel.
Tip/Question?
How long does reactivated silica gel last?
Indefinitely, if stored in an airtight container. Reactivate whenever it becomes saturated again.
How to Bake a Silica Safe Dehumidifier
If you’ve ever opened a new pair of shoes, a camera bag, or a electronics box and found small packets labeled “Do Not Eat,” you’ve encountered silica gel. These tiny packets are packed with moisture-absorbing silica beads that help keep products dry during shipping and storage. But what happens when they’ve done their job? Instead of tossing them in the trash, you can bake a silica safe dehumidifier to bring them back to life.
Yes, you read that right—silica gel can be reactivated at home using your kitchen oven. This simple, cost-effective process allows you to reuse silica gel over and over, making it an eco-friendly and budget-smart solution for controlling humidity in your home, closet, or storage areas.
In this guide, you’ll learn exactly how to bake a silica safe dehumidifier step by step. We’ll cover what silica gel is, why reactivating it works, the tools you’ll need, detailed baking instructions, safety tips, and how to store your refreshed dehumidifier for future use. Whether you’re protecting valuable electronics, preserving important documents, or just trying to keep your closet smelling fresh, this method puts you in control of moisture management—without spending a dime on new packets.
What Is Silica Gel and Why Reactivate It?
Silica gel is a desiccant—a substance that absorbs and holds moisture from the air. It’s made from silicon dioxide, a non-toxic, inert material that’s safe for household use. The beads inside those little packets are porous, with millions of tiny holes that trap water molecules.
Over time, as silica gel absorbs moisture, it becomes saturated. You might notice color-changing silica gel turning from blue to pink (or orange to green, depending on the type), signaling it’s full. At this point, it can’t absorb any more moisture—unless you reactivate it.
Reactivating silica gel means driving out the trapped water so the beads can absorb moisture again. And the best way to do that? Heat. By baking silica gel in your oven, you evaporate the moisture, restoring its drying power. This process is called “regeneration,” and it’s commonly used in industrial settings. But you don’t need fancy equipment—just your kitchen oven.
Tools and Materials You’ll Need
Before you start, gather these supplies:
- Used silica gel packets or loose beads: Collect packets from shoe boxes, electronics, or bulk silica gel containers.
- Oven-safe baking dish: A shallow glass, ceramic, or metal dish works best. Avoid plastic.
- Oven thermometer (optional but recommended): Ensures your oven is at the correct temperature.
- Tweezers or spoon: For handling small packets or beads.
- Heat-resistant gloves: Protect your hands when handling hot dishes.
- Airtight container: For storing reactivated silica gel.
- Well-ventilated workspace: Open a window or use a fan to avoid inhaling any fumes.
Step-by-Step Guide to Baking Silica Gel
Now that you’re prepared, let’s walk through the process of baking your silica safe dehumidifier.
Step 1: Collect and Prepare the Silica Gel
Start by gathering all your used silica gel packets. You can also use loose beads if you’ve purchased them in bulk. Look for packets that are swollen or have changed color—these are fully saturated and ready for reactivation.
If you’re using packets, you have two options:
- Leave them sealed: This is the easiest method. The packets will heat up, and moisture will escape through the porous material.
- Open them and pour out the beads: This allows for faster and more even drying. Use tweezers or scissors to carefully open the packets and transfer the beads to your baking dish.
Tip: If you open the packets, make sure your baking dish is clean and dry. Any residue could contaminate the silica gel.
Step 2: Preheat Your Oven
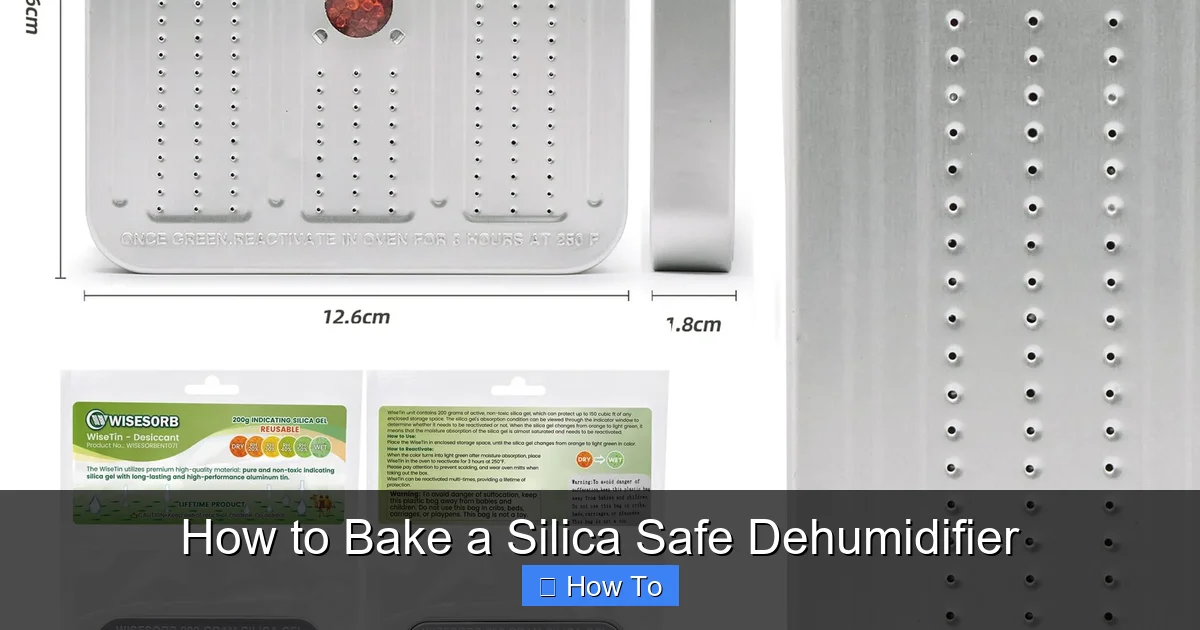
Set your oven to 250°F (121°C). This is the ideal temperature for reactivating silica gel—hot enough to evaporate moisture, but not so hot that it damages the beads or causes them to crack.
Avoid temperatures above 300°F (149°C), as excessive heat can degrade the silica structure or release unwanted fumes. If your oven runs hot, use an oven thermometer to double-check the actual temperature.
Preheating ensures even heating from the start, which is crucial for consistent results.
Step 3: Arrange the Silica Gel in the Baking Dish
Spread the silica gel beads or packets in a single layer across the baking dish. Don’t pile them up—this prevents even heat distribution and can leave some beads still damp.
If using packets, place them flat with the label side up so you can monitor any color changes. For loose beads, aim for a layer no more than ½ inch (1.3 cm) thick.
Tip: Use a dish that’s large enough to avoid overcrowding. A 9×13-inch baking dish works well for up to 2 cups of silica gel.
Step 4: Bake the Silica Gel
Place the baking dish in the center of the preheated oven. Bake for 1 to 2 hours, depending on the amount and saturation level.
Here’s a general guideline:
- Lightly used gel: 1 hour may be enough.
- Heavily saturated gel: Up to 2 hours may be needed.
Check the silica gel periodically. If you’re using color-indicating gel (blue when dry, pink when wet), you’ll see the beads gradually return to their original color as they dry.
Tip: Don’t open the oven door too often, as this can cause temperature fluctuations and extend baking time.
Step 5: Cool and Test the Silica Gel
After baking, turn off the oven and let the silica gel cool completely inside the oven with the door closed. This prevents sudden temperature changes that could cause cracking.
Once cooled, remove the dish using heat-resistant gloves. The beads should feel dry and return to their original color (if color-changing).
To test if reactivation was successful, place a few beads in a small airtight container with a damp paper towel. Seal it and wait 24 hours. If the beads absorb moisture and change color, they’re working properly.
Step 6: Store or Reuse the Silica Gel
Once reactivated, transfer the silica gel to an airtight container until you’re ready to use it. Mason jars, plastic food containers with tight lids, or resealable bags work well.
Label the container with the date so you know when it was last reactivated. Properly stored, reactivated silica gel can last for months before needing another bake.
When you’re ready to use it, place the beads in breathable fabric sachets, old socks, or reuse the original packets. Put them in areas prone to moisture—like camera bags, toolboxes, shoe boxes, or storage bins.
Safety Tips and Best Practices
While baking silica gel is generally safe, follow these precautions to avoid accidents:
- Never eat silica gel: Even though it’s non-toxic, it’s not food. Keep it away from children and pets.
- Avoid overheating: Stick to 250°F (121°C). Higher temperatures can damage the gel or release fumes.
- Use ventilation: Open a window or turn on a range hood to disperse any steam or odors.
- Don’t bake in non-oven-safe containers: Plastic, wax paper, or cardboard can melt or catch fire.
- Wear gloves: Hot dishes can cause burns.
- Don’t rush the process: Under-baked gel won’t absorb moisture effectively.
Troubleshooting Common Issues
Even with careful preparation, you might run into a few hiccups. Here’s how to fix them:
Problem: Silica gel isn’t drying completely
Solution: It may need more time in the oven. Extend baking by 30 minutes and check again. Ensure the beads are spread in a thin layer for even heating.
Visual guide about How to Bake a Silica Safe Dehumidifier
Image source: m.media-amazon.com
Problem: Beads are cracking or breaking
Solution: This can happen if the oven is too hot or if the gel cools too quickly. Stick to 250°F and let it cool slowly in the oven.
Problem: Gel smells odd after baking
Solution: Silica gel should be odorless. A strange smell could mean contamination (e.g., from food residue or chemicals). Discard and start with clean gel.
Problem: Color-changing gel isn’t returning to original color
Solution: Some dyes degrade over time. If the gel still absorbs moisture (test with the damp paper towel method), it’s still usable—just not color-indicating anymore.
Creative Uses for Reactivated Silica Gel
Once you’ve baked your silica safe dehumidifier, put it to work in these practical ways:
- Protect electronics: Place packets in camera bags, phone cases, or toolboxes to prevent moisture damage.
- Preserve documents: Store important papers, photos, or books with silica gel to prevent mold and yellowing.
- Keep shoes dry: Tuck packets into sneakers or boots to absorb sweat and odors.
- Dehumidify small spaces: Use in jewelry boxes, gun safes, or musical instrument cases.
- Emergency preparedness: Include reactivated silica gel in your emergency kit to keep supplies dry.
Environmental and Economic Benefits
Baking silica gel isn’t just convenient—it’s also sustainable. The average household throws away dozens of silica packets each year. By reactivating them, you reduce waste and save money.
A single packet can be reused hundreds of times. Over time, this adds up to significant savings compared to buying new dehumidifiers or moisture absorbers.
Plus, silica gel is non-toxic and doesn’t contribute to plastic pollution like some commercial dehumidifiers. It’s a green solution for a common household problem.
Conclusion
Learning how to bake a silica safe dehumidifier is a simple, smart, and sustainable skill. With just your oven and a few basic supplies, you can restore the moisture-absorbing power of silica gel and use it again and again.
This method saves money, reduces waste, and gives you control over humidity in your home. Whether you’re protecting valuables, organizing your closet, or prepping for storage, reactivated silica gel is a reliable ally against moisture.
So the next time you find a silica packet, don’t toss it—bake it. Your wallet, your belongings, and the planet will thank you.