

Cleaning your Haier dehumidifier regularly ensures optimal performance, prevents mold and bacteria buildup, and extends the appliance’s life. This guide walks you through a complete, easy-to-follow cleaning process using simple household supplies.
Quick Answers to Common Questions
Tip/Question?
Can I use bleach to clean my Haier dehumidifier tank?
No, avoid bleach. It can damage plastic parts and leave harmful residues. Use white vinegar or mild soap instead—they’re safe and effective.
Tip/Question?
How do I know if my dehumidifier filter needs replacing?
If the filter is torn, discolored, or doesn’t improve airflow after cleaning, it’s time for a new one. Most filters last 6–12 months with regular use.
Tip/Question?
Should I clean the coils even if the unit seems to be working fine?
Yes. Dust on coils reduces efficiency over time. Clean them every 3–6 months, especially in dusty environments.
Tip/Question?
Can I run my dehumidifier without the filter?
No. The filter protects internal components from dust. Running it without a filter can cause damage and void your warranty.
Tip/Question?
What’s the best way to prevent mold in the water tank?
Empty and rinse the tank after each use, and clean it weekly with vinegar. Never let water sit for more than 24 hours.
How to Clean a Dehumidifier Haier: A Complete Step-by-Step Guide
If you own a Haier dehumidifier, you already know how valuable it is in keeping your home comfortable, reducing humidity, and preventing mold and mildew. But like any appliance, it needs regular maintenance to work at its best. Over time, dust, moisture, and mineral deposits can build up inside and around your unit, reducing its efficiency and potentially causing unpleasant odors or even mechanical issues.
In this comprehensive guide, we’ll walk you through exactly how to clean a dehumidifier Haier safely and effectively. Whether you have a small portable model or a larger unit for your basement or whole house, these steps apply to most Haier dehumidifiers. You’ll learn how to clean the water tank, filter, coils, fan, and exterior—plus tips for troubleshooting common problems and storing your unit properly. By the end, your dehumidifier will run quieter, work harder, and last longer.
Why Cleaning Your Haier Dehumidifier Matters
Many people overlook dehumidifier maintenance, assuming that because it removes moisture, it stays clean on its own. That’s a common misconception. In reality, the very moisture your dehumidifier pulls from the air creates a perfect breeding ground for mold, bacteria, and mildew—especially in the water tank and internal components.
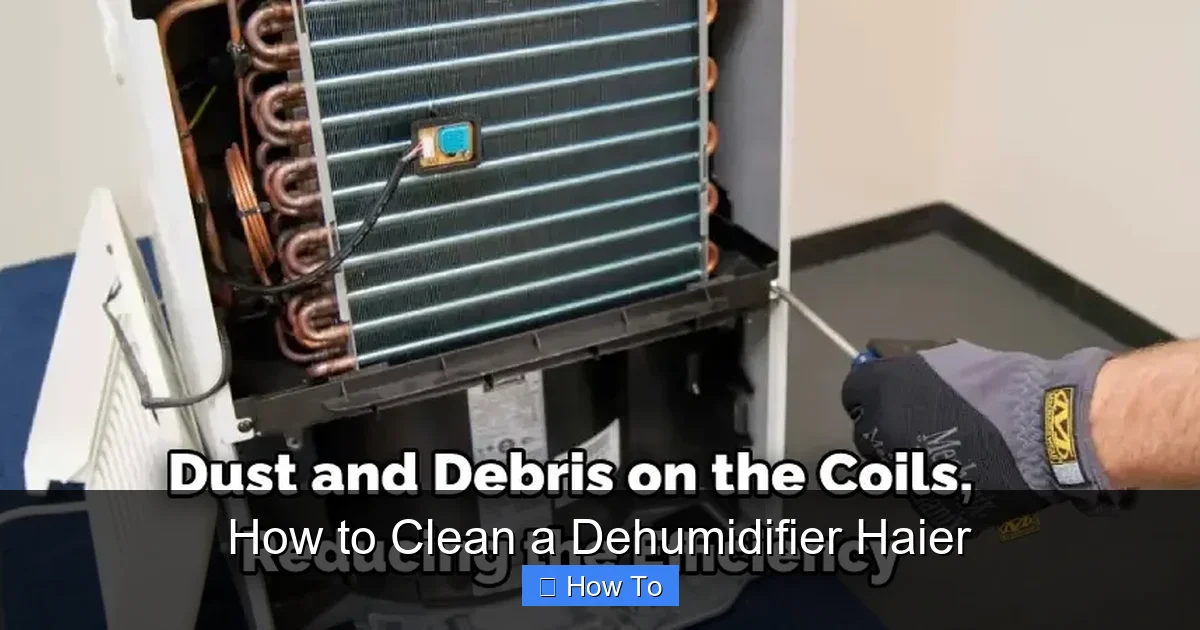
Visual guide about How to Clean a Dehumidifier Haier
Image source: indoorense.com
When you don’t clean your Haier dehumidifier regularly, several things can happen:
- Reduced efficiency: Dust and debris block airflow, forcing the unit to work harder and use more energy.
- Unpleasant odors: Mold and bacteria in the tank or filter can produce musty smells that spread through your home.
- Increased wear and tear: Clogged coils and fans strain the motor, leading to premature failure.
- Health risks: Airborne mold spores and bacteria can aggravate allergies and respiratory issues.
Cleaning your dehumidifier every 2–4 weeks—especially during humid seasons—can prevent these problems and keep your indoor air fresh and healthy. Plus, a well-maintained unit uses less electricity, saving you money on your energy bill.
What You’ll Need to Clean Your Haier Dehumidifier
Before you begin, gather these supplies. Most are common household items, so you likely already have them on hand:
- Soft cloth or sponge
- Mild dish soap or white vinegar
- Warm water
- Soft-bristle brush (like an old toothbrush)
- Vacuum cleaner with a brush attachment
- Rubber gloves (optional, for hygiene)
- Clean towel or paper towels
- Replacement filter (if needed)
Avoid using harsh chemicals like bleach, ammonia, or abrasive cleaners. These can damage plastic parts, corrode metal components, and leave behind toxic residues. Stick to mild, non-toxic cleaners for safety and longevity.
Step 1: Turn Off and Unplug the Unit
Safety first! Before you touch any part of your dehumidifier, make sure it’s completely powered down.
How to safely power down your Haier dehumidifier
- Press the power button to turn off the unit.
- Unplug the power cord from the wall outlet.
- Wait at least 10–15 minutes for the internal components to cool down, especially if the unit has been running recently.
Never clean a dehumidifier while it’s plugged in or still warm. The compressor and coils can retain heat, and water near electrical parts is a serious hazard.
Step 2: Remove and Empty the Water Tank
The water tank (also called the collection bucket) is where moisture from the air collects. It’s the most important part to clean regularly because it’s prone to mold and slime buildup.
How to remove the water tank
- Locate the water tank—usually at the front or bottom of the unit.
- Gently pull the tank straight out. Some models have a latch or release button; check your user manual if you’re unsure.
- If the tank is full, carry it carefully to avoid spills.
How to clean the water tank
- Empty any remaining water into a sink or drain.
- Rinse the tank thoroughly with warm water to remove loose debris.
- Add a few drops of mild dish soap or 1/4 cup of white vinegar to the tank.
- Fill the tank halfway with warm water and swish the solution around.
- Use a soft brush or sponge to scrub the inside, especially the corners and lid where grime accumulates.
- Rinse thoroughly with clean water until no soap or vinegar smell remains.
- Wipe the outside of the tank with a damp cloth.
- Let the tank air dry completely before reinserting it.
Pro Tip: For stubborn mold or slime, soak the tank in a vinegar-water solution (1:1 ratio) for 15–20 minutes before scrubbing. Vinegar is a natural disinfectant and deodorizer.
Step 3: Clean or Replace the Air Filter
The air filter traps dust, pollen, and other particles from the air before it enters the dehumidifier. Over time, it becomes clogged, reducing airflow and efficiency.
How to locate and remove the filter
- Look for a filter cover on the back or side of the unit—usually marked with a filter icon.
- Open the cover by pressing the tabs or unscrewing it (depending on your model).
- Gently pull the filter out.
How to clean the filter
- Shake the filter gently to remove loose dust.
- Use a vacuum cleaner with a brush attachment to suck up embedded dirt.
- If the filter is washable (most Haier models are), rinse it under lukewarm water.
- Do not use soap—it can leave residues that attract more dust.
- Gently pat the filter dry with a clean towel.
- Let it air dry completely (at least 1–2 hours) before reinstalling.
If the filter is torn, heavily soiled, or hasn’t been replaced in over 6 months, it’s time to get a new one. A clean filter ensures better air quality and protects the internal components.
Step 4: Clean the Exterior and Control Panel
The outside of your dehumidifier collects dust, fingerprints, and grime—especially if it’s placed in a basement, laundry room, or garage.
How to clean the exterior
- Wipe the outer casing with a soft, damp cloth.
- For stubborn stains, use a cloth lightly dampened with soapy water.
- Avoid spraying water directly on the unit—wipe instead.
- Dry immediately with a clean towel to prevent water spots.
How to clean the control panel
- Use a microfiber cloth slightly dampened with water.
- Never use liquids near buttons or displays.
- For sticky residue, use a cotton swab dipped in isopropyl alcohol (70% or less).
- Wipe gently and let dry completely before plugging in.
Keeping the exterior clean not only makes your dehumidifier look better but also prevents dust from being sucked into the unit.
Step 5: Clean the Coils and Fan (Advanced Cleaning)
The evaporator and condenser coils are essential for removing moisture from the air. Dust buildup on these coils reduces heat exchange efficiency, making your dehumidifier work harder. The fan also collects dust, which can cause noise and overheating.
How to access the coils and fan
- Refer to your Haier user manual for specific instructions—some models require removing side or back panels.
- Use a screwdriver to carefully remove the access panel (if needed).
- Take a photo before disassembling to help with reassembly.
How to clean the coils
- Use a soft brush or vacuum with a brush attachment to remove loose dust.
- For heavy buildup, use a coil cleaner spray (available at hardware stores) or a mixture of water and mild detergent.
- Spray lightly and let it sit for a few minutes, then wipe with a soft cloth.
- Do not bend or damage the delicate fins on the coils.
- Allow the coils to dry completely before reassembling.
How to clean the fan
- Use a vacuum to remove dust from the fan blades.
- For stuck-on grime, gently wipe with a damp cloth or soft brush.
- Never force the fan to spin—it can damage the motor.
Note: If you’re uncomfortable accessing internal parts, consider hiring a professional for deep cleaning once a year.
Step 6: Reassemble and Test the Unit
Once all parts are clean and dry, it’s time to put your dehumidifier back together.
How to reassemble your Haier dehumidifier
- Reinsert the air filter into its slot and close the filter cover.
- Place the clean, dry water tank back into the unit until it clicks into place.
- Reattach any panels or covers you removed.
- Plug the unit back into a grounded outlet.
- Turn it on and set your desired humidity level.
How to test the unit
- Listen for unusual noises—grinding, rattling, or squealing may indicate a problem.
- Check that the tank fills with water over time (place a small bowl underneath to catch drips if needed).
- Ensure the fan is running smoothly and air is flowing through the vents.
- Monitor the humidity level with a hygrometer to confirm the unit is working effectively.
If everything sounds and works normally, you’re all set! Your Haier dehumidifier is now clean, efficient, and ready to keep your home comfortable.
Troubleshooting Common Cleaning Issues
Even with regular cleaning, you might run into problems. Here’s how to handle the most common issues:
Problem: Water tank won’t come out
Solution: Check for a latch or release button. Some models require you to press a button while pulling. If it’s stuck, gently wiggle it while pulling—don’t force it.
Problem: Filter is damaged or missing
Solution: Order a replacement filter from Haier’s official website or an authorized retailer. Using the unit without a filter can damage internal components.
Problem: Unit still smells musty after cleaning
Solution: The odor may be coming from inside the coils or drainage system. Run the unit with a cup of white vinegar in the tank for a few hours to disinfect internally. Repeat if needed.
Problem: Fan is noisy or not spinning
Solution: Dust or debris may be blocking the fan. Clean it thoroughly. If the motor is damaged, contact Haier customer support.
Problem: Water leaks from the unit
Solution: Check that the tank is properly seated and not cracked. Also, ensure the drain hose (if used) is not clogged or kinked.
How Often Should You Clean Your Haier Dehumidifier?
Cleaning frequency depends on usage and environment:
- High humidity areas (basements, bathrooms): Clean every 2 weeks.
- Moderate use (living rooms, bedrooms): Clean every 3–4 weeks.
- Seasonal use (summer only): Clean before and after each season.
Always clean the water tank after each use if you empty it frequently. A good rule of thumb: if you notice a smell, reduced performance, or visible mold, it’s time to clean—no matter the schedule.
Tips for Maintaining Your Dehumidifier Between Cleanings
Regular cleaning is essential, but small habits can make a big difference:
- Empty the water tank daily if it fills quickly.
- Use a drain hose for continuous drainage if your model supports it.
- Keep the unit away from walls and furniture for proper airflow.
- Avoid placing it near sources of dust, like laundry rooms or workshops.
- Check the filter monthly—even if you don’t clean it, inspect it for damage.
Storing Your Haier Dehumidifier Properly
If you’re not using your dehumidifier for an extended period (like during winter), proper storage prevents mold and damage.
How to store your dehumidifier
- Clean all parts thoroughly (tank, filter, coils, exterior).
- Let everything dry completely.
- Remove the water tank and store it separately.
- Coil the power cord neatly and secure it with a twist tie.
- Store the unit in a dry, cool place—avoid attics or garages with extreme temperatures.
- Cover it with a breathable cloth or original box to prevent dust buildup.
When you’re ready to use it again, give it a quick clean and inspection before turning it on.
Conclusion
Cleaning your Haier dehumidifier doesn’t have to be complicated or time-consuming. With the right tools and a little routine, you can keep your unit running efficiently, extend its lifespan, and enjoy fresher, healthier air in your home. By following this step-by-step guide—emptying and cleaning the tank, maintaining the filter, wiping down the exterior, and occasionally deep-cleaning the coils and fan—you’ll get the most out of your investment.
Remember, a clean dehumidifier is a happy dehumidifier. And a happy dehumidifier means a more comfortable, mold-free, and energy-efficient home. So grab your supplies, set a reminder on your calendar, and make cleaning your Haier dehumidifier a regular part of your home maintenance routine.