

Keeping your Frigidaire dehumidifier clean ensures it works efficiently and lasts longer. This guide walks you through every step—from unplugging the unit to reassembling it—so you can maintain optimal performance and indoor air quality.
Quick Answers to Common Questions
Can I use bleach to clean the water tank?
No, avoid bleach. It can leave toxic residues and damage plastic components. White vinegar is a safer, effective alternative for disinfecting and descaling.
How do I know if my air filter needs replacing?
If the filter is torn, discolored, or doesn’t spring back when pressed, it’s time to replace it. Washable filters should be replaced every 1–2 years depending on use.
Should I clean the coils even if the unit seems to work fine?
Yes. Dust on coils reduces heat exchange efficiency, making the unit work harder and use more energy. Regular cleaning prevents long-term damage.
Can I run my dehumidifier without the air filter?
Never operate the unit without the filter. It protects internal components from dust and debris. Running it unfiltered can cause motor damage and reduce lifespan.
What if my Frigidaire model has a built-in pump?
Clean the pump reservoir and hose separately. Check the manual for pump-specific instructions—some require periodic flushing with vinegar to prevent clogs.
Why Cleaning Your Frigidaire Dehumidifier Matters
If you’ve noticed your Frigidaire dehumidifier isn’t pulling as much moisture from the air as it used to—or worse, it’s starting to smell musty—it’s probably time for a deep clean. Dehumidifiers work hard to remove excess humidity, but in doing so, they collect water, dust, and organic matter that can lead to mold, bacteria, and mineral buildup. Over time, this gunk clogs filters, coats coils, and fouls the water tank, reducing efficiency and potentially releasing unpleasant odors back into your home.
Cleaning your Frigidaire dehumidifier isn’t just about maintenance—it’s about health, performance, and longevity. A well-maintained unit uses less energy, lasts longer, and keeps your indoor air fresh and dry. Most manufacturers, including Frigidaire, recommend cleaning the unit at least once a month during heavy use (like summer) and every two to three months during lighter seasons. This guide will walk you through the entire process, step by step, so you can keep your dehumidifier in top shape—no matter the model.
What You’ll Need Before You Start
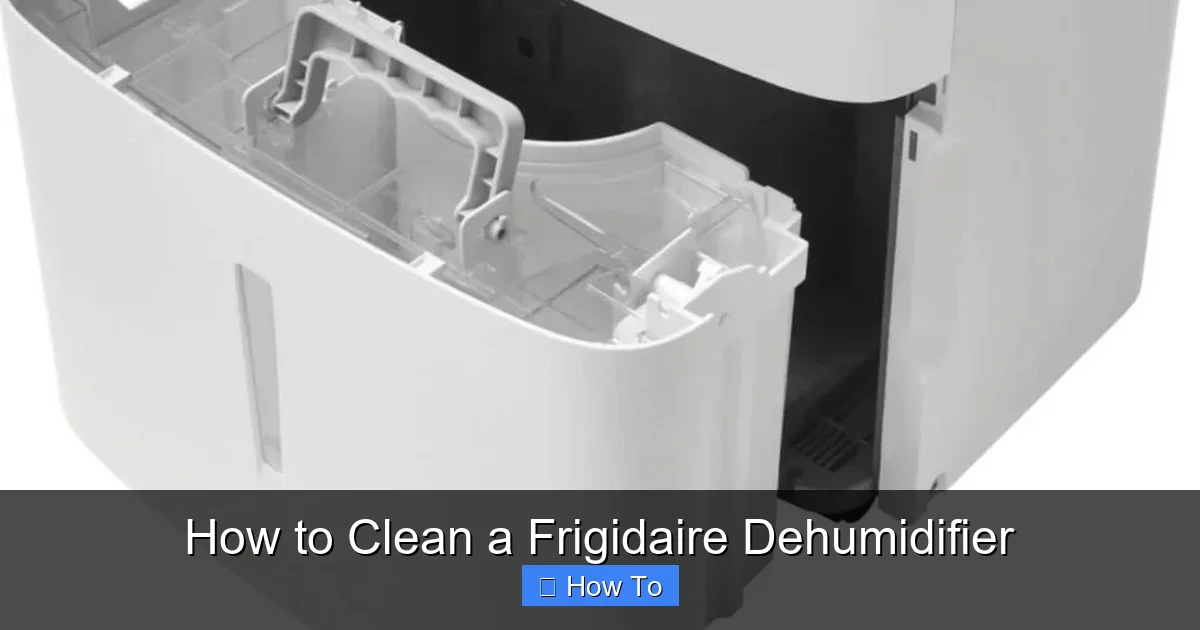
Visual guide about How to Clean a Frigidaire Dehumidifier
Image source: cleancrispair.com
Before diving into the cleaning process, gather these supplies to make the job quick and safe:
- Soft cloths or microfiber towels
- Mild dish soap
- White vinegar (for descaling and disinfecting)
- Soft-bristle brush (like an old toothbrush)
- Vacuum cleaner with a brush attachment
- Bucket or sink for rinsing parts
- Gloves (optional, but recommended for hygiene)
- Replacement air filter (if yours isn’t washable or is damaged)
Having everything ready saves time and prevents mid-cleaning trips to the store. Also, check your user manual—Frigidaire often includes model-specific tips that can help avoid damage.
Step 1: Unplug and Prepare the Unit
Safety is the most important part of cleaning any appliance. Before you touch a single component, unplug the dehumidifier from the wall outlet. Never clean a plugged-in unit—even if it’s turned off—because water and electricity are a dangerous mix.
Once unplugged, move the unit to a well-ventilated area like a garage, basement, or outdoor patio. This gives you space to work and allows any cleaning fumes (like vinegar) to dissipate. If you’re cleaning indoors, open a window or turn on a fan.
Let the unit sit for 10–15 minutes to cool down if it’s been running recently. Hot components can warp or become brittle when exposed to cold water, and you don’t want to burn yourself.
Step 2: Remove and Empty the Water Tank
The water tank (also called the collection bucket) is where all the extracted moisture collects. Over time, stagnant water breeds bacteria and leaves behind slimy residue or mineral deposits—especially in hard water areas.
Locate the Tank
On most Frigidaire models, the tank is at the front or side of the unit. Look for a handle or a recessed area. Gently pull it straight out—don’t force it, as some tanks have safety switches that prevent removal if not aligned properly.
Empty the Water
Pour the water down a drain or toilet. Never dump it on plants or grass if it contains cleaning residue later—wait until after you’ve rinsed the tank.
Rinse and Inspect
Rinse the empty tank with warm water to remove loose debris. Look inside for:
- White or gray crust (mineral buildup)
- Green or black spots (mold or mildew)
- Sticky film (bacterial slime)
If you see any of these, it’s time for a deeper clean.
Step 3: Clean the Water Tank Thoroughly
A quick rinse isn’t enough. To truly sanitize the tank and prevent odors, follow these steps:
Soak with Vinegar Solution
Mix equal parts white vinegar and warm water in the tank (e.g., 1 cup vinegar + 1 cup water). Let it soak for 15–20 minutes. Vinegar is a natural disinfectant and dissolves mineral deposits without harsh chemicals.
Scrub Gently
Use a soft-bristle brush or sponge to scrub the inside walls, corners, and lid. Pay extra attention to the spout or float mechanism—these areas often trap gunk. Avoid abrasive scrubbers like steel wool, which can scratch plastic and create hiding spots for bacteria.
Rinse and Dry
Rinse the tank thoroughly with clean water until no vinegar smell remains. Shake out excess water and let it air-dry completely before reinserting. Never put a wet tank back into the unit—it can cause leaks or trigger error codes.
Step 4: Remove and Clean the Air Filter
The air filter is your dehumidifier’s first line of defense against dust, pet dander, and allergens. A clogged filter restricts airflow, making the unit work harder and less efficiently.
Locate the Filter
Most Frigidaire dehumidifiers have a removable filter behind a front or side grille. Look for a latch or sliding panel. Some models have a filter indicator light that reminds you when it’s time to clean.
Remove the Filter
Gently pull the filter out. If it’s a mesh or foam type, it’s usually washable. If it’s a HEPA or carbon filter, check your manual—some are disposable and should be replaced, not cleaned.
Vacuum Loose Dust
Use a vacuum with a brush attachment to remove surface dust. This prevents clogging your sink or drain during washing.
Wash the Filter
Rinse the filter under lukewarm water. For stubborn grime, soak it in a mild soap solution for 10 minutes, then rinse thoroughly. Never use hot water—it can warp or melt the filter material.
Air-Dry Completely
Let the filter dry flat in a shaded, well-ventilated area. Never reinstall a damp filter—it can promote mold growth inside the unit.
Step 5: Clean the Exterior and Vents
Dust and grime accumulate on the outside of your dehumidifier, especially around the air intake and exhaust vents. This not only looks dirty but can also reduce airflow.
Wipe Down the Housing
Use a damp microfiber cloth with a drop of mild soap to wipe the plastic casing. Avoid spraying water directly onto the unit—wring out the cloth so it’s just slightly moist. Pay attention to control panels and buttons; use a cotton swab for tight spaces.
Clean the Vents
Use a vacuum brush attachment to suck dust from the front and back vents. For deeper cleaning, wipe with a vinegar-dampened cloth to disinfect. Never insert objects like paper clips or knives into vents—you could damage internal components.
Step 6: Clean the Interior Coils and Components
This step requires a bit more care, as you’re dealing with delicate internal parts. However, it’s essential for maintaining efficiency.
Access the Interior
Some Frigidaire models allow you to remove the front or side panel to access the evaporator and condenser coils. Check your user manual—if screws are involved, keep them in a small bowl so you don’t lose them. If your model doesn’t allow easy access, skip to the next step and focus on external cleaning.
Vacuum the Coils
Use the vacuum’s brush attachment to gently remove dust from the coils. These thin metal fins are fragile—don’t press hard or you’ll bend them, which reduces cooling efficiency.
Use a Coil Brush (Optional)
For heavy buildup, use a soft coil brush (available at hardware stores) to loosen debris before vacuuming. Never use water or liquid cleaners directly on the coils unless specified in your manual.
Check the Float Mechanism
The float is a small plastic piece inside the tank or near the drain that shuts off the unit when the tank is full. Make sure it moves freely—if it’s stuck, clean around it with a damp cloth.
Step 7: Reassemble and Test the Unit
Once everything is clean and dry, it’s time to put your dehumidifier back together.
Reinstall the Filter
Slide the dry air filter back into its slot. Make sure it’s seated properly—misaligned filters can cause error messages or reduced performance.
Replace the Water Tank
Insert the dry, clean tank firmly until it clicks or locks into place. Double-check that it’s fully seated to prevent leaks.
Reattach Panels (If Removed)
Secure any panels or covers with screws. Don’t overtighten—plastic threads can strip easily.
Plug In and Test
Plug the unit back in and turn it on. Set it to a low humidity level (like 45–50%) and listen for normal operation. Check for:
- Unusual noises (grinding, rattling)
- Water leaks
- Error codes on the display
If everything runs smoothly, you’re good to go! Run the unit for a few hours and check the tank to ensure it’s collecting water properly.
Troubleshooting Common Cleaning Issues
Even with careful cleaning, you might run into problems. Here’s how to handle them:
Unit Won’t Turn On After Cleaning
- Check that the water tank is fully inserted—many models have a safety switch that prevents operation if the tank is missing or misaligned.
- Ensure the power cord is securely plugged in.
- Look for blown fuses or tripped circuit breakers.
Water Leaking from the Unit
- Inspect the tank for cracks or warping.
- Make sure the tank is seated correctly and the drain hose (if used) isn’t kinked or clogged.
- Check the float mechanism—if it’s stuck open, water may overflow.
Strange Odors Persist
- Run the unit with a bowl of baking soda inside the room to absorb odors.
- Consider using a dehumidifier cleaner spray designed for internal sanitizing.
- If mold is deeply embedded, you may need professional servicing.
Reduced Moisture Removal
- Confirm the air filter is clean and properly installed.
- Check that room temperature is above 65°F—dehumidifiers work poorly in cold spaces.
- Ensure doors and windows are closed during operation.
How Often Should You Clean Your Frigidaire Dehumidifier?
Cleaning frequency depends on usage and environment:
- Weekly: Empty and rinse the water tank.
- Monthly: Clean the tank with vinegar, wash the air filter, and wipe exterior vents.
- Every 2–3 Months: Deep clean coils (if accessible), inspect internal components, and check for mold.
- Seasonally: Before storing for winter or after long periods of non-use, give the unit a full cleaning.
If you live in a humid climate, have pets, or notice odors sooner, increase cleaning frequency. A clean dehumidifier is a happy dehumidifier—and a healthier home.
Tips for Preventing Future Buildup
Cleaning is easier when you prevent problems before they start:
- Use a drain hose for continuous drainage instead of emptying the tank daily.
- Place the unit on a level surface to ensure proper water flow.
- Avoid running the dehumidifier in dusty or greasy areas (like kitchens without range hoods).
- Replace disposable filters as recommended—typically every 6–12 months.
- Keep the room well-ventilated to reduce overall humidity load.
Conclusion
Cleaning your Frigidaire dehumidifier doesn’t have to be a chore. With the right tools and a little time each month, you can keep it running efficiently, extend its lifespan, and improve your home’s air quality. Remember: a clean dehumidifier is more than just a well-maintained appliance—it’s a key part of a healthy, comfortable living space. Follow this guide regularly, and you’ll breathe easier knowing your unit is working at its best.