
Building your own dehumidifier for an indoor pool is a cost-effective way to manage humidity, prevent mold, and protect your home or facility. This guide walks you through the process using accessible materials and simple tools, helping you create a functional system tailored to your space.
Quick Answers to Common Questions
Can I use a regular dehumidifier for my indoor pool?
Standard dehumidifiers aren’t designed for the high humidity and warm temperatures of indoor pools. They may overheat or fail quickly. A custom-built or pool-specific unit is better suited.
How much does it cost to build a DIY dehumidifier?
Costs vary, but you can build a functional unit for $200–$500 using used or repurposed parts. This is significantly less than commercial pool dehumidifiers, which often cost $2,000 or more.
Do I need an HVAC license to build this?
No license is required for personal use, but handling refrigerants safely is critical. If you’re unsure, consult a licensed technician for guidance.
How often should I run the dehumidifier?
Run it continuously during pool use and for 4–6 hours afterward. Use a timer or humidistat to automate operation based on humidity levels.
Can I build a solar-powered dehumidifier?
Yes, but it’s complex. You’d need solar panels, a battery system, and a DC-compatible compressor. It’s more feasible for small-scale or supplemental use.
How to Build Your Own Dehumidifier for an Indoor Pool
If you have an indoor pool, you know how quickly humidity can spiral out of control. The warm water evaporates constantly, turning your pool room into a steamy, damp environment. Over time, this excess moisture can lead to mold growth, peeling paint, rust on metal fixtures, and even damage to your home’s structure. While commercial dehumidifiers are available, they can be expensive—especially models designed for large, high-humidity spaces like indoor pools. That’s why building your own dehumidifier is a smart, budget-friendly alternative.
In this guide, you’ll learn how to build a functional, refrigerant-based dehumidifier tailored specifically for your indoor pool area. We’ll walk you through the science behind dehumidification, the components you’ll need, step-by-step assembly instructions, and tips for maintaining your system. By the end, you’ll have a custom solution that keeps your pool room dry, comfortable, and protected—without breaking the bank.
Why You Need a Dehumidifier for Your Indoor Pool
Indoor pools are a luxury, but they come with unique challenges. Unlike outdoor pools, indoor pools are enclosed, which traps moisture in the air. Every time someone swims, splashes, or even walks near the water, tiny droplets evaporate into the surrounding air. Over time, this creates a consistently high humidity level—often exceeding 60%, which is well above the recommended 30–50% range for indoor spaces.
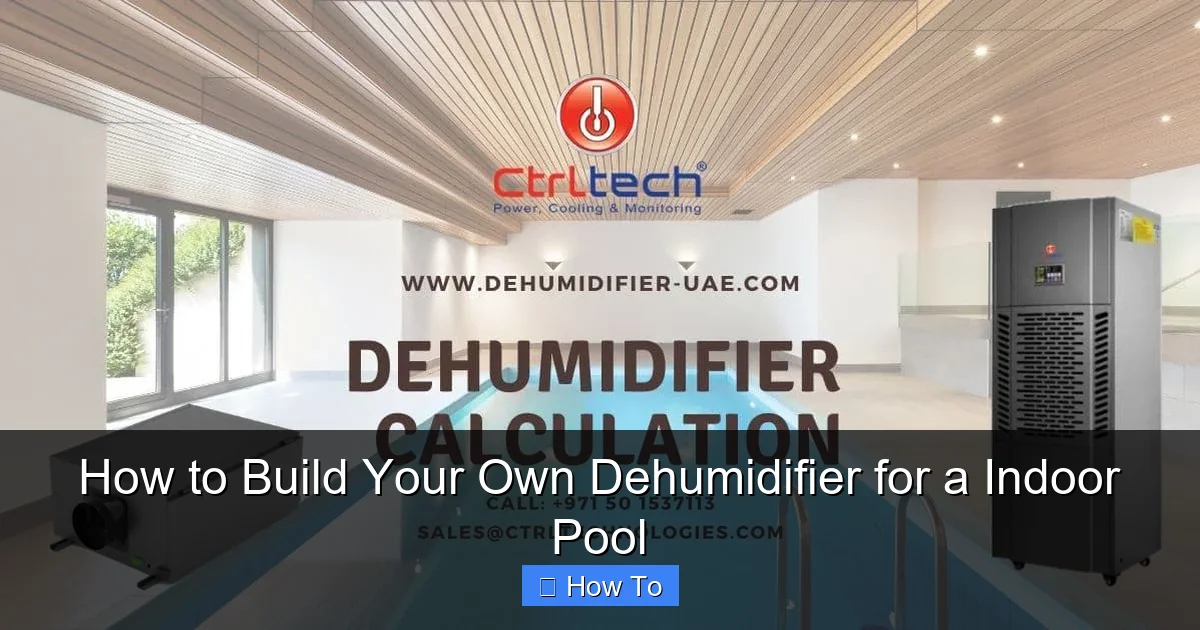
Visual guide about How to Build Your Own Dehumidifier for a Indoor Pool
Image source: dehumidifier-uae.com
High humidity doesn’t just feel uncomfortable. It can cause serious problems:
- Mold and mildew growth: Damp walls, ceilings, and corners become breeding grounds for mold, which can trigger allergies and respiratory issues.
- Structural damage: Wood, drywall, and insulation can warp, rot, or degrade when exposed to constant moisture.
- Corrosion: Metal fixtures, ductwork, and HVAC components can rust, reducing their lifespan and efficiency.
- Increased energy costs: Humid air feels warmer, so your air conditioning system has to work harder to cool the space.
- Unpleasant odors: Stagnant, damp air often leads to musty smells that are hard to eliminate.
A dehumidifier solves these issues by removing excess moisture from the air. While commercial units are effective, they can cost thousands of dollars—especially for large spaces. Building your own dehumidifier gives you control over the design, size, and cost, making it a practical DIY project for homeowners, pool owners, or facility managers.
Understanding How Dehumidifiers Work
Before you start building, it’s important to understand the basic principles of dehumidification. Most dehumidifiers—whether commercial or DIY—use one of two methods: refrigerant (cooling-based) or desiccant (absorption-based). For an indoor pool, a refrigerant-based system is usually the best choice because it’s efficient, relatively simple to build, and effective in warm, humid environments.
How Refrigerant Dehumidifiers Work
A refrigerant dehumidifier works similarly to an air conditioner. Here’s a simplified breakdown:
- Air intake: A fan pulls humid air from the room into the unit.
- Cooling the air: The air passes over cold evaporator coils, causing moisture to condense into water droplets.
- Collecting water: The condensed water drips into a collection tray or bucket.
- Reheating the air: The now-dry air passes over warm condenser coils, which reheat it to room temperature.
- Air output: The dry, warm air is blown back into the room.
This cycle repeats continuously, gradually lowering the humidity level. The key components include a compressor, evaporator and condenser coils, a fan, a refrigerant, and a water collection system.
Why Refrigerant Systems Are Ideal for Indoor Pools
Refrigerant dehumidifiers are especially effective in warm, humid environments—exactly what you find in an indoor pool room. They work best when the air temperature is above 65°F (18°C), which is typical for heated pools. They’re also energy-efficient and can handle large volumes of air, making them suitable for spacious areas.
Desiccant dehumidifiers, which use moisture-absorbing materials like silica gel, are better for cold or very dry environments. They’re more complex and expensive to build, so we’ll focus on the refrigerant method in this guide.
Planning Your DIY Dehumidifier
Before you start gathering materials, take time to plan your project. A well-thought-out design ensures your dehumidifier will be effective, safe, and long-lasting.
Assess Your Space
Start by evaluating your indoor pool area:
- Size of the room: Measure the length, width, and height to calculate the total cubic footage. A larger space requires a more powerful dehumidifier.
- Pool size and usage: A larger pool or frequent use increases evaporation and humidity.
- Ventilation: Is the room sealed, or does it have windows, vents, or exhaust fans? Poor ventilation traps moisture.
- Current humidity level: Use a hygrometer to measure the humidity. Aim to reduce it to 40–50%.
- Power source: Ensure you have access to a grounded electrical outlet near the installation site.
Determine the Required Capacity
Dehumidifiers are rated by how much water they can remove in 24 hours, usually measured in pints. For indoor pools, you’ll need a high-capacity unit—typically 50 to 100+ pints per day, depending on size and usage.
As a rough estimate:
- Small pool room (under 500 sq ft): 50–70 pints/day
- Medium pool room (500–1,000 sq ft): 70–100 pints/day
- Large pool room (over 1,000 sq ft): 100+ pints/day
Keep in mind that DIY units may not match commercial efficiency, so aim slightly higher than your calculated need.
Choose a Design Approach
There are two main ways to build a DIY dehumidifier:
- Modify an existing air conditioner or dehumidifier: This is the easiest method. You can repurpose an old window AC unit or small dehumidifier by adding a water collection system and adjusting the airflow.
- Build from scratch using HVAC components: This gives you full control over size and performance but requires more technical skill and safety precautions.
For most DIYers, modifying an existing unit is the best starting point. It’s safer, faster, and still highly effective.
Gathering Materials and Tools
Once you’ve planned your design, it’s time to gather the necessary materials and tools. Here’s a comprehensive list for a refrigerant-based DIY dehumidifier.
Essential Components
- Refrigeration unit: A small window air conditioner (5,000–8,000 BTU) or a standalone dehumidifier compressor. Look for used units online or at appliance recycling centers.
- Evaporator and condenser coils: These are usually part of the AC unit. Ensure they’re clean and undamaged.
- Compressor: Must be compatible with your coils and refrigerant type (R-134a or R-410A are common).
- Fan: A 120V axial fan (80–120 CFM) to move air through the system.
- Refrigerant: Purchase the correct type and amount. Never mix refrigerants.
- Water collection tray or bucket: A shallow, leak-proof container to catch condensed water.
- Drain hose: Flexible tubing to direct water to a drain or outside.
- Insulation: Foam board or spray foam to insulate the unit and prevent condensation on the exterior.
- Electrical components: Power cord, switch, fuse, and wiring. Use UL-listed parts for safety.
- Hygrometer: To monitor humidity levels before and after installation.
Tools You’ll Need
- Screwdrivers (Phillips and flathead)
- Wire strippers and crimpers
- Drill and drill bits
- Hacksaw or pipe cutter
- Measuring tape
- Soldering iron (for refrigerant lines, if needed)
- Safety gear: gloves, goggles, and a respirator (when handling refrigerant)
Safety First
Working with refrigeration systems involves risks. Refrigerants are under high pressure and can be harmful if released. Always:
- Work in a well-ventilated area.
- Never cut or puncture refrigerant lines without proper recovery equipment.
- Consult a licensed HVAC technician if you’re unsure about handling refrigerants.
- Follow local regulations for refrigerant use and disposal.
Step-by-Step Assembly Instructions
Now that you have your materials and plan, let’s build your dehumidifier. We’ll use the modification method—repurposing a window air conditioner—as it’s the most accessible for beginners.
Step 1: Prepare the Air Conditioner Unit
Start with a used window AC unit. Remove the outer casing using a screwdriver. Carefully disconnect the electrical wiring, but keep the compressor, coils, and fan intact. You’ll be reusing these core components.
Clean the evaporator and condenser coils with a soft brush and coil cleaner. Dirty coils reduce efficiency and can cause overheating.
Step 2: Modify the Airflow Path
The goal is to redirect airflow so that humid air enters through the evaporator side (cold coils), gets dried, and exits through the condenser side (warm coils).
- Seal any gaps in the unit’s housing with foam tape or silicone caulk to prevent air leaks.
- Ensure the fan is positioned to pull air in from the front (evaporator side) and push it out the back (condenser side).
- If needed, reposition the fan or add ducting to guide airflow properly.
Step 3: Install the Water Collection System
As moisture condenses on the cold evaporator coils, it will drip down. You need a tray to catch it.
- Place a shallow plastic or metal tray under the evaporator coils.
- Drill a small hole in the side of the tray and insert a drain hose.
- Route the hose to a floor drain, sump pump, or outside. Use a U-shaped trap to prevent air from escaping.
- Secure the hose with zip ties or clamps to avoid kinks or leaks.
Step 4: Reconnect the Refrigeration System
This step requires caution. If you’re not experienced with HVAC systems, consider consulting a professional.
- Ensure all refrigerant lines are intact and properly connected.
- If you need to add or replace lines, use copper tubing and flare fittings.
- Evacuate the system (remove air and moisture) using a vacuum pump before recharging.
- Recharge with the correct type and amount of refrigerant. Overcharging or undercharging reduces efficiency.
Step 5: Wire the Electrical System
Safety is critical when working with electricity.
- Connect the compressor, fan, and power cord to a control switch.
- Use a fused disconnect or circuit breaker for protection.
- Ground all metal parts to prevent electric shock.
- Test the wiring with a multimeter before plugging in.
Step 6: Insulate and Seal the Unit
Insulation prevents condensation on the outside of the unit and improves efficiency.
- Wrap the housing with foam board or spray foam insulation.
- Seal all seams and openings to keep humid air from bypassing the coils.
- Leave access panels for future maintenance.
Step 7: Test the System
Before installing the dehumidifier in your pool room, test it in a controlled environment.
- Plug in the unit and turn it on.
- Check that the fan is running and the compressor starts (you’ll hear a hum).
- Wait 10–15 minutes and feel the air output—it should be dry and slightly warm.
- Check the water collection tray for condensation.
- Use a hygrometer to measure humidity before and after running the unit for an hour.
If everything works, you’re ready to install it in your pool room.
Installing and Using Your DIY Dehumidifier
Proper installation ensures maximum efficiency and safety.
Placement Tips
- Place the unit in a central location, away from walls or furniture.
- Ensure there’s at least 12 inches of clearance on all sides for airflow.
- Keep it elevated off the floor to prevent water damage.
- Avoid placing it near heat sources like heaters or direct sunlight.
Operating Guidelines
- Run the dehumidifier continuously during pool use and for several hours afterward.
- Set a timer or use a humidistat (if available) to automate operation.
- Check the water collection tray daily and empty or drain it as needed.
- Monitor humidity levels weekly with a hygrometer.
Energy Efficiency Tips
- Seal windows, doors, and vents to reduce moisture infiltration.
- Use exhaust fans in bathrooms and kitchens to remove additional humidity.
- Insulate walls and ceilings to minimize condensation.
- Clean or replace air filters regularly to maintain airflow.
Troubleshooting Common Issues
Even the best DIY projects can run into problems. Here’s how to fix common issues.
Unit Won’t Turn On
- Check the power cord and outlet.
- Test the fuse or circuit breaker.
- Ensure the compressor isn’t locked or damaged.
Not Removing Enough Moisture
- Clean the evaporator and condenser coils.
- Check for refrigerant leaks or low charge.
- Ensure proper airflow—clean the fan and remove obstructions.
Water Leaking from the Unit
- Inspect the collection tray and drain hose for cracks or clogs.
- Ensure the unit is level—tilting can cause water to spill.
- Check seals and gaskets for wear.
Unusual Noises or Vibrations
- Tighten loose screws or mounting brackets.
- Check the fan blades for balance and damage.
- Ensure the compressor is securely mounted.
Ice Buildup on Coils
- This usually means the refrigerant is low or airflow is restricted.
- Clean the coils and fan.
- Check for proper refrigerant levels.
Maintaining Your DIY Dehumidifier
Regular maintenance keeps your dehumidifier running efficiently and extends its lifespan.
- Monthly: Clean the air filter, coils, and fan. Check the drain hose for clogs.
- Quarterly: Inspect electrical connections and refrigerant lines. Test the hygrometer.
- Annually: Deep-clean the entire unit. Consider recharging the refrigerant if performance drops.
- As needed: Replace worn parts like gaskets, seals, or the fan motor.
Keep a maintenance log to track cleaning, repairs, and performance.
Conclusion
Building your own dehumidifier for an indoor pool is a rewarding DIY project that saves money and protects your investment. By understanding the science behind dehumidification, carefully planning your design, and following safety guidelines, you can create a system that effectively controls humidity, prevents mold and corrosion, and keeps your pool room comfortable year-round.
While commercial units offer convenience, a DIY solution gives you flexibility, customization, and the satisfaction of solving a real-world problem with your own hands. Whether you’re a seasoned DIYer or a first-time builder, this project is achievable with the right tools, knowledge, and patience.
Remember to prioritize safety, monitor performance, and maintain your system regularly. With your custom dehumidifier in place, you can enjoy your indoor pool without worrying about the damaging effects of excess moisture.