
Bypassing a humidity sensor on a dehumidifier can help keep the unit running continuously when the built-in sensor fails or gives inaccurate readings. This guide walks you through the process safely, including tools needed, wiring tips, and important safety precautions.
Quick Answers to Common Questions
Tip/Question?
Can I bypass the sensor permanently?
While possible, a permanent bypass removes automatic humidity control. It’s safer to use it temporarily and replace the sensor when you can.
Tip/Question?
Will bypassing void my warranty?
Yes, most manufacturers consider internal modifications a violation of warranty terms. Check your manual before proceeding.
Tip/Question?
What if my dehumidifier has a digital display?
Digital models may show error codes when the sensor is bypassed. Some units won’t operate at all without a valid sensor signal.
Tip/Question?
How do I know if the sensor is really faulty?
Test it with a multimeter. If resistance doesn’t change with humidity, or if it reads open/short, the sensor is likely bad.
Tip/Question?
Can I use a resistor instead of a jumper wire?
Yes, for some sensors. A 10kΩ resistor may simulate a mid-range humidity reading, but a jumper (0Ω) is simpler for full bypass.
How to Bypass Humidity Sensor on Dehumidifier
Is your dehumidifier refusing to turn on even though the air feels damp? Or maybe it shuts off too early, leaving your basement or laundry room still clammy? These issues are often caused by a faulty or overly sensitive humidity sensor. While the best long-term solution is to repair or replace the sensor, there are times when you need your dehumidifier to run continuously—like during a flood cleanup or in extremely humid seasons. In such cases, bypassing the humidity sensor can be a practical temporary fix.
This comprehensive guide will walk you through how to bypass the humidity sensor on a dehumidifier step by step. You’ll learn how to safely access internal components, identify the sensor, create a bypass using simple tools, and test the system. We’ll also cover important safety tips, troubleshooting advice, and alternatives to consider. Whether you’re a DIY enthusiast or just trying to get through a humid week, this guide will help you keep your dehumidifier running when you need it most.
Why Would You Want to Bypass the Humidity Sensor?
Before diving into the technical steps, it’s important to understand why someone might want to bypass the humidity sensor. The sensor is a critical part of your dehumidifier’s control system. It measures the moisture level in the air and tells the unit when to turn on or off. When functioning properly, it helps maintain optimal humidity—usually between 30% and 50%—while saving energy.
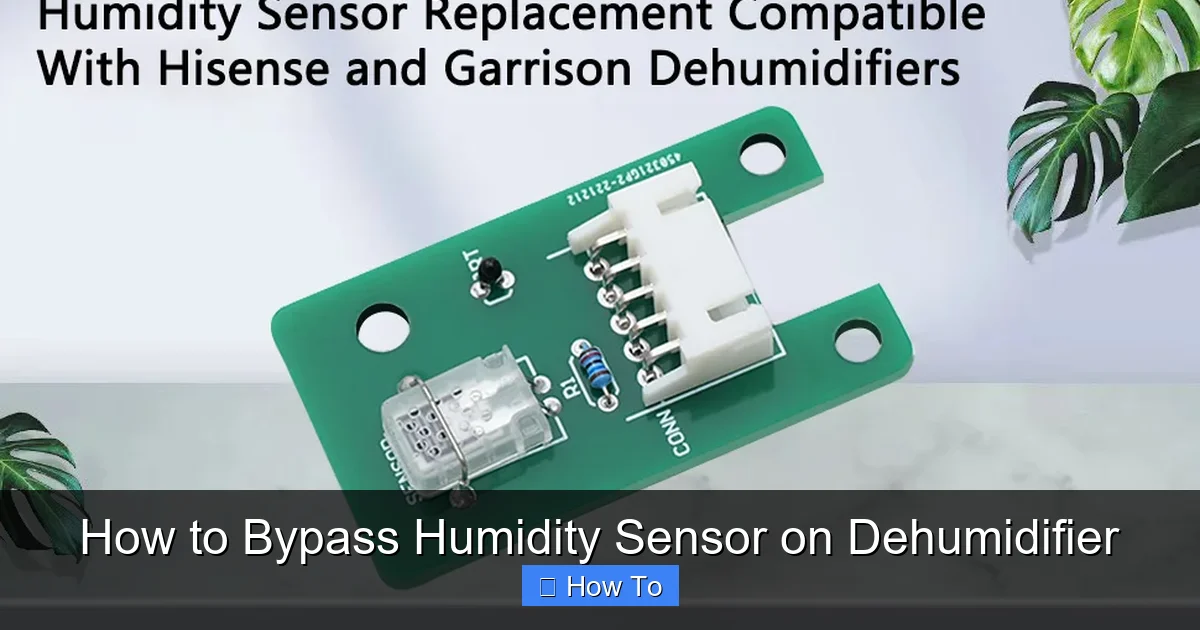
Visual guide about How to Bypass Humidity Sensor on Dehumidifier
Image source: m.media-amazon.com
However, sensors can fail due to dust buildup, corrosion, or electronic faults. A malfunctioning sensor might:
- Prevent the dehumidifier from turning on, even in very humid conditions.
- Cause the unit to shut off prematurely, leaving moisture in the air.
- Give inconsistent or inaccurate readings, leading to poor performance.
In emergency situations—like after water damage or during prolonged rainy weather—you may need the dehumidifier to run nonstop. Bypassing the sensor allows the unit to operate continuously, giving you time to fix the root issue or replace the sensor later.
That said, bypassing is not a permanent solution. Without a working sensor, you lose automatic humidity control, which can lead to over-drying, increased energy use, or even water damage from an overflowing tank. Use this method only when necessary and monitor the unit closely.
Tools and Materials You’ll Need
Before starting, gather the following tools and materials. Most are common household items or inexpensive electronics supplies:
- Screwdrivers: Phillips and flathead, depending on your dehumidifier’s screws.
- Multimeter: To test continuity and voltage (optional but helpful).
- Insulated jumper wire: 18–22 gauge solid-core wire, about 6–8 inches long, with stripped ends.
- Wire strippers: To remove insulation from wire ends.
- Electrical tape or heat shrink tubing: For insulating connections.
- Safety gloves and goggles: To protect against sharp edges and electrical hazards.
- Needle-nose pliers: For handling small wires and connectors.
- Flashlight: To illuminate tight spaces inside the unit.
Optional but useful:
- Replacement sensor: If you plan to fix the issue long-term.
- Zip ties: To secure loose wires after reassembly.
- Labeling tape: To mark wires before disconnecting them.
Make sure your workspace is clean, dry, and well-lit. Work on a non-conductive surface like a wooden table, and keep water away from your tools and the dehumidifier.
Safety Precautions Before You Begin
Working inside an electrical appliance carries risks. Even when unplugged, capacitors in the dehumidifier can store dangerous levels of electricity. Follow these safety steps to protect yourself:
1. Unplug the Dehumidifier
Always disconnect the unit from the power outlet before opening it. Don’t rely on the power switch—physically unplugging ensures no current is flowing.
2. Discharge Capacitors
Capacitors store electrical charge even after the unit is off. To discharge them safely:
- Wait at least 10–15 minutes after unplugging.
- Use an insulated screwdriver with a wooden handle to short the capacitor terminals (if accessible).
- Alternatively, consult your user manual or look for a discharge resistor—some models include one that automatically drains the capacitor.
3. Wear Protective Gear
Put on safety gloves and goggles to protect against sharp metal edges, dust, and accidental sparks.
4. Work in a Dry Area
Moisture increases the risk of electric shock. Avoid working in damp basements or garages unless absolutely necessary.
5. Don’t Rush
Take your time. Rushing increases the chance of mistakes, damaged components, or injury.
Remember: If you’re unsure about any step, consult a professional technician. This guide is for informational purposes and assumes basic electrical knowledge.
Step-by-Step Guide to Bypassing the Humidity Sensor
Now that you’re prepared, let’s get into the actual process. The steps may vary slightly depending on your dehumidifier model, but the general approach remains the same.
Step 1: Locate the Humidity Sensor
The humidity sensor is usually a small, disc-shaped or rectangular component mounted near the air intake or on the control board. It often has two or three thin wires connected to it.
To find it:
- Remove the front or rear panel using a screwdriver. Most models have screws along the edges.
- Look for a component labeled “RH” (relative humidity), “HUM,” or “Sensor.”
- It may be attached to a small circuit board or mounted on a plastic bracket.
- Trace the wires from the sensor back to the main control board.
Tip: Take a photo before disconnecting anything. This will help you remember the original wiring layout.
Step 2: Identify the Sensor Wires
Most humidity sensors have two or three wires:
- Two-wire sensors: Typically send a resistance signal based on humidity. The control board reads this resistance to determine moisture levels.
- Three-wire sensors: May include a power supply (Vcc), ground (GND), and signal (SIG) wire.
Use your multimeter to identify the function of each wire if unsure:
- Set the multimeter to resistance (ohms).
- Touch the probes to the sensor terminals.
- A working sensor will show varying resistance as you breathe on it or expose it to moisture.
If the resistance doesn’t change, the sensor is likely faulty.
Step 3: Disconnect the Sensor
Carefully unplug the sensor from the control board. Most connectors are push-in types that release with gentle pressure. If soldered, use a soldering iron to desolder the connections—but only if you’re experienced.
Label the wires or take another photo to remember which goes where.
Step 4: Create the Bypass
The goal of the bypass is to trick the control board into thinking the air is dry, so it keeps the dehumidifier running.
For a two-wire sensor:
- Strip about 1/4 inch of insulation from both ends of your jumper wire.
- Connect one end to each terminal where the sensor was plugged in.
- Secure the connection with electrical tape or heat shrink tubing.
This creates a short circuit, simulating a “dry” signal (low resistance).
For a three-wire sensor:
- You’ll need to simulate the signal wire’s output.
- Connect the signal wire to ground (GND) using the jumper wire.
- This tells the control board the humidity is low.
Note: Some advanced models use digital sensors (I2C or SPI). Bypassing these is more complex and may require a resistor or microcontroller simulation. In such cases, consider replacing the sensor instead.
Step 5: Test the Bypass
Before reassembling the unit, test your work:
- Reconnect the dehumidifier to power.
- Turn it on and observe the behavior.
- The unit should start running immediately and continue without shutting off.
- Listen for the compressor and fan—both should operate normally.
If the unit doesn’t turn on or behaves erratically:
- Double-check your connections.
- Ensure the jumper wire is making solid contact.
- Verify that you’ve bypassed the correct terminals.
If everything works, proceed to reassembly.
Step 6: Reassemble the Dehumidifier
Once testing is successful:
- Disconnect the power again.
- Secure the jumper wire with zip ties to prevent it from touching other components.
- Replace the panel and tighten all screws.
- Ensure no wires are pinched or exposed.
Your dehumidifier is now operating in bypass mode.
Tips for Safe and Effective Bypassing
To get the most out of your bypass and avoid problems, follow these practical tips:
- Use the Right Wire: Solid-core wire is better than stranded for jumper connections—it holds its shape and makes better contact.
- Insulate All Exposed Metal: Prevent short circuits by covering every bare wire with tape or heat shrink.
- Label the Bypass: Attach a note inside the unit saying “Sensor Bypassed” so future users know the modification exists.
- Monitor Humidity Manually: Use a standalone hygrometer to check room humidity. Aim for 30–50% to prevent mold or over-drying.
- Empty the Tank Frequently: Without automatic shutoff, the tank can overflow. Check it every few hours during heavy use.
- Limit Bypass Duration: Use this method only for short-term needs. Plan to repair or replace the sensor as soon as possible.
Troubleshooting Common Issues
Even with careful work, problems can arise. Here’s how to handle common issues:
Dehumidifier Still Won’t Turn On
Possible causes:
- The bypass isn’t making proper contact.
- The control board is faulty.
- Another safety switch (like a float switch) is tripped.
Solution: Recheck connections, ensure the tank is empty, and inspect other switches.
Unit Turns On but Stops After a Few Minutes
This could mean:
- The thermal overload protector is kicking in due to overheating.
- The compressor is struggling without proper feedback.
Solution: Let the unit cool down, ensure proper ventilation, and consider reducing runtime.
Bypass Causes Erratic Behavior
If the dehumidifier cycles on and off randomly or displays error codes:
- The control board may not recognize the bypass signal.
- You may have connected the wrong terminals.
Solution: Revert to the original wiring and consider replacing the sensor instead.
Electrical Smell or Smoke
Stop immediately. This indicates a short circuit or overheating. Disconnect power, inspect for burnt wires, and consult a technician.
Alternatives to Bypassing the Sensor
While bypassing works in a pinch, it’s not ideal long-term. Consider these alternatives:
- Clean the Sensor: Dust and debris can interfere with readings. Gently wipe the sensor with a dry cloth or compressed air.
- Replace the Sensor: Many sensors are inexpensive and easy to install. Check your model number and order a compatible replacement online.
- Use an External Hygrometer: Pair your dehumidifier with a smart hygrometer that can trigger the unit via a smart plug when humidity rises.
- Upgrade to a New Unit: If your dehumidifier is old or frequently malfunctions, investing in a new, energy-efficient model may be more cost-effective.
These options restore full functionality and safety without permanent modifications.
Conclusion
Bypassing the humidity sensor on a dehumidifier is a useful skill for emergency situations, but it comes with risks and limitations. By following this guide, you can safely create a temporary bypass using simple tools and basic electrical knowledge. Always prioritize safety, test your work carefully, and monitor the unit closely while in bypass mode.
Remember, this fix is not a substitute for proper maintenance or repair. Whenever possible, clean, replace, or professionally service the sensor to ensure your dehumidifier operates efficiently and safely. With the right approach, you can keep your home comfortable and dry—even when the sensor fails.