
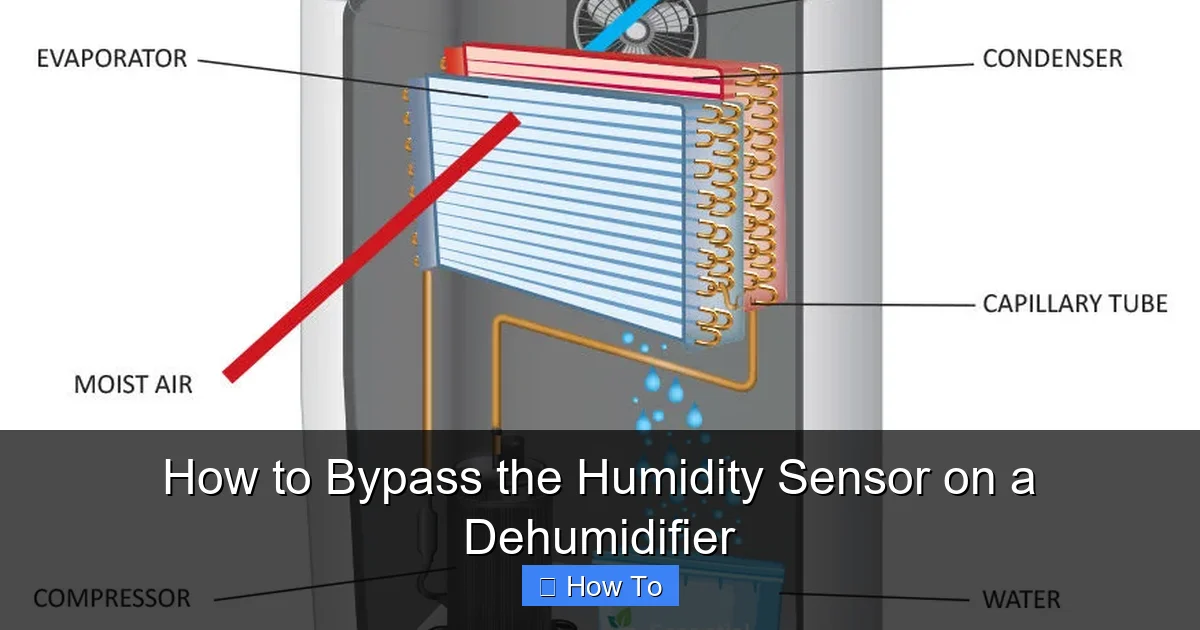
This guide explains how to bypass the humidity sensor on a dehumidifier when it malfunctions or gives inaccurate readings. You’ll learn safe methods, tools needed, and important precautions to keep your unit running smoothly.
Quick Answers to Common Questions
Tip/Question?
Can I bypass the sensor without opening the dehumidifier?
No, you must access the internal wiring to disconnect or modify the sensor. This requires removing panels and working inside the unit.
Tip/Question?
Will bypassing damage my dehumidifier?
If done correctly, no. But poor wiring or short circuits can damage the control board or compressor. Always insulate connections and test carefully.
Tip/Question?
How do I know if the sensor is really bad?
Use a multimeter to test resistance. If it doesn’t change with humidity or shows open/short, it’s likely faulty.
Tip/Question?
Can I use a different resistor value?
Yes, but stay within 10kΩ to 100kΩ. A 47kΩ resistor is a safe choice for most capacitive sensors.
Tip/Question?
Should I bypass the sensor in winter?
Not recommended. In cold weather, dehumidifiers can freeze. Running continuously increases the risk of ice buildup on the coils.
Introduction: Why You Might Need to Bypass a Humidity Sensor
If your dehumidifier suddenly stops working—even though the air feels damp—it might not be broken. Instead, the culprit could be a faulty humidity sensor. These sensors are designed to monitor moisture levels in the air and tell the dehumidifier when to turn on or off. But over time, they can wear out, get dirty, or give false readings, causing your unit to shut down prematurely.
In some cases, especially in older or heavily used models, the sensor may fail entirely. When that happens, you’re left with a dehumidifier that won’t run, even when you need it most. That’s where bypassing the humidity sensor comes in.
Bypassing the sensor essentially tricks the dehumidifier into thinking the humidity level is always high, so it runs continuously. This isn’t a permanent fix, but it can be a useful temporary solution—especially during humid seasons or in basements, crawl spaces, or garages where moisture control is critical.
In this guide, we’ll walk you through how to bypass the humidity sensor on a dehumidifier safely and effectively. You’ll learn what tools you need, how to locate the sensor, and step-by-step instructions for different types of dehumidifiers. We’ll also cover important safety tips, troubleshooting advice, and when it might be better to replace the sensor instead.
Whether you’re a DIY enthusiast or just trying to keep your home dry, this guide will help you get your dehumidifier back up and running.
What Is a Humidity Sensor and How Does It Work?
Before we dive into bypassing, it’s important to understand what a humidity sensor does and how it fits into your dehumidifier’s system.
Most modern dehumidifiers use a capacitive humidity sensor—a small electronic component that measures the amount of moisture in the air. It works by detecting changes in electrical capacitance caused by water vapor. The sensor sends this data to the control board, which then decides whether to run the compressor and fan.
Some models also include a built-in hygrometer, which displays the current humidity level on a digital screen. If the sensor fails, the display might show incorrect readings, or the unit might not respond at all.
There are two main types of humidity sensors used in dehumidifiers:
- Capacitive sensors: The most common type. They’re affordable, accurate, and respond quickly to changes in humidity.
- Resistive sensors: Less common, but still found in some older models. They measure humidity based on changes in electrical resistance.
In both cases, the sensor is usually connected to the main control board via a small ribbon cable or individual wires. When it fails, the control board may interpret the signal as “low humidity” and shut off the unit—even if the air is still damp.
That’s why bypassing the sensor can restore functionality. But it’s not a decision to take lightly. We’ll cover the risks and alternatives later.
When Should You Bypass the Humidity Sensor?
Not every dehumidifier problem requires a sensor bypass. In fact, bypassing should be a last resort. Here are some signs that your humidity sensor might be the issue:
- The dehumidifier turns on but shuts off after a few minutes, even in a damp room.
- The humidity reading on the display is way off (e.g., showing 30% in a basement that feels like 70%).
- The unit runs continuously but doesn’t seem to reduce moisture levels.
- You’ve cleaned the air filter and coils, but the problem persists.
- The sensor appears dirty, corroded, or physically damaged.
If you’ve ruled out other common issues—like a clogged filter, frozen coils, or a faulty compressor—then the sensor is a likely suspect.
But before you start disassembling your dehumidifier, ask yourself: Is bypassing really the best option?
In some cases, replacing the sensor is cheaper and safer. Replacement sensors are available online for many popular models, and installation is often straightforward. We’ll talk more about that in the alternatives section.
However, if you can’t find a replacement part, or if the sensor is integrated into the control board, bypassing might be your only practical choice.
Tools and Materials You’ll Need
Bypassing a humidity sensor doesn’t require advanced tools, but you do need the right equipment to do it safely and correctly.
Here’s what you’ll need:
- Screwdrivers: A Phillips and flathead screwdriver for opening the dehumidifier casing.
- Multimeter: To test continuity and verify the sensor is faulty.
- Wire strippers and cutters: For trimming and preparing wires.
- Electrical tape or heat shrink tubing: To insulate exposed wires.
- Wire connectors (butt splices or twist-on caps): For securely joining wires.
- Safety gloves and goggles: To protect yourself from sharp edges and electrical components.
- Needle-nose pliers: Helpful for handling small wires and connectors.
Optional but helpful:
- Labeling tape: To mark wires before disconnecting them.
- Digital camera or phone: To take photos of the wiring before you start—this helps when reassembling.
- Replacement fuse (if applicable): Some dehumidifiers have a fuse that may blow during a short circuit.
Make sure your workspace is clean, dry, and well-lit. Work on a non-conductive surface like a wooden table, and avoid working on carpet or near water.
Safety Precautions Before You Begin
Working inside an electrical appliance can be dangerous if you’re not careful. Dehumidifiers contain capacitors that can store a charge even after the unit is unplugged. Here are essential safety steps:
1. Unplug the Dehumidifier
Always disconnect the unit from the power outlet before opening it. Don’t just turn it off—unplug it completely.
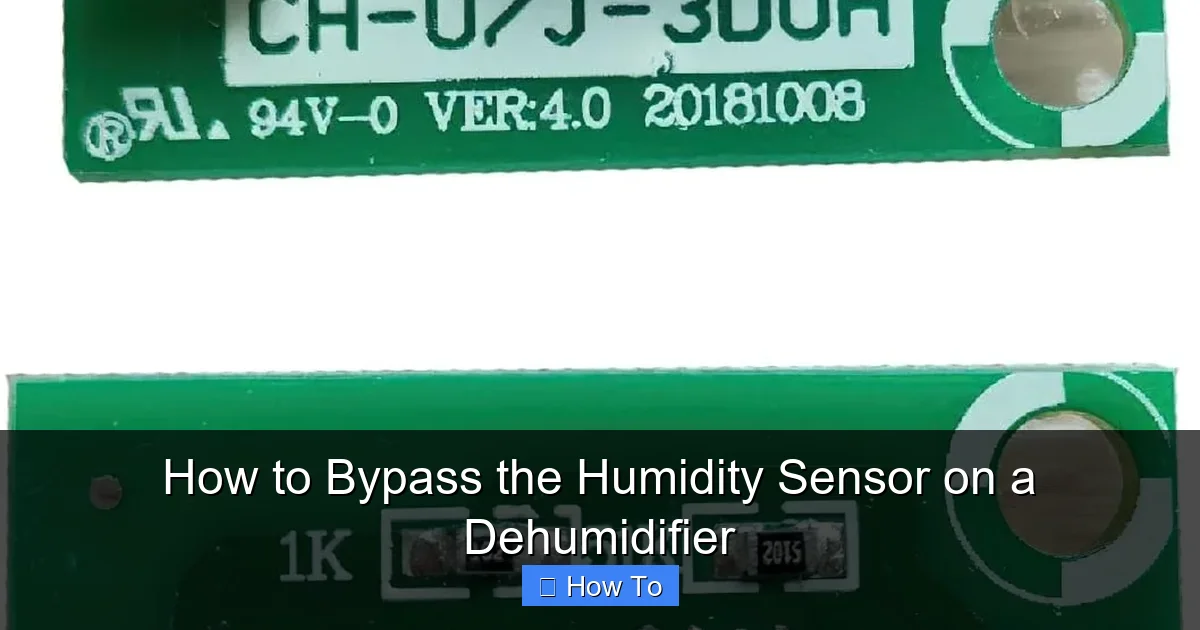
Visual guide about How to Bypass the Humidity Sensor on a Dehumidifier
Image source: m.media-amazon.com
2. Discharge the Capacitor
The compressor in your dehumidifier uses a start/run capacitor that can hold a dangerous charge. To discharge it safely, use an insulated screwdriver with a wooden handle to short the capacitor terminals. Touch both terminals at the same time—this will safely discharge any stored energy. Never touch the capacitor with your bare hands.
3. Wear Protective Gear
Put on safety gloves and goggles to protect against sharp metal edges and accidental sparks.
4. Work in a Dry Area
Moisture increases the risk of electric shock. Avoid working in damp basements or garages unless the area is completely dry.
5. Don’t Rush
Take your time. Rushing increases the chance of mistakes, which could damage the unit or cause injury.
6. Know Your Limits
If you’re not comfortable working with electronics, consider calling a professional. Bypassing a sensor incorrectly can damage the control board or create a fire hazard.
Safety isn’t optional—it’s essential. If at any point you feel unsure, stop and seek help.
Step-by-Step Guide: How to Bypass the Humidity Sensor
Now that you’re prepared, let’s walk through the process of bypassing the humidity sensor. These steps apply to most residential dehumidifiers, but always refer to your user manual or look up your model online for specific details.
Step 1: Locate the Humidity Sensor
The humidity sensor is usually located near the air intake or behind the control panel. On many models, it’s a small plastic module with two or three wires connected to it. It may be mounted on the front bezel or inside the main housing.
To find it:
- Remove the front panel or control cover using your screwdriver.
- Look for a small rectangular or circular component with wires leading to it.
- It’s often labeled “HUM” or “RH” (relative humidity).
Take a photo of the wiring before disconnecting anything. This will help you remember how everything was connected.
Step 2: Test the Sensor (Optional but Recommended)
Before bypassing, use your multimeter to check if the sensor is actually faulty.
Set the multimeter to resistance (ohms) mode. Disconnect the sensor wires from the control board. Touch the probes to the sensor terminals.
- A working capacitive sensor should show a resistance that changes when you breathe on it or expose it to moisture.
- If the reading is infinite (open circuit) or zero (short circuit), the sensor is likely bad.
If the sensor tests fine, the problem might be elsewhere—like the control board or wiring.
Step 3: Disconnect the Sensor Wires
Carefully disconnect the wires from the sensor. Most sensors use quick-connect terminals or soldered connections.
- If using quick-connects, gently pull them off with pliers.
- If soldered, use a soldering iron to melt the solder and remove the wires.
Label the wires if they’re not color-coded. For example, mark one “Sensor+” and the other “Sensor–”.
Step 4: Bypass the Sensor
Now comes the actual bypass. The goal is to simulate a “high humidity” signal so the dehumidifier thinks it should keep running.
There are two common methods:
Method A: Short the Sensor Wires
This is the simplest approach. By connecting the two sensor wires together, you’re telling the control board that humidity is constantly high.
- Strip about 1/2 inch of insulation from each wire.
- Twist the exposed ends together.
- Secure with a wire connector or electrical tape.
- Insulate the connection completely to prevent shorts.
This method works on many older models, but not all. Some control boards expect a specific resistance range and may not respond to a direct short.
Method B: Add a Resistor (Recommended for Precision)
For better compatibility, use a resistor to mimic the sensor’s normal resistance at high humidity.
- Most capacitive sensors read between 10kΩ and 100kΩ at 50–80% humidity.
- Use a 47kΩ resistor (a common value) for a safe middle ground.
- Solder or connect the resistor between the two sensor wires.
- Secure and insulate the connection.
This method is more reliable and less likely to confuse the control board.
Step 5: Reassemble the Dehumidifier
Once the bypass is in place, carefully reassemble the unit:
- Reconnect any panels or covers you removed.
- Make sure no wires are pinched or exposed.
- Double-check that all screws are tightened.
Don’t plug it in yet—first, do a visual inspection to ensure everything looks secure.
Step 6: Test the Dehumidifier
Plug the unit back in and turn it on. It should now run continuously, regardless of the actual humidity level.
- Listen for the compressor and fan to start.
- Check that water begins collecting in the tank.
- Monitor the unit for at least 30 minutes to ensure it’s working safely.
If it doesn’t turn on, unplug it immediately and recheck your connections. A loose wire or short circuit could prevent operation.
Step 7: Monitor and Maintain
After bypassing, your dehumidifier will run non-stop. This means:
- It will use more electricity.
- The water tank will fill up faster.
- The compressor may overheat if not properly ventilated.
To avoid issues:
- Empty the tank regularly.
- Ensure the unit has good airflow.
- Consider using a timer to limit runtime (e.g., 8–12 hours per day).
Also, keep an eye on the coils. If they freeze, the unit may need a break or better airflow.
Troubleshooting Common Issues After Bypassing
Even with careful work, problems can arise. Here’s how to handle common post-bypass issues:
The Dehumidifier Won’t Turn On
If the unit doesn’t power up at all:
- Check that the power cord is plugged in securely.
- Test the outlet with another device.
- Inspect the internal fuse—some models have a resettable thermal fuse that may have blown.
- Verify that your bypass connection isn’t causing a short circuit.
The Compressor Doesn’t Start
If the fan runs but the compressor doesn’t:
- The start capacitor may be faulty.
- The control board might not be receiving the correct signal.
- Try the resistor method if you used a direct short—some boards reject shorts.
The Unit Overheats or Trips the Circuit Breaker
This suggests a short circuit or overload:
- Unplug the unit immediately.
- Check all wire connections for exposed metal or loose strands.
- Ensure the bypass isn’t touching any metal parts.
- Test the compressor and capacitor with a multimeter.
The Water Tank Fills Too Fast
Since the unit runs continuously, it removes moisture faster. This is normal, but:
- Empty the tank frequently.
- Consider upgrading to a model with a built-in pump for continuous drainage.
- Use a hose to drain directly into a floor drain or sump pump.
The Display Shows Error Codes
Some models display error codes when sensors are disconnected:
- Check the manual for code meanings.
- Some units allow you to disable sensor checks via a hidden menu—search online for your model.
- If the error persists, the control board may need reprogramming or replacement.
Alternatives to Bypassing the Sensor
Bypassing is a workaround, not a fix. Before you modify your dehumidifier, consider these alternatives:
1. Clean the Sensor
Dust, mold, or corrosion can interfere with sensor readings. Use a soft brush or cotton swab with isopropyl alcohol to gently clean the sensor. Let it dry completely before reassembling.
2. Replace the Sensor
Many humidity sensors are replaceable. Search for your dehumidifier model + “humidity sensor replacement” online. Prices range from $10 to $40. Installation usually involves removing a few screws and plugging in the new sensor.
3. Recalibrate the Sensor
Some digital dehumidifiers allow you to recalibrate the humidity reading. Check the user manual for calibration instructions. This can fix inaccurate readings without any disassembly.
4. Use an External Hygrometer
If the built-in sensor is unreliable, use a standalone hygrometer to monitor humidity. You can then manually turn the dehumidifier on and off based on the reading.
5. Upgrade to a New Dehumidifier
If your unit is old or frequently malfunctions, it may be time for an upgrade. Newer models are more energy-efficient, quieter, and often have better sensors and smart features.
Important Warnings and Considerations
While bypassing can restore function, it comes with risks:
- Voided warranty: Most manufacturers won’t honor warranties if you’ve modified the unit.
- Increased energy use: Running continuously uses more electricity.
- Overheating risk: The compressor may overheat if not properly maintained.
- Fire hazard: Poor wiring can cause shorts or sparks.
- No humidity control: You lose automatic shutoff, so you must monitor the unit manually.
Always weigh the pros and cons. If safety or reliability is a concern, consult a technician.
Conclusion: Is Bypassing Right for You?
Bypassing the humidity sensor on a dehumidifier can be a lifesaver when your unit stops working due to a faulty sensor. It’s a practical DIY fix that requires basic tools and some patience. By following the steps in this guide, you can get your dehumidifier running again—especially in emergencies or when replacement parts aren’t available.
However, it’s not a permanent solution. Bypassing removes the unit’s ability to sense humidity, which means it will run non-stop. This increases energy costs and wear on the compressor. For long-term use, replacing the sensor or upgrading your dehumidifier is usually the better choice.
Always prioritize safety. Unplug the unit, discharge capacitors, and double-check your work. If you’re unsure at any point, don’t hesitate to seek professional help.
With the right approach, you can keep your home dry and comfortable—even when the sensor fails.