
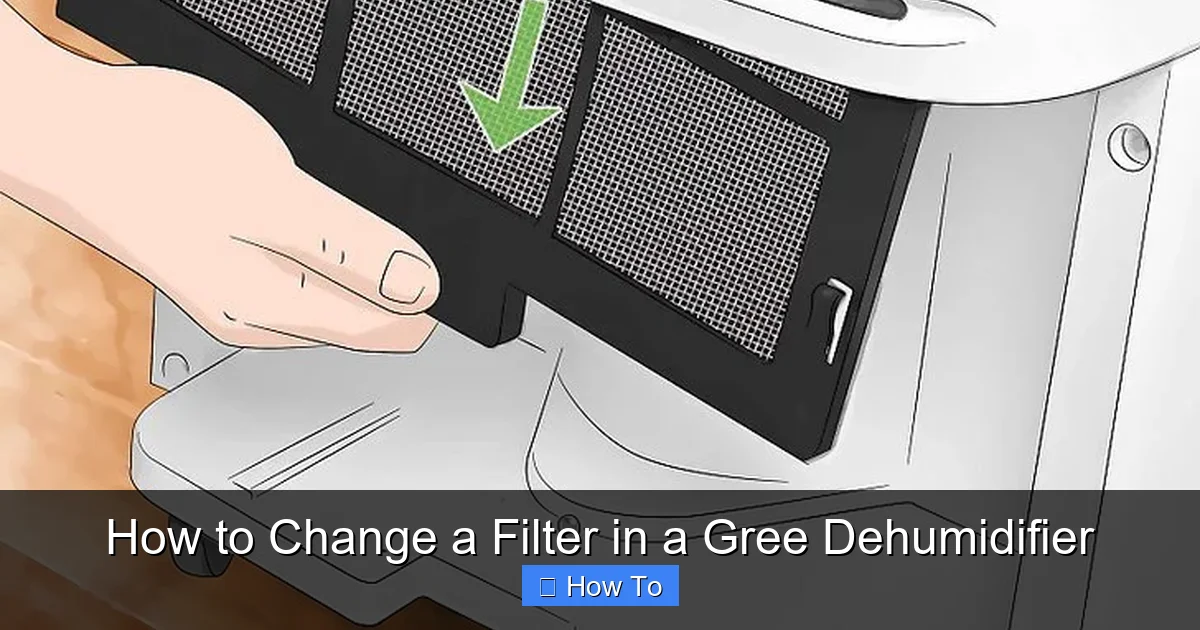
Changing the filter in your Gree dehumidifier is a simple but essential maintenance task that ensures optimal performance and cleaner air. This guide walks you through the entire process—from locating the filter to installing a new one—with clear instructions and helpful tips to keep your unit running smoothly.
Quick Answers to Common Questions
How often should I change the filter in my Gree dehumidifier?
Check the filter every 1–2 months. In humid, dusty, or pet-heavy environments, you may need to change it monthly. A clogged filter reduces efficiency and can damage the unit.
Can I clean and reuse the filter instead of replacing it?
Most Gree filters are not washable. Attempting to clean a non-washable filter can damage the mesh. Always replace with a new filter for best results.
What happens if I don’t change the filter?
A dirty filter restricts airflow, increases energy use, reduces dehumidification, and can lead to mold growth or motor damage. It also worsens indoor air quality.
Where can I buy a replacement filter for my Gree dehumidifier?
Purchase genuine Gree filters from authorized retailers, the Gree website, or reputable online stores like Amazon. Always match the model number for compatibility.
My filter indicator light is on, but the filter looks clean. What should I do?
The light may be based on runtime, not visual condition. Replace the filter anyway, then reset the indicator. If it comes back on quickly, check for airflow issues or sensor problems.
How to Change a Filter in a Gree Dehumidifier
Keeping your Gree dehumidifier in top shape doesn’t require a technician—just a little regular care. One of the most important maintenance tasks is changing the air filter. Over time, the filter collects dust, pet dander, mold spores, and other airborne particles. If left unchanged, a clogged filter forces the unit to work harder, reduces efficiency, and can even lead to poor indoor air quality or mechanical issues.
In this comprehensive guide, you’ll learn exactly how to change a filter in a Gree dehumidifier—step by step. Whether you’re a first-time user or just need a refresher, we’ll cover everything from identifying your model to installing a new filter and resetting the indicator light. By the end, you’ll feel confident performing this simple task that makes a big difference in your dehumidifier’s performance and your home’s comfort.
Let’s get started!
Why Changing the Filter Matters
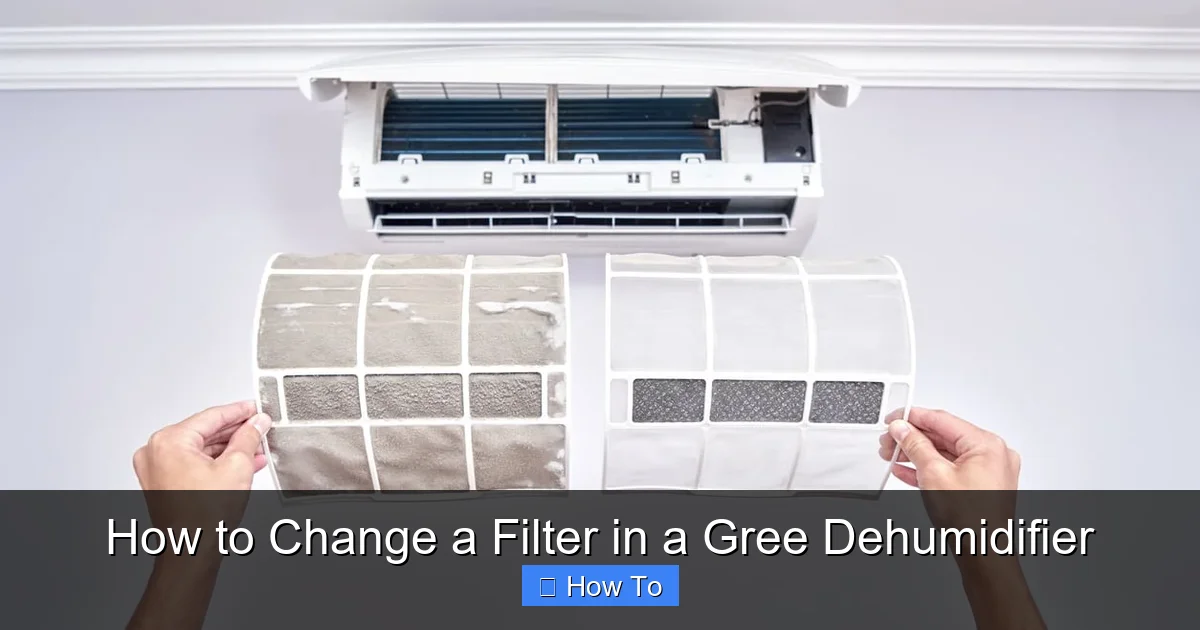
Visual guide about How to Change a Filter in a Gree Dehumidifier
Image source: a-1guaranteed.com
Before diving into the steps, it’s important to understand why this task is so crucial. The air filter in your Gree dehumidifier serves as the first line of defense against indoor pollutants. As air is drawn into the unit, it passes through the filter, which captures contaminants before the air is dried and released back into the room.
When the filter becomes dirty or clogged, several problems can arise:
– Reduced airflow: A blocked filter restricts how much air the unit can process, lowering dehumidification efficiency.
– Increased energy use: The motor has to work harder to pull air through a dirty filter, raising your electricity bill.
– Poor air quality: A dirty filter can’t trap allergens effectively, allowing dust and mold to circulate in your home.
– Risk of mold growth: Moisture and trapped debris in the filter create a breeding ground for mold, which can then be blown back into the room.
– Potential damage to internal components: Over time, restricted airflow can overheat the compressor or fan motor.
By changing the filter regularly, you protect your investment, save energy, and breathe easier. Most Gree dehumidifiers recommend checking the filter every 1–2 months, especially during humid seasons or in high-traffic areas like basements, laundry rooms, or pet-friendly homes.
What You’ll Need
Before you begin, gather these supplies to make the process quick and hassle-free:
- A replacement Gree air filter (check your model number for compatibility)
- A soft cloth or microfiber towel
- A vacuum cleaner with a brush attachment (optional, for cleaning vents)
- A small brush or toothbrush (for detailed cleaning)
- A trash bag or container (to dispose of the old filter)
Pro tip: Keep a spare filter stored near your dehumidifier so you’re never caught off guard when it’s time for a change.
Step 1: Turn Off and Unplug the Dehumidifier
Safety is always the first priority. Before touching any part of your Gree dehumidifier, make sure it’s completely powered down.
Why This Step Is Important
Even though the filter is an external component, working on an energized appliance can pose electrical risks. Additionally, the fan or compressor could accidentally activate if the unit is in standby mode.
How to Do It
1. Locate the power button on your Gree dehumidifier and press it to turn the unit off.
2. Unplug the power cord from the wall outlet. Don’t just rely on the switch—physically disconnecting the cord ensures no power is flowing.
3. Wait at least 5–10 minutes before proceeding. This allows any residual charge to dissipate and gives internal components time to cool down.
Once the unit is off and unplugged, you’re ready to move to the next step.
Step 2: Locate the Air Filter
The filter is typically housed behind a removable grille or panel on the back or side of the dehumidifier. The exact location varies slightly depending on your Gree model, but most follow a similar design.
Common Filter Locations
– Rear-mounted filter: Found on the back of the unit, behind a plastic grille. Common on models like the Gree GDEH20, GDEH30, and GDEH50.
– Side-mounted filter: Located on the left or right side, often behind a sliding or snap-on panel.
– Top-mounted filter: Less common, but some compact models have a filter access panel on top.
How to Identify the Filter Cover
Look for a rectangular or square grille with small vents or perforations. It’s usually held in place by clips, screws, or a simple snap mechanism. Some models have a small handle or indentation to help you grip the cover.
If you’re unsure, consult your user manual. Gree often includes a diagram showing the filter location. You can also search online using your model number (e.g., “Gree GDEH30 filter location”) for visual guides.
Step 3: Remove the Filter Cover
Once you’ve found the filter, it’s time to remove the cover.
For Snap-On Covers
1. Place your fingers on the edges of the grille.
2. Gently pull outward. Most covers are held by plastic clips that release with light pressure.
3. If it doesn’t budge, check for hidden tabs or a release button. Avoid using excessive force—this can break the clips.
For Screw-Secured Covers
1. Use a Phillips-head screwdriver to remove the screws.
2. Keep the screws in a small container so you don’t lose them.
3. Carefully lift the cover away from the unit.
For Sliding Panels
1. Slide the panel to the left or right (as indicated by arrows or grooves).
2. Lift it out once it reaches the end of the track.
Once the cover is off, you should see the air filter inside.
Step 4: Remove the Old Filter
Now that the filter is exposed, carefully remove it from its housing.
How to Handle the Filter
– Hold the filter by its frame, not the mesh material. This prevents tearing or damage.
– Gently slide it out of the slot. Most filters fit snugly but should come out with minimal effort.
– Inspect the filter for dirt, discoloration, or mold. A clean filter is usually white or light gray; a dirty one will appear dark or stained.
Dispose of the Old Filter Properly
Place the used filter in a sealed plastic bag before throwing it in the trash. This prevents dust and contaminants from spreading into your home or garbage area.
Pro tip: Take a photo of the filter’s orientation before removing it. This helps you remember how to install the new one correctly.
Step 5: Clean the Filter Housing
While the filter is out, take a moment to clean the area where it sits. Dust and debris can accumulate in the housing and reduce airflow even with a new filter.
Cleaning Steps
1. Use a soft cloth or microfiber towel to wipe down the interior of the filter compartment.
2. For stubborn dust, use a vacuum with a brush attachment to gently suction away debris.
3. If there’s mold or mildew, dampen a cloth with a mild vinegar-water solution (1:1 ratio) and wipe the area. Avoid getting water into electrical components.
4. Let the housing dry completely before inserting the new filter.
This extra step ensures your new filter starts with a clean environment and works at peak efficiency.
Step 6: Install the New Filter
Now it’s time to install the replacement filter. Make sure you’re using a genuine Gree filter or a high-quality compatible alternative designed for your specific model.
How to Insert the Filter
1. Check the airflow direction arrows on the filter frame. These indicate which way the air should flow—usually toward the unit’s interior.
2. Align the filter with the slot in the housing, matching the arrow direction.
3. Gently slide the filter into place until it sits flush against the back of the compartment.
4. Ensure it’s seated properly—there should be no gaps or loose edges.
What If the Filter Doesn’t Fit?
If the new filter is too large or too small, double-check the model number. Filters are not universal—using the wrong size can cause air leaks or poor filtration. If you’re unsure, contact Gree customer support or refer to the filter packaging for compatibility details.
Step 7: Reattach the Filter Cover
With the new filter in place, it’s time to secure the cover.
For Snap-On Covers
1. Align the cover with the slots or clips on the dehumidifier.
2. Press firmly around the edges until you hear or feel it click into place.
3. Give it a gentle tug to confirm it’s secure.
For Screw-Secured Covers
1. Position the cover over the filter housing.
2. Reinsert the screws and tighten them evenly. Don’t overtighten—this can crack the plastic.
For Sliding Panels
1. Slide the panel back into the track until it locks in place.
Make sure the cover is fully closed and there are no gaps where air could bypass the filter.
Step 8: Reset the Filter Indicator Light
Many Gree dehumidifiers come with a filter change indicator light that alerts you when it’s time for maintenance. After replacing the filter, you’ll need to reset this light so it accurately tracks future usage.
How to Reset the Indicator
1. Plug the dehumidifier back into the power outlet.
2. Turn the unit on using the power button.
3. Locate the “Filter” or “Reset” button on the control panel. It’s usually labeled or marked with a filter icon.
4. Press and hold the button for 3–5 seconds until the indicator light turns off or changes color.
5. Some models may require you to press the “Mode” and “Timer” buttons simultaneously—check your manual for specific instructions.
If the light doesn’t reset, try unplugging the unit for 30 seconds and repeating the process. If it still won’t reset, consult the troubleshooting section below.
Step 9: Test the Dehumidifier
Before considering the job done, run a quick test to ensure everything is working properly.
Testing Steps
1. Set the dehumidifier to your desired humidity level (e.g., 45–50%).
2. Let it run for 15–20 minutes.
3. Listen for normal operation—smooth fan and compressor sounds, no unusual noises.
4. Check that air is flowing freely from the vents.
5. Verify that the filter indicator light remains off.
If everything looks and sounds good, your filter change is complete!
Troubleshooting Common Issues
Even with careful steps, you might encounter a few hiccups. Here’s how to handle common problems:
Filter Indicator Light Won’t Reset
– Ensure the unit is fully powered on.
– Try the reset procedure again, holding the button longer.
– Check for firmware updates or contact Gree support if the issue persists.
Airflow Feels Weak After Filter Change
– Double-check that the filter is installed in the correct direction.
– Make sure the filter cover is fully closed and sealed.
– Clean the intake and exhaust vents if they’re dusty.
Unusual Noises or Vibrations
– Confirm the filter is seated properly and not obstructing the fan.
– Check that the unit is level and stable on the floor.
– Inspect for loose screws or panels.
Filter Gets Dirty Too Quickly
– Consider using a higher-efficiency filter if available.
– Reduce dust sources in the room (e.g., vacuum regularly, close windows during high pollen days).
– Increase filter check frequency during humid or dusty seasons.
Maintenance Tips for Long-Term Performance
Changing the filter is just one part of dehumidifier care. Follow these tips to keep your Gree unit running efficiently for years:
- Clean the water tank weekly: Empty and rinse the bucket to prevent mold and bacteria growth.
- Wipe down the exterior monthly: Use a damp cloth to remove dust and grime from the casing.
- Check the coils annually: If you’re comfortable, use a soft brush to clean the evaporator and condenser coils.
- Store properly during off-seasons: If not using the unit for months, clean it thoroughly, remove the filter, and store in a dry place.
- Use a timer or smart plug: Run the dehumidifier during off-peak hours to save energy.
Conclusion
Changing the filter in your Gree dehumidifier is a quick, straightforward task that pays big dividends in performance, energy efficiency, and indoor air quality. By following this step-by-step guide, you’ve learned how to safely remove the old filter, clean the housing, install a new one, and reset the indicator light.
Remember, regular maintenance is the key to a long-lasting appliance. Mark your calendar for filter checks every 1–2 months, and keep a spare filter on hand so you’re never caught off guard. With a little care, your Gree dehumidifier will keep your home comfortable, dry, and healthy for years to come.
Now that you’re a filter-changing pro, why not share this guide with a friend or family member? A well-maintained dehumidifier is a gift that keeps on giving—cleaner air, lower energy bills, and peace of mind.