
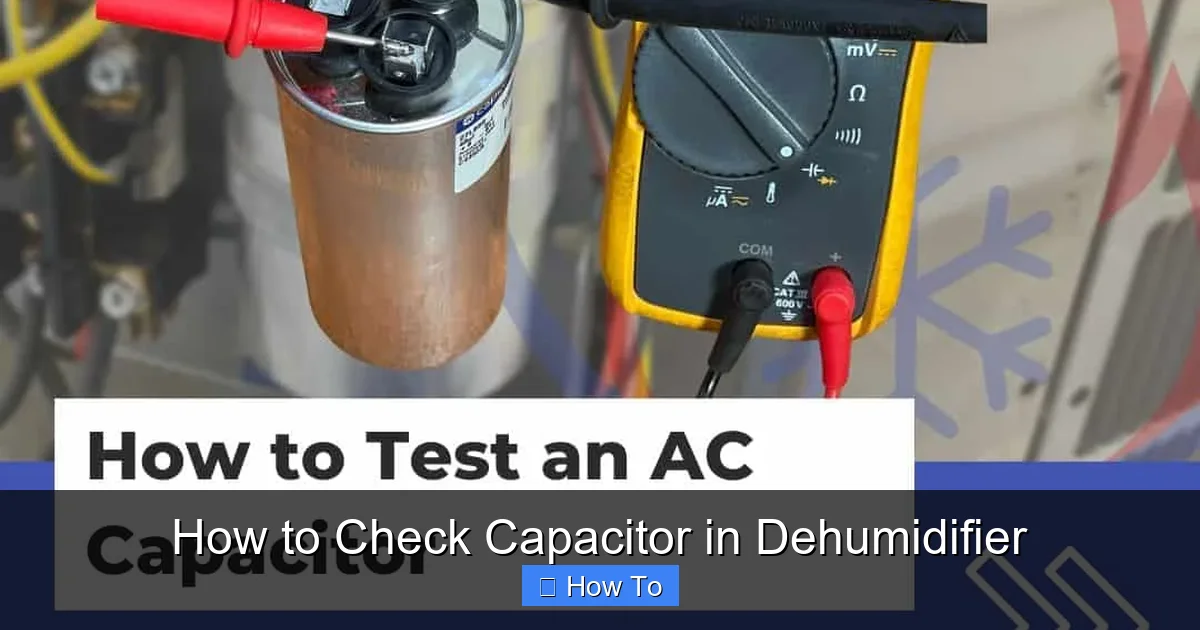
This guide teaches you how to check capacitor in dehumidifier using a multimeter, ensuring your unit runs efficiently. You’ll learn safety steps, testing methods, and when to replace faulty capacitors.
Quick Answers to Common Questions
Tip/Question?
Can I test a capacitor without a multimeter?
While not ideal, you can check for physical damage or use a capacitor tester. However, a multimeter is the most accurate and affordable tool for home use.
Tip/Question?
How often should I check the capacitor?
There’s no set schedule, but inspect it if the unit shows starting issues or after 3–5 years of use.
Tip/Question?
Is it safe to replace the capacitor myself?
Yes, if you follow safety steps and use the correct replacement. If unsure, consult a professional.
Tip/Question?
What if my multimeter doesn’t have a capacitance setting?
Use the resistance mode to check for shorts or opens, but this won’t measure capacitance accurately.
Tip/Question?
Can a bad capacitor damage other parts?
Yes, a faulty capacitor can cause the motor to overheat or fail, leading to more expensive repairs.
How to Check Capacitor in Dehumidifier
If your dehumidifier isn’t working properly—maybe the fan won’t spin, the compressor won’t start, or the unit keeps shutting off—the capacitor could be the culprit. The capacitor is a small but vital component that stores and releases electrical energy to help start the motor and keep it running smoothly. Over time, capacitors can wear out, especially in humid environments where dehumidifiers are used most. Learning how to check capacitor in dehumidifier can save you time, money, and the hassle of calling a technician.
In this comprehensive guide, you’ll learn everything you need to know about testing a dehumidifier capacitor. We’ll walk you through safety precautions, how to locate the capacitor, how to test it using a multimeter, and what to do if it’s faulty. Whether you’re a DIY enthusiast or just want to understand your appliance better, this guide will give you the confidence to troubleshoot and fix common capacitor issues.
Why Capacitors Fail in Dehumidifiers
Capacitors are designed to handle electrical stress, but they’re not indestructible. In dehumidifiers, they work hard, especially during startup when the motor needs a burst of power. Over time, heat, humidity, and constant cycling can degrade the internal materials. A failing capacitor may not deliver enough power, causing the motor to struggle or not start at all.
Common signs of a bad capacitor include:
– The dehumidifier hums but doesn’t start
– The fan spins slowly or not at all
– The unit trips the circuit breaker
– The compressor clicks repeatedly
– The dehumidifier shuts off unexpectedly
If you notice any of these symptoms, it’s time to check the capacitor. But before you do, remember: capacitors store electricity even when the unit is unplugged. That’s why safety is the most important step.
Safety First: Preparing to Check the Capacitor
Before touching any internal components, you must take precautions to protect yourself from electrical shock.
Unplug the Dehumidifier
The first and most critical step is to unplug the dehumidifier from the wall outlet. Never work on an appliance while it’s plugged in. Even if the unit appears off, there could still be live current inside.

Visual guide about How to Check Capacitor in Dehumidifier
Image source: i.ytimg.com
Discharge the Capacitor
Capacitors store electrical charge long after the power is disconnected. To safely discharge it, you’ll need an insulated screwdriver with a metal shaft and a resistor (or a discharge tool). Place the metal tip of the screwdriver across the capacitor’s terminals while wearing rubber gloves. You may hear a small pop or see a spark—this is normal. Wait a few seconds, then repeat to ensure it’s fully discharged.
Wear Protective Gear
Use rubber-soled shoes, safety goggles, and insulated gloves. These reduce the risk of electric shock and protect your eyes from debris.
Work in a Dry, Well-Lit Area
Moisture increases the risk of shock. Choose a dry workspace with good lighting so you can clearly see the components.
Tools and Equipment You’ll Need
To check the capacitor, you’ll need a few basic tools:
- Digital multimeter – This is essential for measuring capacitance, resistance, and voltage. Make sure it has a capacitance setting (usually marked with “F” or “µF”).
- Insulated screwdrivers – For opening the dehumidifier casing and handling components.
- Needle-nose pliers – Useful for disconnecting wires and handling small parts.
- Multimeter probes – Usually come with the multimeter, but ensure they’re in good condition.
- Capacitor discharge tool or resistor – A 20kΩ, 5-watt resistor works well for safe discharging.
- Safety gloves and goggles – For personal protection.
Having the right tools makes the process faster and safer. If your multimeter doesn’t have a capacitance function, you can still test for continuity and resistance, but it’s less accurate.
Step-by-Step Guide to Checking the Capacitor
Now that you’re prepared, let’s walk through the process of checking the capacitor in your dehumidifier.
Step 1: Access the Internal Components
Most dehumidifiers have a removable front or side panel. Use your screwdriver to remove the screws holding the cover in place. Keep the screws in a small container so you don’t lose them. Once the panel is off, you should see the internal wiring, compressor, fan motor, and control board.
Step 2: Locate the Capacitor
The capacitor is usually a small, cylindrical component, often black or blue, mounted near the compressor or fan motor. It may be attached with a clip or zip tie. Look for two or three wires connected to it. Some dehumidifiers have a start capacitor (for the compressor) and a run capacitor (for the fan), so identify which one you’re testing based on the symptoms.
Step 3: Disconnect the Wires
Before testing, disconnect the wires from the capacitor terminals. Use needle-nose pliers to gently pull them off. Take a photo or note the wire positions so you can reconnect them correctly later. Labeling the wires with tape can help avoid confusion.
Step 4: Discharge the Capacitor (Again)
Even if you discharged it earlier, it’s good practice to do it again before handling. Use your discharge tool or resistor to short the terminals. This ensures no residual charge remains.
Step 5: Set Up Your Multimeter
Turn on your digital multimeter and set it to the capacitance mode (µF). If your meter doesn’t have this setting, use the resistance (ohms) mode as a secondary test. Make sure the probes are inserted into the correct ports—usually “COM” for black and “V/Ω/mA” for red.
Step 6: Test the Capacitance
Touch the multimeter probes to the capacitor terminals. It doesn’t matter which probe goes where—capacitors are non-polarized in most dehumidifiers. The meter will display the capacitance value in microfarads (µF). Compare this reading to the value printed on the capacitor’s label.
For example, if the label says “35 µF ± 6%,” the reading should be between 32.9 µF and 37.1 µF. If the reading is significantly lower or shows “OL” (overload), the capacitor is likely bad.
Step 7: Test for Shorts or Open Circuits
Switch your multimeter to resistance (ohms) mode. Touch the probes to the terminals. A healthy capacitor will show a low resistance that gradually increases as it charges. If the meter shows zero resistance (short circuit) or infinite resistance (open circuit), the capacitor is faulty.
Step 8: Check for Physical Damage
While the capacitor is out, inspect it visually. Look for:
- B bulging or swollen top or bottom
- B leaking fluid or oily residue
- B burnt or charred marks
- B cracked or broken casing
Any of these signs mean the capacitor has failed and needs replacement.
Interpreting Your Test Results
Understanding what your multimeter readings mean is key to diagnosing the problem.
Normal Readings
If the capacitance is within 10% of the labeled value and the resistance test shows a gradual increase, the capacitor is likely good. Reconnect the wires, reassemble the unit, and test the dehumidifier.
Low Capacitance
A reading significantly lower than the labeled value (e.g., 20 µF on a 35 µF capacitor) indicates the capacitor has lost its ability to store charge. This is common in older units and will cause starting issues.
No Capacitance (OL or 0)
If the meter shows “OL” or zero, the capacitor is open or shorted. It cannot function and must be replaced.
Rapid Resistance Drop
If the resistance drops quickly and stays low, the capacitor is shorted internally. This can cause overheating and damage other components.
How to Replace a Faulty Capacitor
If your tests confirm the capacitor is bad, it’s time to replace it.
Step 1: Purchase the Correct Replacement
Match the new capacitor to the old one in:
- B Capacitance (µF)
- B Voltage rating (VAC)
- B Physical size and terminal type
You can find this information on the capacitor label. Buy from a reputable supplier or the manufacturer to ensure quality.
Step 2: Install the New Capacitor
Connect the wires to the new capacitor in the same configuration as the old one. Secure it in place with a clip or zip tie. Double-check all connections before reassembling the unit.
Step 3: Reassemble and Test
Replace the cover and screws. Plug in the dehumidifier and turn it on. Listen for normal operation—the fan should spin smoothly, and the compressor should start without humming or clicking.
Troubleshooting Common Issues
Even after replacing the capacitor, problems may persist. Here’s how to troubleshoot:
Dehumidifier Still Won’t Start
Check the power cord, outlet, and circuit breaker. Test the compressor and fan motor for continuity. A faulty relay or control board could also be the issue.
New Capacitor Fails Quickly
This could indicate an underlying problem, such as overheating, voltage spikes, or a failing motor. Inspect the unit for blocked vents, dirty coils, or electrical issues.
Unit Trips the Breaker
A shorted capacitor or motor can cause this. Recheck all connections and ensure the replacement capacitor is correctly rated.
Preventing Future Capacitor Problems
Regular maintenance can extend the life of your dehumidifier and its capacitor:
- Clean the air filter monthly – A dirty filter restricts airflow, causing the motor to work harder.
- Keep the unit level – Tilting can affect oil circulation in the compressor.
- Avoid overuse – Let the unit rest between cycles to prevent overheating.
- Use a surge protector – Protects against voltage spikes that can damage electronics.
- Schedule annual inspections – Check wiring, capacitors, and motors for wear.
Conclusion
Knowing how to check capacitor in dehumidifier is a valuable skill that can save you from costly repairs or replacements. By following the steps in this guide—prioritizing safety, using the right tools, and interpreting test results correctly—you can diagnose and fix capacitor issues with confidence. Remember, a healthy capacitor ensures your dehumidifier starts reliably and runs efficiently, keeping your home comfortable and dry. With regular maintenance and prompt attention to problems, your dehumidifier can serve you well for many years.