

This guide walks you through how to adjust crawl space dehumidifier settings for maximum performance and efficiency. You’ll learn about ideal humidity levels, proper placement, troubleshooting tips, and maintenance best practices.
Quick Answers to Common Questions
Tip/Question?
What’s the best humidity level for a crawl space?
Keep it between 30% and 50%. This range prevents mold, pests, and structural damage without over-drying the air.
Tip/Question?
How often should I clean the dehumidifier filter?
Clean it every 1–3 months. A dirty filter reduces airflow and makes the unit work harder.
Tip/Question?
Can I use a regular dehumidifier in my crawl space?
No. Use a crawl space-specific model with a drain hose, low-temperature operation, and high moisture removal capacity.
Tip/Question?
Why is my dehumidifier freezing up?
This usually happens in cold crawl spaces. Choose a unit with auto-defrost or insulate the area to keep temps above 65°F.
Tip/Question?
Should I run the dehumidifier year-round?
Yes. Humidity fluctuates seasonally, so continuous (but auto-controlled) operation is best for consistent protection.
How to Adjust Crawl Space Dehumidifier: A Complete Step-by-Step Guide
If you’ve noticed dampness, musty smells, or warped wood in your crawl space, a dehumidifier can be a game-changer. But simply installing one isn’t enough—you need to know how to adjust crawl space dehumidifier settings correctly. Without proper adjustments, your unit might work too hard, waste energy, or fail to control moisture effectively.
In this guide, we’ll walk you through everything you need to know—from understanding ideal humidity levels to fine-tuning your dehumidifier’s settings, placement, and maintenance routine. Whether you’re a DIY homeowner or working with a contractor, these steps will help you protect your home from moisture damage, improve indoor air quality, and extend the life of your HVAC system.
Let’s get started.
Why Adjusting Your Crawl Space Dehumidifier Matters
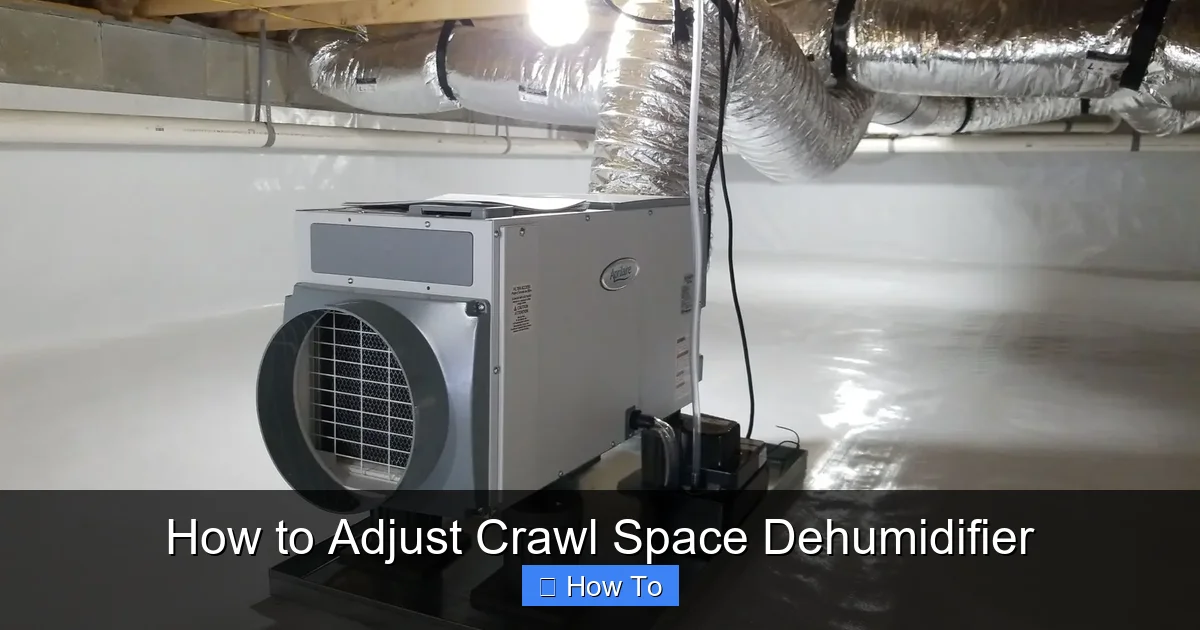
Visual guide about How to Adjust Crawl Space Dehumidifier
Image source: precisioncrawlspace.com
Crawl spaces are naturally prone to high humidity due to their proximity to soil and limited ventilation. When moisture levels rise above 60%, you create the perfect environment for mold, wood rot, termites, and dust mites. These issues don’t just affect your crawl space—they can spread to your living areas, triggering allergies and damaging your home’s structure.
A well-adjusted dehumidifier prevents these problems by maintaining a stable, dry environment. But if the settings are off—say, too high or too low—you could end up with wasted energy, frozen coils, or incomplete drying. That’s why learning how to adjust crawl space dehumidifier controls is essential.
Think of your dehumidifier like a thermostat: it needs the right target to function efficiently. Adjusting it correctly ensures it runs only when needed, removes the right amount of moisture, and protects your home year-round.
Step 1: Understand Ideal Humidity Levels
Before touching any dials or buttons, you need to know what humidity level to aim for. The ideal range for a crawl space is between 30% and 50% relative humidity (RH). Here’s why:
– Below 30%: Too dry. This can cause wood to crack, shrink, or warp. It also increases static electricity and may irritate respiratory systems.
– 30%–50%: Optimal. This range prevents mold growth, deters pests, and protects structural integrity.
– Above 50%: Too humid. Mold, mildew, and pests thrive. Wood begins to decay.
Most modern crawl space dehumidifiers come with built-in hygrometers and humidistats, allowing you to set a target humidity level. If yours doesn’t, consider installing a standalone digital hygrometer for accurate readings.
How to Check Current Humidity
Use a hygrometer (digital is best) to measure the current humidity in your crawl space. Place it in the center of the area, away from direct sunlight or water sources, and wait 10–15 minutes for a stable reading.
If the reading is above 50%, your dehumidifier needs to work harder. If it’s below 30%, you may need to raise the setting slightly.
Seasonal Adjustments
Humidity levels fluctuate with the seasons. In summer, outdoor air is more humid, so your dehumidifier may need to run more often. In winter, the air is drier, and the unit might cycle less.
– Summer (June–August): Set humidity to 40%–45%.
– Spring/Fall: 45%–50%.
– Winter (December–February): 35%–40% (to prevent over-drying).
These adjustments help balance moisture control with energy efficiency.
Step 2: Choose the Right Dehumidifier for Your Crawl Space
Not all dehumidifiers are created equal. Crawl spaces have unique challenges—tight spaces, high humidity, and limited access—so you need a unit designed for the job.
Look for a crawl space dehumidifier (not a standard room model) with these features:
– High moisture removal rate: At least 50–70 pints per day for a 1,000 sq. ft. space.
– Built-in pump or drain hose: For continuous drainage without manual emptying.
– Low-temperature operation: Should work efficiently down to 41°F (5°C).
– Automatic defrost: Prevents ice buildup in cold weather.
– Energy Star certification: Saves up to 30% on energy costs.
Popular brands include Santa Fe, AprilAire, and Dri-Eaz. Avoid cheap basement dehumidifiers—they often lack the durability and features needed for crawl spaces.
Sizing Your Dehumidifier
To choose the right size, calculate your crawl space’s square footage (length × width). Then consider:
– 500–1,000 sq. ft.: 50-pint unit.
– 1,000–1,500 sq. ft.: 70-pint unit.
– 1,500+ sq. ft.: 70+ pint unit or dual units.
If your crawl space has standing water, poor drainage, or a dirt floor, go one size up for better performance.
Step 3: Install the Dehumidifier Correctly
Even the best dehumidifier won’t work well if it’s poorly placed. Proper installation ensures maximum airflow, efficient moisture removal, and easy maintenance.
Where to Place the Dehumidifier
– Central location: Avoid corners or tight spaces. Place it where air can circulate freely.
– Elevated surface: Use a stand or platform to keep it off damp ground.
– Near a drain: If using a hose, position it close to a floor drain or sump pump.
– Away from obstructions: Keep at least 12 inches of clearance on all sides.
Avoid placing it directly on soil or near standing water. If your crawl space has a vapor barrier (plastic sheeting), make sure the dehumidifier sits on top of it.
Connecting the Drain Hose
Most crawl space dehumidifiers come with a drain hose for continuous water removal. Here’s how to set it up:
1. Attach the hose to the drain outlet on the back or side of the unit.
2. Run the hose to a floor drain, sump pit, or outside (if code allows).
3. Ensure the hose has a downward slope—no loops or kinks.
4. Secure it with zip ties or clips to prevent movement.
If you don’t have a drain, consider a model with a built-in condensate pump. These can push water up to 15 feet vertically, giving you more placement flexibility.
Electrical Requirements
Crawl space dehumidifiers typically require a dedicated 120V outlet. Check the manufacturer’s specs for amperage and wiring needs. Never use extension cords—they can overheat and pose a fire risk.
If your crawl space lacks power, consult an electrician to install a GFCI-protected outlet. This is a must for safety in damp environments.
Step 4: Adjust the Humidity Setting
Now for the main event: adjusting the dehumidifier’s humidity setting. This is usually done via a control panel on the unit or a remote thermostat.
Locate the Control Panel
Most models have a digital display with buttons for:
– Humidity set point (e.g., 45%)
– Fan speed (low, medium, high)
– Timer (on/off schedules)
– Mode (auto, continuous, etc.)
Refer to your user manual for specific instructions—controls vary by brand.
Set the Target Humidity
1. Press the “Humidity” or “Set” button.
2. Use the up/down arrows to select your desired level (e.g., 45%).
3. Press “Enter” or wait for the setting to save.
Start with 45% and monitor for a week. If you still see condensation or smell mildew, lower it to 40%. If the air feels too dry or the unit runs constantly, raise it to 50%.
Choose the Right Fan Speed
– Low: Quieter, uses less energy. Best for moderate humidity.
– Medium: Balanced performance. Good for most conditions.
– High: Removes moisture faster. Use during high-humidity seasons or after water intrusion.
In most cases, medium speed is ideal. Only use high if you’re dealing with active moisture issues.
Enable Auto Mode
Set the dehumidifier to “Auto” mode so it turns on only when humidity exceeds your set point. This saves energy and prevents over-drying.
Avoid “Continuous” mode unless you’re drying out a flooded crawl space—it runs nonstop and wastes power.
Step 5: Monitor and Maintain Your Dehumidifier
Adjusting the settings is just the beginning. Regular maintenance ensures your dehumidifier keeps working efficiently for years.
Monthly Maintenance Checklist
- Clean the air filter: Remove and vacuum or rinse it. A dirty filter restricts airflow and reduces efficiency.
- Check the drain hose: Look for clogs, kinks, or leaks. Flush it with water if needed.
- Inspect the coils: Dust and debris can build up. Use a soft brush or compressed air to clean them.
- Look for ice buildup: If coils are frozen, the unit may be in a cold space or have a refrigerant issue.
- Test the humidistat: Use a separate hygrometer to verify accuracy.
Seasonal Deep Cleaning
Every 3–6 months, do a thorough cleaning:
1. Unplug the unit.
2. Remove the front panel (if applicable).
3. Wipe down the interior with a damp cloth and mild detergent.
4. Check the condensate pan for sludge or mold.
5. Reassemble and plug back in.
If you notice a musty smell, the pan or coils may need a vinegar solution (1:1 water and white vinegar) to kill bacteria.
Replace Filters Annually
Even with regular cleaning, filters degrade over time. Replace them once a year—or sooner if you have pets or high dust levels.
Step 6: Troubleshoot Common Problems
Even with proper adjustments, issues can arise. Here’s how to fix the most common ones.
Dehumidifier Won’t Turn On
– Check power supply: Is it plugged in? Is the outlet working?
– Test the GFCI: Press the “Reset” button.
– Inspect the float switch: If the water tank is full, the unit may shut off automatically.
Not Removing Enough Moisture
– Dirty filter or coils: Clean them.
– Low fan speed: Increase to medium or high.
– Incorrect setting: Lower the humidity target.
– Poor airflow: Clear obstructions around the unit.
Unit Runs Constantly
– Humidity setting too low: Raise it slightly.
– Leaky crawl space: Check for gaps in vents, doors, or walls.
– Undersized unit: Consider upgrading to a larger model.
Ice on Coils
– Cold environment: Crawl space is below 65°F. Use a model with auto-defrost.
– Dirty coils: Clean them.
– Refrigerant leak: Call a technician.
Water Leaking from Unit
– Clogged drain hose: Clear the blockage.
– Cracked condensate pan: Replace it.
– Improper slope: Ensure the hose drains downward.
Bonus Tips for Maximum Efficiency
– Seal your crawl space: Close vents and install a vapor barrier to reduce moisture entry.
– Use a smart thermostat: Some models connect to Wi-Fi, letting you monitor and adjust settings remotely.
– Insulate pipes: Prevent condensation on cold water lines.
– Schedule professional inspections: Have a technician check the system every 2–3 years.
Conclusion
Learning how to adjust crawl space dehumidifier settings is a vital step in protecting your home from moisture damage. By setting the right humidity level, placing the unit correctly, and maintaining it regularly, you’ll enjoy a drier, healthier crawl space—and a more comfortable home overall.
Remember, the goal isn’t to eliminate all moisture, but to maintain a balanced environment. Start with 45% humidity, monitor the results, and make small adjustments as needed. With the right approach, your dehumidifier will run efficiently, save energy, and give you peace of mind for years to come.
Don’t wait for mold or pests to appear—take control of your crawl space today.