
Building your own dehumidifier is easier than you think. This guide walks you through creating an effective, low-cost unit using everyday materials. Perfect for basements, closets, or small spaces.
[FEATURED_IMAGE_PLACEHERPLACEHOLDER]
Quick Answers to Common Questions
Can I use table salt instead of calcium chloride?
No—table salt (sodium chloride) doesn’t absorb moisture effectively. Calcium chloride is hygroscopic and ideal for dehumidifying.
How often should I recharge silica gel?
Check every 2–3 weeks. When it changes color (blue to pink), it’s time to dry it in the oven at 250°F for 2–3 hours.
Is it safe to leave a Peltier dehumidifier on overnight?
Yes, if properly built with insulated wiring and a reliable power supply. Never leave it unattended if you’re unsure about the electrical setup.
Can I build a dehumidifier without electricity?
Absolutely! The desiccant method uses no power and works great in closets, safes, or storage bins.
Will this work in a cold basement?
Passive desiccants work in cold spaces. Peltier units are less efficient below 60°F—consider a refrigerant-based commercial unit for very cold areas.
Introduction: Why Build Your Own Dehumidifier?
High humidity doesn’t just feel uncomfortable—it can damage your home, ruin clothes, and encourage mold growth. While store-bought dehumidifiers work great, they’re often expensive and use a lot of electricity. That’s where DIY options come in. Building your own dehumidifier lets you control costs, customize size and function, and even repurpose household items.
In this guide, you’ll learn two practical methods: a passive desiccant-based system (great for small, enclosed spaces) and an active Peltier-powered unit (better for slightly larger areas). Both are safe, affordable, and surprisingly effective. Whether you’re tackling dampness in a closet, protecting tools in a garage, or preserving documents in a basement, this project puts moisture control in your hands.
Understanding How Dehumidifiers Work
Before building, it helps to know how dehumidifiers remove moisture. Most commercial units use one of two principles: refrigeration or desiccation.
Visual guide about How to Build a Dehumidifier
Image source: bestdehumidifierchoice.com
Refrigerant Dehumidifiers
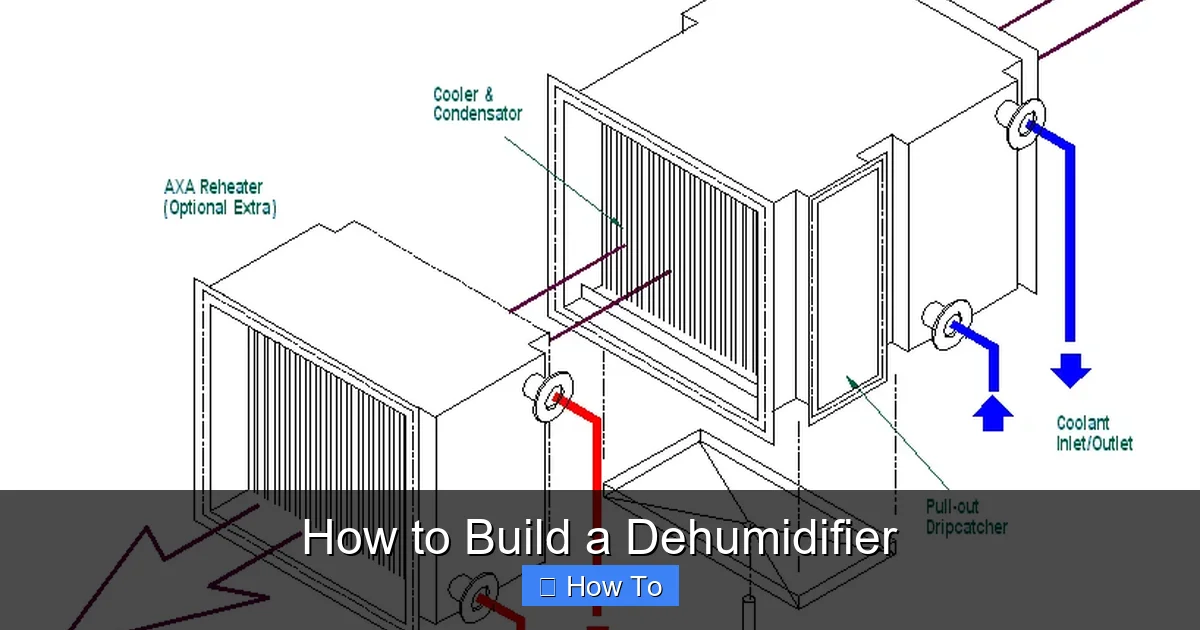
These cool air below its dew point, causing water vapor to condense on cold coils. The water drips into a tank, and dry air is reheated and released. They’re efficient in warm, humid environments but use significant electricity.
Desiccant Dehumidifiers
These use moisture-absorbing materials like silica gel, calcium chloride, or rock salt. Air passes over the desiccant, which traps water molecules. No electricity needed—just periodic recharging by drying the material. Perfect for passive, low-energy setups.
Your DIY version will likely use the desiccant method (simpler and safer) or mimic the refrigerant effect with a Peltier cooler (more complex but active).
Method 1: Building a Passive Desiccant Dehumidifier
This is the easiest and safest option. It requires no wiring, minimal tools, and works silently. Best for small, enclosed spaces like closets, safes, or storage bins.
Materials You’ll Need
- Two plastic containers with lids (one larger, one smaller)
- Silica gel beads or calcium chloride (available at hardware stores or online)
- Drill or sharp tool
- Small fan (optional, for better airflow)
- Mesh or breathable fabric (coffee filter, nylon stocking)
- Rubber bands or tape
Step-by-Step Instructions
Step 1: Prepare the Inner Container
Take the smaller container and drill multiple small holes (about 1/8 inch) in the bottom and sides. These holes allow moist air to enter while keeping the desiccant inside. Make sure the holes are small enough that beads won’t fall out.
Step 2: Add the Desiccant
Fill the perforated container with silica gel or calcium chloride. Silica gel is reusable—just dry it in an oven at 250°F for 2–3 hours to recharge. Calcium chloride is cheaper but dissolves into liquid over time, so you’ll need a drain system (see below).
Step 3: Create a Drain (For Calcium Chloride)
If using calcium chloride, place the inner container inside the larger one. The outer container will collect the brine that forms as the salt absorbs moisture. Drill a small overflow hole near the top of the outer container if needed, or check and empty it weekly.
Step 4: Improve Airflow (Optional)
For better performance, attach a small USB or battery-powered fan to the lid of the outer container. Point it inward to circulate air over the desiccant. Use mesh or fabric to cover the fan intake to prevent dust from entering.
Step 5: Seal and Place
Close the lid securely and place your dehumidifier in the target area. For closets, hang it from a hook or place it on a shelf. Check every few days—especially in humid weather—and recharge or replace the desiccant as needed.
Tips for Maximum Effectiveness
- Use food-grade silica gel if placing near clothes or food.
- Label the container “Do Not Open” if using calcium chloride—it’s corrosive.
- Combine with moisture-absorbing products like DampRid for extra protection.
- In very humid climates, rotate multiple units or recharge desiccants more frequently.
Method 2: Building an Active Peltier Dehumidifier
If you’re comfortable with basic electronics, this method uses a thermoelectric cooler (Peltier module) to condense moisture—just like a mini fridge. It’s more efficient than passive systems and works continuously with power.
Materials You’ll Need
- Peltier module (TEC1-12706, 12V, 60W)
- Heat sinks (one large for hot side, one smaller for cold side)
- Computer fan (12V, 80mm or 120mm)
- Power supply (12V DC, 5A minimum)
- Plastic or metal container (for water collection)
- Thermal paste
- Wires, soldering iron, heat shrink tubing
- Insulating material (foam board or rubber gasket)
- Small tray or sponge (to catch condensation)
Step-by-Step Instructions
Step 1: Assemble the Peltier Unit
Apply thermal paste to both sides of the Peltier module. Attach the large heat sink to the hot side (usually marked “+” or the side that gets warm when powered). Attach the smaller heat sink to the cold side. Use screws or thermal adhesive—ensure tight contact for efficient heat transfer.
Step 2: Mount the Fan
Attach the computer fan to the large (hot side) heat sink. The fan should blow air away from the Peltier to dissipate heat. Secure it with zip ties or screws. This prevents overheating, which reduces cooling efficiency.
Step 3: Create a Condensation Tray
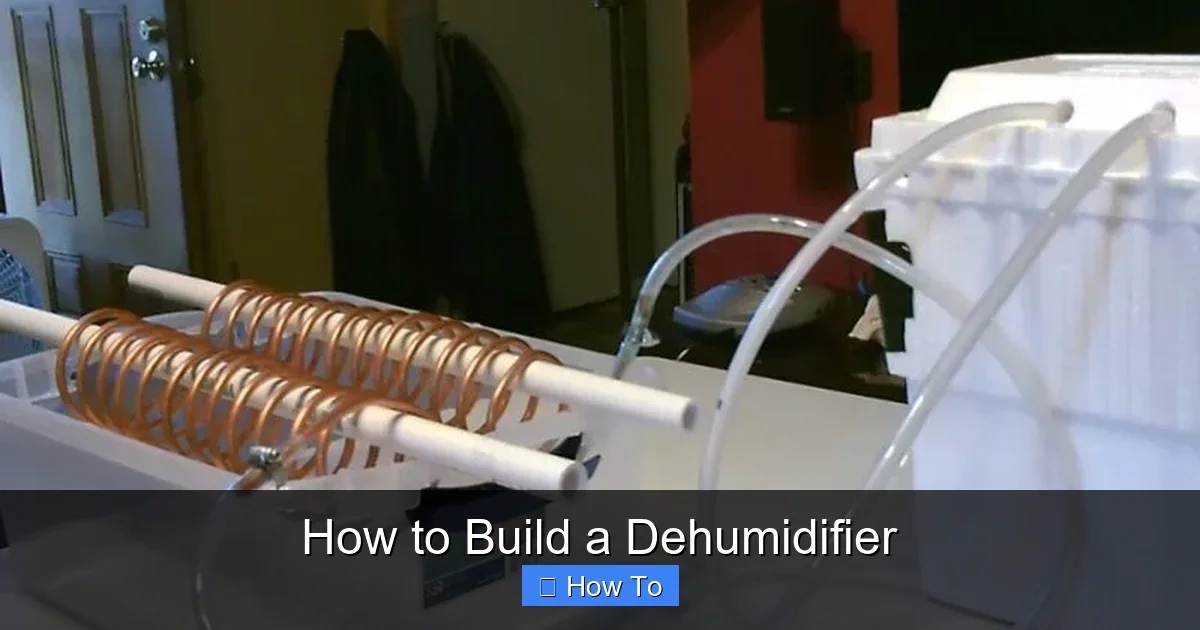
Place a small plastic tray or absorbent sponge beneath the cold heat sink. As air passes over the cold surface, moisture will condense and drip into the tray. Position the entire assembly over a collection container or use a tube to direct water outside.
Step 4: Wire the Circuit
Connect the Peltier module and fan in parallel to the 12V power supply. Use red wire for positive (+) and black for negative (–). Solder connections and cover with heat shrink tubing to prevent shorts. Double-check polarity—reversing it swaps hot and cold sides!
Step 5: Insulate and Enclose
Wrap the cold side and tray with insulating foam to prevent external heat from warming the cold surface. Place the entire unit inside a sealed box with an air intake on one side and an exhaust on the other. Use foam gaskets to seal gaps.
Step 6: Test and Optimize
Plug in the power supply and let it run for 10–15 minutes. You should see condensation forming on the cold heat sink. If not, check connections, fan direction, and insulation. Adjust fan speed or add a second fan for better airflow if needed.
Safety and Efficiency Tips
- Never run the Peltier without a heat sink—it can burn out in seconds.
- Use a fused power supply to prevent electrical fires.
- Keep all wiring away from water collection areas.
- Monitor temperature with a thermometer—ideal cold side temp is 40–50°F for condensation.
- This unit works best in rooms above 60°F; efficiency drops in cold environments.
Choosing the Right Method for Your Needs
Not every space needs a high-tech solution. Consider these factors when deciding:
Space Size
Passive desiccant units work well in areas under 10 cubic feet (e.g., gun safes, toolboxes). Peltier units can handle up to 50–100 cubic feet (small rooms, RVs).
Humidity Level
In moderate humidity (50–60% RH), silica gel is sufficient. For high humidity (70%+), especially in basements, a Peltier unit or commercial dehumidifier may be better.
Power Access
If you can’t run an extension cord, go passive. If electricity is available and you want continuous operation, choose the active method.
Maintenance Tolerance
Desiccant systems require weekly checks and recharging. Peltier units need less frequent attention but occasional cleaning of the cold plate and water tray.
Troubleshooting Common Issues
Even well-built dehumidifiers can run into problems. Here’s how to fix the most common ones.
No Condensation in Peltier Unit
Check that the cold side is actually cold. If both sides feel warm, the Peltier may be reversed or underpowered. Ensure the hot side fan is working and the heat sink isn’t blocked.
Desiccant Isn’t Absorbing Moisture
Silica gel turns from blue to pink when saturated. Recharge it in the oven. If using rock salt, it may have fully dissolved—replace it and ensure proper drainage.
Water Leaking or Overflowing
Empty collection trays regularly. For calcium chloride systems, drill a small overflow hole or use a wider outer container.
Fan Not Spinning
Test the fan separately with a battery. If it works, check wiring and polarity. Loose connections are a common culprit.
Unit Gets Too Hot
The hot side should be warm but not scorching. Improve ventilation around the heat sink or add a second fan. Reduce operating time if overheating persists.
Maintenance and Long-Term Care
To keep your DIY dehumidifier working efficiently:
- Recharge silica gel every 2–4 weeks in humid climates.
- Clean the cold plate and tray weekly to prevent mold or mineral buildup.
- Inspect wires and connections monthly for wear or corrosion.
- Replace calcium chloride when it turns to liquid sludge.
- Store unused desiccants in airtight containers to maintain effectiveness.
With proper care, a passive unit can last years, and a Peltier unit can run for thousands of hours.
Conclusion: Take Control of Your Air
Building a dehumidifier isn’t just a fun weekend project—it’s a smart way to protect your belongings, improve air quality, and save money. Whether you choose the simple desiccant method or dive into electronics with a Peltier cooler, you’ll gain valuable skills and a custom solution tailored to your space.
Remember, these DIY units won’t replace industrial-grade dehumidifiers for whole-house use, but they’re perfect for targeted moisture control. Start small, experiment, and don’t be afraid to tweak your design. With a little creativity and the right materials, you can keep your home dry, comfortable, and mold-free—all on your own terms.