

Building a dehumidifier wood kiln is a cost-effective way to dry lumber at home. This guide walks you through materials, construction, and operation for safe, efficient wood drying.
Quick Answers to Common Questions
Tip/Question?
What’s the best wood for testing your kiln?
Use scrap or low-value wood like pine or poplar for your first few drying cycles. This lets you fine-tune settings without risking expensive lumber.
Tip/Question?
Can I use a window air conditioner instead of a dehumidifier?
No. Air conditioners cool the air but don’t remove moisture efficiently. A dehumidifier is designed specifically for moisture removal and works better in a sealed kiln.
Tip/Question?
How often should I check the kiln?
Check it daily during the first week, then every 2–3 days. Monitor temperature, humidity, and water levels to ensure everything is working properly.
Tip/Question?
Can I dry green wood directly in the kiln?
It’s better to air-dry green wood for a week or two first. Starting with very wet wood can overwhelm the dehumidifier and increase drying time.
Tip/Question?
What if my kiln is too small?
You can expand it later by adding panels or building a larger chamber. Start small and upgrade as your needs grow.
How to Build a Dehumidifier Wood Kiln
If you’re a woodworker, furniture maker, or hobbyist who works with wood, you know how important it is to use properly dried lumber. Wet or green wood can warp, crack, or develop mold over time, ruining your projects. While you can air-dry wood, it takes months or even years. A faster, more controlled method is using a kiln. But commercial kilns are expensive. That’s why building your own dehumidifier wood kiln is a smart, budget-friendly solution.
In this guide, you’ll learn how to build a dehumidifier wood kiln from scratch. You’ll discover the materials you need, step-by-step construction tips, and how to operate your kiln safely and effectively. Whether you’re drying firewood, lumber for furniture, or specialty wood for crafts, this DIY kiln will help you get the job done faster and with better results.
What Is a Dehumidifier Wood Kiln?
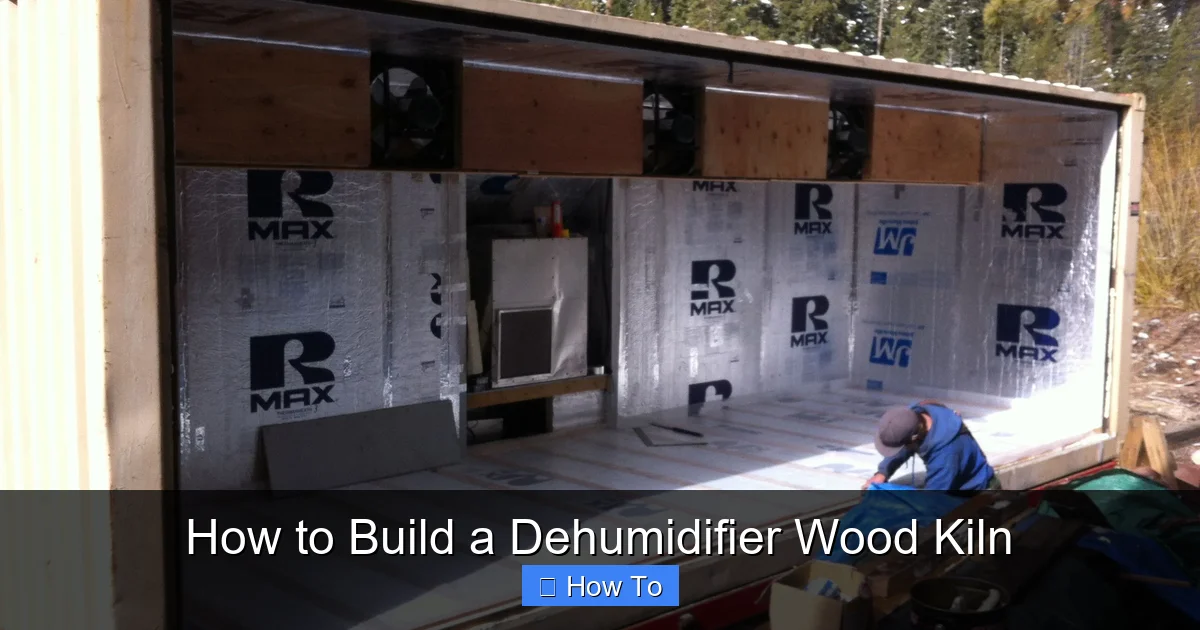
Visual guide about How to Build a Dehumidifier Wood Kiln
Image source: i.pinimg.com
A dehumidifier wood kiln is a sealed chamber that uses a dehumidifier, a small heater, and a fan to remove moisture from wood. Unlike traditional kilns that use steam or high heat, a dehumidifier kiln gently pulls moisture out of the wood using condensation. This method is gentler on the wood, reducing the risk of cracking or warping.
The process works like this: warm, moist air inside the kiln rises and passes over the cold coils of the dehumidifier. The moisture condenses into water, which collects in a tank or drains away. The dry air is then reheated and circulated back into the chamber. Over time, the wood loses moisture and reaches the desired moisture content—usually between 6% and 12%, depending on your project.
This type of kiln is ideal for small-scale drying, such as for home workshops or small woodworking businesses. It’s energy-efficient, easy to build, and much cheaper than commercial options.
Why Build Your Own Kiln?
Buying a commercial wood kiln can cost thousands of dollars. Even small models start at $1,500 or more. Building your own dehumidifier kiln can cost under $300, depending on the size and materials you use.
Other benefits include:
- Custom size: Build a kiln that fits your space and wood needs.
- Control over drying conditions: Adjust temperature and humidity to suit different wood types.
- Learning experience: Gain hands-on knowledge about wood drying and kiln operation.
- Scalability: Start small and expand later if needed.
Plus, once you’ve built it, you can reuse the kiln for years with minimal maintenance.
Planning Your Kiln: Size and Location
Before you start building, you need to decide on the size and location of your kiln.
Choosing the Right Size
The size of your kiln depends on how much wood you plan to dry at once. A small kiln (4’ x 4’ x 4’) is great for hobbyists drying a few boards. A larger one (6’ x 6’ x 8’) can handle full-sized lumber stacks.
Consider:
- The dimensions of your wood pieces.
- How much space you need for air circulation (at least 2–3 inches between boards).
- Your available workspace and budget.
For most DIYers, a 4’ x 4’ x 4’ kiln is a good starting point.
Selecting the Location
Your kiln should be built in a dry, well-ventilated area like a garage, shed, or basement. Avoid outdoor locations unless you can fully protect the kiln from rain and snow.
Key requirements:
- Insulation: The space should be insulated to retain heat and improve efficiency.
- Power access: You’ll need a nearby electrical outlet (120V standard is fine).
- Drainage: The dehumidifier will produce water, so have a way to drain it (bucket or hose).
- Safety: Keep the kiln away from flammable materials and install smoke detectors nearby.
Materials and Tools You’ll Need
Here’s a list of materials and tools to build a basic dehumidifier wood kiln.
Materials
- ¾-inch plywood (for walls and floor)
- Rigid foam insulation (1-inch thick, R-6 or higher)
- Aluminum foil tape or silicone sealant (for sealing joints)
- Wood screws (1.5-inch and 2-inch)
- Hinges and latch (for the door)
- Weather stripping (to seal the door)
- Small space heater (500–1000 watts)
- Dehumidifier (30–50 pint capacity)
- Box fan (12-inch or 16-inch)
- Thermometer and hygrometer (to monitor temperature and humidity)
- Thermostat (optional, for automatic temperature control)
- Water collection bucket or drain hose
- Wooden stickers (1-inch strips for stacking wood)
Tools
- Circular saw or table saw
- Drill and drill bits
- Screwdriver
- Measuring tape
- Level
- Utility knife
- Clamps
- Safety gear (gloves, goggles, mask)
Step-by-Step Construction Guide
Now that you have your materials and tools, it’s time to build your kiln.
Step 1: Build the Frame and Walls
Start by cutting the plywood to size. For a 4’ x 4’ x 4’ kiln, you’ll need:
- Two 4’ x 4’ panels (floor and ceiling)
- Four 4’ x 4’ panels (walls)
Use screws to assemble the box. Make sure all corners are square and the structure is sturdy.
Step 2: Insulate the Interior
Cut the rigid foam insulation to fit inside each wall, floor, and ceiling. Secure it with construction adhesive or screws. Insulation is crucial—it keeps the heat in and improves the dehumidifier’s efficiency.
Seal all joints with aluminum foil tape or silicone sealant. This prevents air leaks and moisture buildup.
Step 3: Install the Door
Cut a door opening on one of the 4’ x 4’ walls. A 24-inch-wide door is usually sufficient. Use hinges to attach the door and install a latch to keep it closed.
Apply weather stripping around the door frame to create an airtight seal. Test the door by closing it and checking for gaps.
Step 4: Add Ventilation and Access Points
You’ll need small vents for air circulation and access for power cords and hoses.
Drill two small holes (1–2 inches) near the top and bottom of the kiln:
- One for the dehumidifier’s drain hose (if using a hose instead of a bucket).
- One for the power cords of the heater, fan, and dehumidifier.
Seal around the holes with silicone to maintain the airtight environment.
Step 5: Install the Dehumidifier, Heater, and Fan
Place the dehumidifier inside the kiln, ideally near the back. If it has a built-in pump, you can run a drain hose out through the vent hole. Otherwise, place a bucket underneath and empty it regularly.
Position the space heater near the front or side. Keep it at least 12 inches away from wood and walls to prevent fire hazards.
Mount the box fan on the ceiling or high on a wall. It should blow air downward to circulate warm, dry air over the wood.
Step 6: Install Monitoring Devices
Mount the thermometer and hygrometer inside the kiln where you can easily read them. Place them at mid-height, away from direct heat or fan airflow.
If you’re using a thermostat, connect it to the heater to automatically maintain a set temperature (usually 80–100°F for most wood types).
Step 7: Test the Kiln
Before loading wood, run a test cycle:
- Close the door and turn on the heater, fan, and dehumidifier.
- Let it run for 2–4 hours.
- Check the temperature and humidity levels.
- Ensure the dehumidifier is collecting water.
- Look for air leaks or unusual noises.
Make adjustments as needed. For example, if the humidity isn’t dropping, check the seal on the door or increase the heater setting.
Loading and Drying Your Wood
Now that your kiln is ready, it’s time to dry some wood.
Preparing the Wood
Start with clean, unstuck wood. Remove any bark or dirt. If the wood is freshly cut, let it air-dry for a few days to remove surface moisture.
Stacking the Wood
Use wooden stickers (1-inch strips) to separate each layer of wood. This allows air to flow between the boards. Stack the wood evenly, with stickers aligned vertically to prevent sagging.
Leave at least 2–3 inches of space between the stack and the walls, ceiling, and floor for air circulation.
Setting Drying Conditions
The ideal drying conditions depend on the wood species and thickness:
- Temperature: 80–100°F (27–38°C)
- Humidity: Start at 60–70%, then gradually reduce to 40–50%
- Time: 1–4 weeks, depending on wood thickness and moisture content
Thinner boards (1 inch or less) dry faster. Thicker lumber (2 inches or more) may take several weeks.
Monitoring the Process
Check the kiln daily. Record the temperature and humidity. Empty the dehumidifier’s water tank if needed.
After a week, test the wood’s moisture content with a moisture meter. Wood is dry enough when it reaches 6–12% moisture, depending on your project and climate.
Troubleshooting Common Issues
Even with careful planning, problems can arise. Here’s how to fix the most common issues.
High Humidity Not Dropping
If the humidity stays high, check:
- Is the dehumidifier working? Listen for the compressor.
- Is the door sealed tightly? Look for gaps or worn weather stripping.
- Is the heater too weak? Upgrade to a 1000-watt heater if needed.
- Is the wood too wet? Pre-dry it outdoors for a few days.
Wood Cracking or Warping
This usually happens if the wood dries too fast. To prevent it:
- Reduce the temperature to 80°F.
- Increase humidity slightly (to 60%).
- Slow down the drying process over 3–4 weeks.
Dehumidifier Overheating
Dehumidifiers can overheat in small, hot spaces. To fix:
- Ensure the kiln is well-ventilated.
- Don’t run the heater and dehumidifier at full power simultaneously.
- Use a dehumidifier with an auto-shutoff feature.
Electrical Issues
Overloading circuits can trip breakers. Use a dedicated outlet and avoid running other high-power tools at the same time.
Safety Tips
Safety is critical when operating a kiln.
- Install a smoke detector near the kiln.
- Keep a fire extinguisher nearby (Class C for electrical fires).
- Never leave the kiln unattended for long periods.
- Use a GFCI outlet to prevent electrical shocks.
- Check cords and plugs for damage before each use.
Maintaining Your Kiln
To keep your kiln running smoothly:
- Clean the dehumidifier’s filter monthly.
- Check and replace weather stripping annually.
- Inspect insulation for damage or moisture buildup.
- Wipe down interior walls to prevent mold.
With proper care, your kiln can last for many years.
Conclusion
Building a dehumidifier wood kiln is a rewarding DIY project that saves money and gives you control over your wood drying process. With basic tools and materials, you can create a safe, efficient kiln that delivers professional-quality results.
Remember to plan carefully, monitor conditions closely, and prioritize safety. Start with small batches of wood and adjust your settings as you learn. Over time, you’ll master the art of kiln drying and enjoy the benefits of perfectly dried lumber for all your projects.
Whether you’re building furniture, crafting instruments, or drying firewood, your homemade kiln will be a valuable addition to your workshop.