
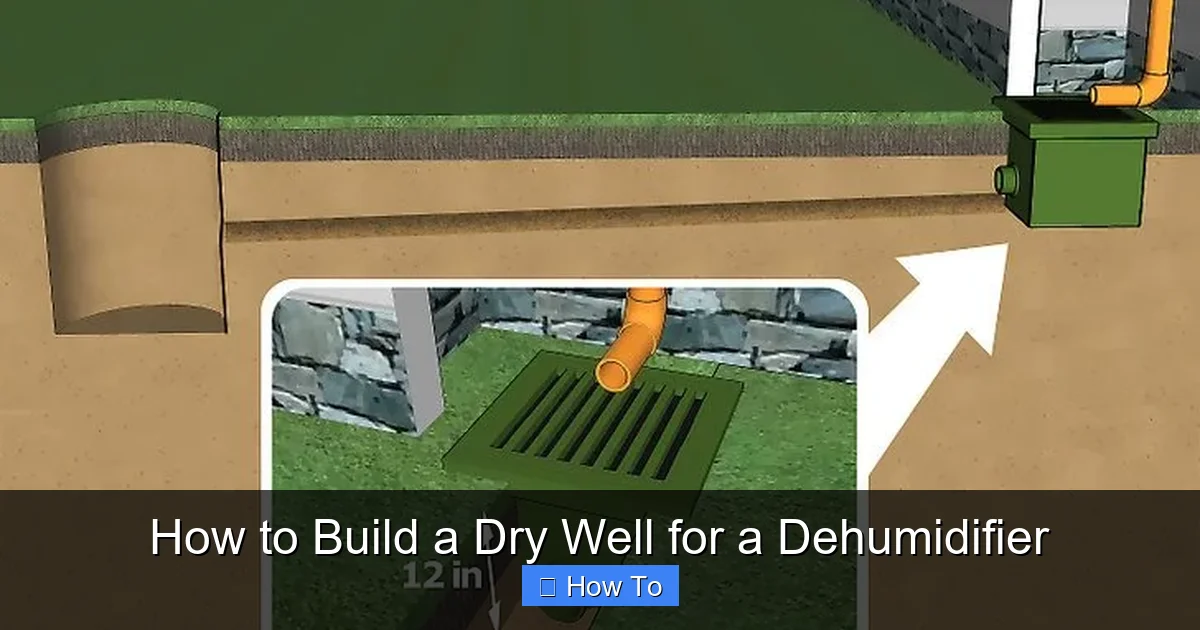
Building a dry well for your dehumidifier helps safely drain collected water away from your home’s foundation. This guide walks you through planning, digging, installing gravel and perforated pipe, and maintaining your dry well for long-term moisture control.
Quick Answers to Common Questions
Can I use a dry well with any dehumidifier?
Yes, as long as your dehumidifier has a continuous drain option or a hose outlet. Most modern units support this feature.
How deep should the dry well be?
The chamber should sit on 6–12 inches of gravel and be buried with at least 6 inches of soil on top—typically 4 to 6 feet deep total.
What if my yard is flat?
Even on flat ground, you can create a slight slope in the trench. Use a laser level or hose level to ensure proper drainage.
Can I build a dry well without a chamber?
Yes, you can create a “gravel pit” dry well using just gravel and fabric, but a chamber is more efficient and longer-lasting.
How long does it take to build a dry well?
Most DIYers complete the project in 4–6 hours, depending on soil type and distance from the dehumidifier.
Introduction: Why You Need a Dry Well for Your Dehumidifier
If you own a dehumidifier, you know how much water it can collect—especially in humid climates or damp basements. Most dehumidifiers come with a built-in bucket that needs frequent emptying, which is tedious and inefficient. While you can connect a hose for continuous drainage, simply routing that hose to a floor drain or outside isn’t always practical or safe. That’s where a dry well comes in.
A dry well is an underground structure designed to collect and slowly disperse water into the surrounding soil. When connected to your dehumidifier, it provides a hands-free, long-term solution for managing excess moisture. Not only does this reduce maintenance, but it also helps protect your home’s foundation, prevent mold growth, and improve indoor air quality.
In this guide, we’ll walk you through the entire process of building a dry well for your dehumidifier—from planning and materials to installation and maintenance. Whether you’re a DIY beginner or an experienced home improver, you’ll find clear, step-by-step instructions and practical tips to get the job done right.
Step 1: Assess Your Needs and Choose the Right Location
Visual guide about How to Build a Dry Well for a Dehumidifier
Image source: wikihow.com
Before grabbing a shovel, take time to evaluate your situation. Not all homes or dehumidifiers require the same dry well setup.
Determine Water Output
First, check your dehumidifier’s specifications. Most residential units remove between 20 and 70 pints of water per day. A typical dry well should handle up to 50 gallons per day comfortably. If your unit produces more than that—or if you live in an extremely humid area—consider a larger dry well or multiple chambers.
Evaluate Soil and Drainage
Not all soil types drain equally. Sandy or loamy soil absorbs water quickly, while clay-heavy soil drains slowly and may cause pooling. To test your soil, dig a small hole about 12 inches deep, fill it with water, and time how long it takes to drain. If it takes more than 24 hours, your soil may not support a standard dry well. In such cases, consider adding a French drain or using a sump pump with a discharge line.
Pick the Perfect Spot
Location is critical. Follow these guidelines:
– Place the dry well at least 10 feet away from your home’s foundation to prevent water from seeping back toward the structure.
– Avoid areas near septic systems, wells, or property lines.
– Choose a spot with a slight downward slope away from your house to encourage natural water flow.
– Ensure the area is accessible for future maintenance but not in a high-traffic zone.
Step 2: Gather Tools and Materials
Having the right tools and materials on hand will make the installation smoother and safer.
Essential Tools
- Shovel or post-hole digger
- Tape measure
- Level
- Utility knife
- Hacksaw (for cutting pipe)
- Garden hose (for testing slope)
- Work gloves and safety goggles
Required Materials
- One 50–100 gallon dry well chamber (plastic or concrete)
- 4-inch perforated drain pipe (length depends on distance from dehumidifier)
- Landscape fabric (4–6 oz weight, enough to wrap the chamber)
- Clean, coarse gravel (pea gravel or crushed stone, about 1/2 to 1 inch in size)
- PVC or flexible drain hose (to connect dehumidifier to dry well)
- Pipe connectors or couplings (if needed)
- Duct tape or zip ties (for securing hose)
Tip: You can often find dry well kits at home improvement stores that include the chamber, pipe, and fabric—saving you time and guesswork.
Step 3: Plan the Layout and Mark the Area
A little planning now prevents big mistakes later.
Measure the Distance
Determine the distance from your dehumidifier to the chosen dry well location. Add a few extra feet to your pipe length to allow for slope and connection ease.
Calculate the Slope
Water needs to flow by gravity, so the pipe must slope downward at a rate of 1/4 inch per foot. For example, if your dry well is 10 feet away, the pipe should drop 2.5 inches from the dehumidifier to the dry well inlet.
Use a laser level or string line with a level to mark the correct slope. You can also use a garden hose filled with water—water will naturally find the correct slope.
Mark the Dig Sites
Use spray paint or stakes and string to mark:
– The outline of the dry well hole (typically 2–3 feet wider than the chamber)
– The path for the drain pipe trench (about 12–18 inches deep)
Step 4: Dig the Dry Well Hole and Trench
Now it’s time to get digging—but safety first.
Call 811 Before You Dig
In the U.S., call 811 at least 48 hours before digging. This free service will mark underground utilities like gas, water, and electrical lines. Hitting a line can be dangerous and costly.
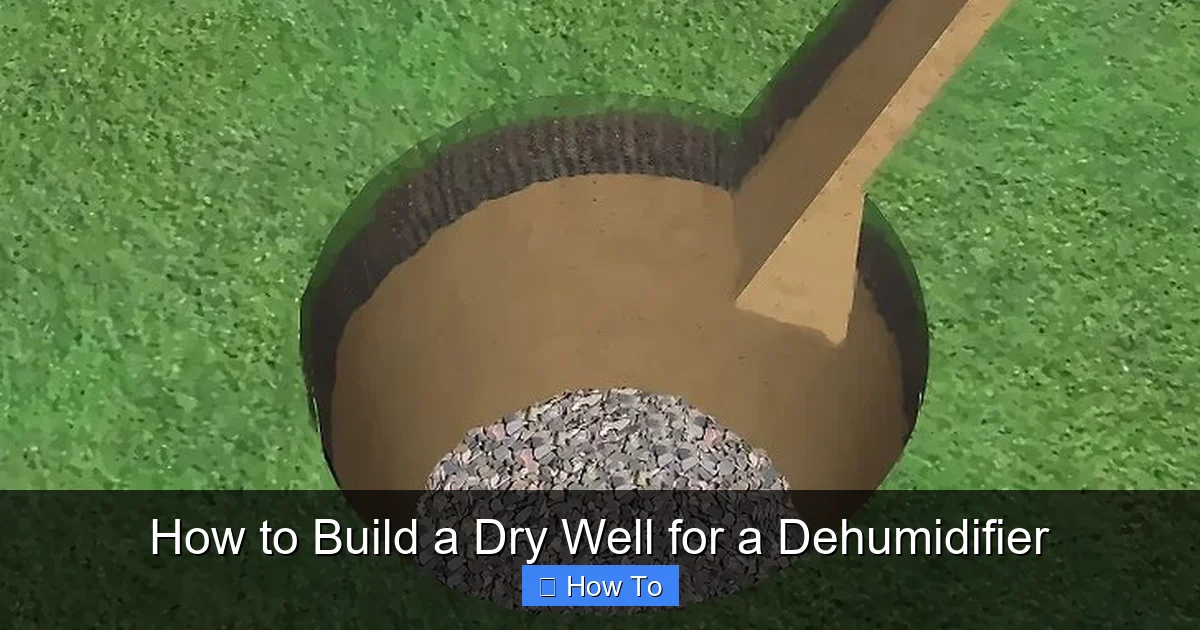
Dig the Dry Well Hole
Using a shovel or rented auger, dig a hole that is:
– 2–3 feet wider than your dry well chamber
– Deep enough to allow 6–12 inches of gravel beneath the chamber and 6 inches above the top before backfilling
For a standard 50-gallon chamber (about 30 inches in diameter and 48 inches tall), dig a hole roughly 4 feet wide and 5.5 feet deep.
Dig the Trench for the Drain Pipe
Dig a trench from the dehumidifier location to the dry well. The trench should be:
– 12–18 inches deep
– Wide enough to comfortably fit the 4-inch pipe
– Sloped consistently downward (1/4 inch per foot)
Use a level and measuring tape to check the slope every few feet. A slight error can cause water to pool and back up.
Step 5: Prepare the Dry Well Chamber
Your dry well chamber needs protection from soil and roots.
Wrap the Chamber in Landscape Fabric
Cut a large piece of landscape fabric and wrap it completely around the dry well chamber. Leave extra fabric at the top to fold over later. This fabric allows water to enter while keeping soil and roots out.
Secure the fabric with duct tape or zip ties, but don’t seal it completely—water needs to pass through.
Create an Inlet Hole
Most dry well chambers have pre-drilled inlet holes. If yours doesn’t, use a hole saw or utility knife to cut a 4-inch opening on the side, about 6–8 inches from the top. This ensures water enters above the gravel base and doesn’t disturb the foundation.
Step 6: Install the Dry Well
Now it’s time to place the chamber and connect the pipe.
Add a Gravel Base
Pour 6–12 inches of clean gravel into the bottom of the hole. Use a level to ensure it’s even. This base improves drainage and prevents the chamber from settling unevenly.
Place the Chamber
Carefully lower the wrapped dry well chamber into the hole. Use a level to make sure it’s sitting straight. Adjust the gravel base if needed.
Connect the Drain Pipe
Insert the 4-inch perforated drain pipe into the inlet hole of the chamber. Use a rubber coupling or PVC adapter if necessary to create a watertight seal. Make sure the pipe slopes downward toward the chamber.
Run the other end of the pipe through the trench back to the dehumidifier location. Temporarily cap the end near the dehumidifier to prevent dirt from entering.
Backfill with Gravel and Soil
Fill the space around the chamber with gravel up to the top of the inlet hole. This allows water to flow freely into the chamber.
Then, fold the excess landscape fabric over the top of the chamber to cover it completely.
Finally, backfill the rest of the hole with native soil. Tamp it down gently in layers to prevent settling.
Fill the Trench
Cover the drain pipe trench with soil, leaving a slight mound to account for settling. You can sod or seed the area later.
Step 7: Connect the Dehumidifier
Now link your dehumidifier to the dry well.
Attach the Discharge Hose
Most dehumidifiers have a built-in hose barb or drain outlet. Attach a flexible drain hose (usually 1/2 or 3/4 inch in diameter) to this outlet. Use a hose clamp if needed to prevent leaks.
Run the Hose to the Dry Well
Route the hose through the trench to the dry well. Connect it to the perforated pipe using a reducer fitting or adapter. Ensure the entire run has a consistent downward slope.
Secure and Test
Use zip ties or clips to secure the hose along its path, especially at bends or joints. Then, turn on the dehumidifier and let it run for 30–60 minutes. Check for leaks, proper flow, and pooling.
Step 8: Maintain Your Dry Well
A dry well isn’t “set it and forget it.” Regular maintenance ensures long-term performance.
Inspect Every 6 Months
Check the dehumidifier hose for kinks, clogs, or leaks. Look for standing water near the dry well, which could indicate a blockage or poor drainage.
Flush the System
Once a year, disconnect the hose and flush the dry well with a garden hose. This removes sediment, algae, or debris that may have accumulated.
Monitor Soil Conditions
After heavy rains, observe how quickly water dissipates. If the area remains soggy, your soil may not be draining well. Consider adding more gravel or upgrading to a larger system.
Troubleshooting Common Issues
Even the best installations can run into problems. Here’s how to fix them.
Water Backing Up into the Dehumidifier
This usually means the pipe isn’t sloped correctly or is clogged. Recheck the slope and flush the pipe with water. Remove any kinks in the hose.
Slow Drainage or Pooling
If water isn’t draining quickly, the dry well may be full or the soil may be compacted. Dig up a small section to inspect. Add more gravel or consider a second dry well.
Odors or Algae Growth
Stagnant water can breed bacteria or algae. Flush the system and consider adding a small amount of bleach (1/4 cup) to the dry well to disinfect. Rinse thoroughly afterward.
Frozen Pipes in Winter
In cold climates, water in the hose can freeze. Disconnect the hose in winter or use a heated drain hose designed for dehumidifiers.
Conclusion: Enjoy a Drier, Healthier Home
Building a dry well for your dehumidifier is a smart, cost-effective way to manage moisture and protect your home. With proper planning, the right materials, and careful installation, you can create a system that works quietly and efficiently for years.
Not only will you save time by eliminating constant bucket emptying, but you’ll also reduce the risk of mold, foundation damage, and high humidity. Plus, your dehumidifier will run more efficiently when it’s not constantly shutting off due to a full tank.
Remember: location, slope, and maintenance are the keys to success. Take your time, follow local codes, and don’t hesitate to consult a professional if you’re unsure about soil conditions or drainage.
With this guide, you’re well-equipped to build a dry well that keeps your home dry, comfortable, and healthy—season after season.