
Building an insulated box around your dehumidifier can significantly reduce noise, improve energy efficiency, and protect the unit from dust and damage. This guide walks you through every step, from planning and materials to assembly and safety checks, so you can create a custom enclosure that works perfectly for your space.
Quick Answers to Common Questions
Tip/Question?
Can I use foam board insulation directly against the dehumidifier?
No—avoid direct contact between foam insulation and the dehumidifier. Leave an air gap of at least 1–2 inches to prevent overheating and allow airflow.
Tip/Question?
How often should I clean the filter when using an insulated box?
Check the filter weekly. The box can trap dust, so the filter may clog faster than usual. Clean or replace it as needed.
Tip/Question?
Can I build the box around a dehumidifier with a built-in pump?
Yes, but ensure the pump’s discharge hose has a clear path to the drain. Don’t block the hose or restrict its movement.
Tip/Question?
Is it safe to leave the dehumidifier running overnight in the box?
Yes, if ventilation is adequate and the box doesn’t overheat. Monitor the first few runs and ensure the unit cycles normally.
Tip/Question?
Can I add wheels to the box for mobility?
Absolutely! Attach locking casters to the bottom for easy movement. Just ensure the box remains stable when in use.
Introduction: Why Build an Insulated Box Around Your Dehumidifier?
If you’ve ever run a dehumidifier in a quiet room—like a bedroom, basement, or home office—you know how loud they can be. The constant hum, fan whir, and compressor clicks can disrupt sleep, concentration, or relaxation. But there’s a smart, cost-effective solution: building an insulated box around your dehumidifier.
An insulated enclosure does more than just muffle noise. It can also improve the unit’s efficiency by stabilizing the air temperature around it, reduce dust buildup, and protect the machine from accidental bumps or spills. Plus, with the right design, it can blend seamlessly into your home decor.
In this guide, you’ll learn how to build a safe, effective, and customizable insulated box for your dehumidifier. We’ll cover everything from planning and materials to step-by-step construction, ventilation, and safety tips. Whether you’re a DIY beginner or a seasoned builder, this project is manageable, affordable, and highly rewarding.
Step 1: Assess Your Dehumidifier and Space
Before picking up a hammer or saw, take time to evaluate your dehumidifier and where it will sit. This step ensures your box fits well and functions safely.
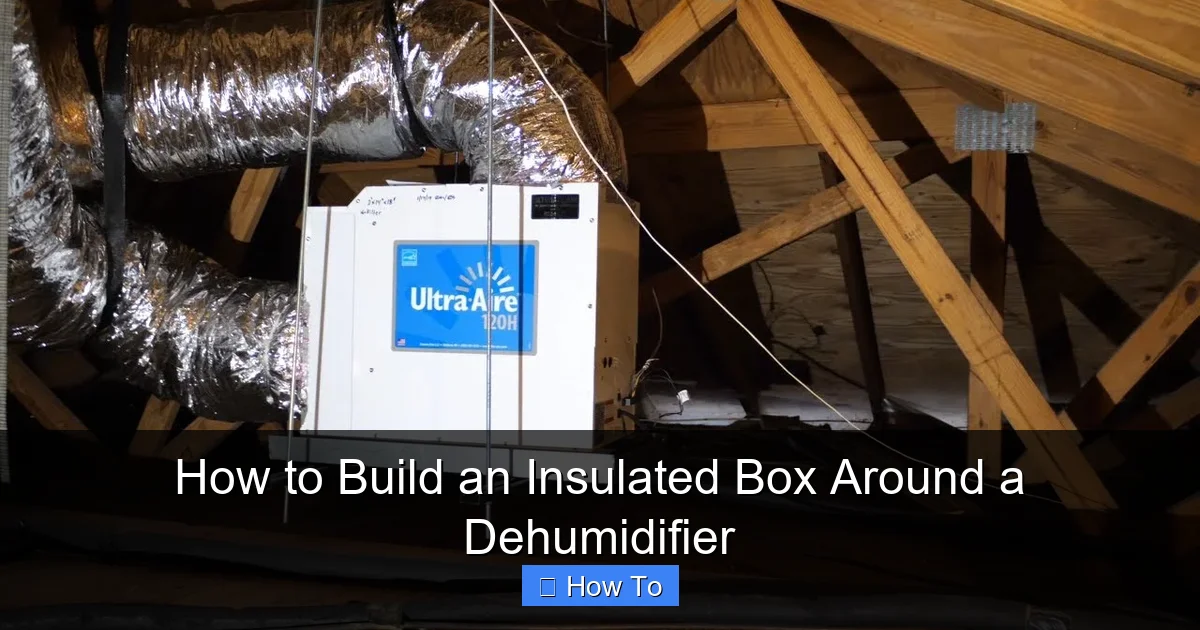
Visual guide about How to Build an Insulated Box Around a Dehumidifier
Image source: i.ytimg.com
Measure Your Dehumidifier
Use a tape measure to record the height, width, and depth of your dehumidifier. Include any protruding parts like handles, vents, or water tanks. Add at least 2–3 inches to each dimension to allow for insulation thickness and airflow space. For example, if your unit is 18”H x 12”W x 10”D, your box should be at least 22”H x 16”W x 14”D.
Check Vent Locations
Most dehumidifiers have an intake vent (usually on the front or side) and an exhaust vent (often on the top or back). Note their exact positions—you’ll need to align ventilation openings in your box with these vents. Blocking them can cause overheating, reduced performance, or even fire hazards.
Consider the Location
Where will the box sit? Basements, laundry rooms, and closets are common spots. Make sure the area has enough clearance for the box and allows easy access for maintenance. Avoid placing the box near heat sources like furnaces or water heaters.
Think About Access Needs
You’ll need to empty the water tank, clean the filter, and occasionally service the unit. Plan for a removable front panel, hinged door, or sliding top to make these tasks easy. A well-designed access point saves time and frustration.
Step 2: Choose the Right Materials
The materials you select will affect the box’s durability, insulation performance, and safety. Here’s what you’ll need and why.
Wood for the Frame and Panels
Plywood or medium-density fiberboard (MDF) are excellent choices for the box structure. They’re sturdy, easy to cut, and affordable. Use ½-inch or ¾-inch thickness for strength. Avoid particleboard—it swells when exposed to moisture.
Insulation Material
For sound and thermal insulation, consider these options:
- Acoustic Foam Panels: Great for noise reduction. Look for fire-retardant versions.
- Mass Loaded Vinyl (MLV): A dense, flexible material that blocks sound effectively. It’s safe and easy to attach.
- Fiberglass Insulation: Affordable and effective, but wear gloves and a mask when handling. Seal it inside the box to prevent fiber release.
- Closed-Cell Foam Board: Resists moisture and provides both thermal and sound insulation.
Combine materials for better results—for example, use MLV on the inside and foam board on the outside.
Ventilation Components
Proper airflow is non-negotiable. You’ll need:
- Mesh Vents or Grilles: For intake and exhaust openings. Choose metal or plastic with fine mesh to keep dust out.
- Inline Fans (Optional): If natural airflow is insufficient, small computer or duct fans can help circulate air. Use low-noise models.
- Ducting (Optional): Flexible ducts can direct exhaust air away from the box, especially useful in tight spaces.
Fasteners and Adhesives
Use wood screws, nails, or brackets to assemble the box. For attaching insulation, use construction adhesive, spray foam, or double-sided tape. Avoid materials that emit fumes when heated.
Safety and Fire Resistance
Since dehumidifiers generate heat, prioritize fire-safe materials. Look for insulation labeled “fire-retardant” or “Class A fire rating.” Avoid foam boards that melt or release toxic fumes when hot.
Step 3: Design Your Insulated Box
A good design balances functionality, safety, and ease of use. Sketch your plan before building.
Create a Simple Blueprint
Draw a front, side, and top view of your box. Label dimensions, vent locations, and access points. Include space for insulation—typically 1–2 inches on each side.
Plan Ventilation Openings
Mark where the intake and exhaust vents will go. Make openings slightly larger than the dehumidifier’s vents to ensure unrestricted airflow. If using fans, position them to pull air in (intake) and push it out (exhaust).
Design for Access
Decide how you’ll access the dehumidifier. Options include:
- A removable front panel held by screws or latches.
- A hinged door on the front or top.
- A sliding top or side panel.
Ensure the access method doesn’t compromise insulation or safety.
Consider Aesthetics
If the box will be visible, think about finish. Paint, wood stain, or decorative panels can make it look like furniture. Add rubber feet to protect floors and reduce vibration.
Step 4: Cut and Prepare the Wood Panels
Now it’s time to build! Gather your tools and materials, and follow these steps.
Gather Tools
You’ll need:
- Circular saw, jigsaw, or handsaw
- Measuring tape and square
- Drill and screwdriver
- Sandpaper or sander
- Clamps (helpful for holding pieces)
- Safety gear: gloves, goggles, dust mask
Cut the Panels
Based on your blueprint, cut six panels: front, back, left, right, top, and bottom. Double-check measurements before cutting. Sand all edges to prevent splinters.
Cut Vent Openings
Use a jigsaw or hole saw to cut holes for intake and exhaust vents. Measure carefully—misaligned vents can block airflow. Sand the edges of the holes smooth.
Test Fit the Box
Assemble the box without glue or screws to ensure all pieces fit. Place your dehumidifier inside to confirm clearance. Make adjustments if needed.
Step 5: Install Insulation
Insulation is the heart of your noise-reducing box. Install it properly for maximum effect.
Line the Interior
Attach insulation to the inside of each panel. Use construction adhesive or spray foam for a secure bond. For MLV, staple or tape it in place. Cover all surfaces—walls, top, bottom, and inside of the door.
Seal Gaps
Even small gaps can let sound escape. Use acoustic caulk or foam tape to seal seams between panels. Pay extra attention to corners and edges.
Avoid Blocking Vents
Don’t cover vent openings with insulation. Leave a clear path for air to flow. If using fans, install them after insulation is in place.
Layer for Better Performance
For superior noise reduction, use multiple layers. For example, attach acoustic foam to the wood, then add MLV over it. This combination absorbs and blocks sound effectively.
Step 6: Assemble the Box
With insulation in place, it’s time to put the box together.
Attach the Sides and Back
Start by screwing the back panel to the left and right sides. Use wood screws and pre-drill holes to prevent splitting. Ensure corners are square.
Add the Bottom Panel
Secure the bottom to the sides and back. This forms the base of the box. Make sure it’s level and sturdy.
Install the Top Panel
Attach the top last, unless you’re using a removable or hinged design. If the top is fixed, ensure it’s secure. If removable, use screws or latches for easy access.
Attach the Front Panel or Door
If using a fixed front, screw it in place. For a door, install hinges and a latch. Test the door to ensure it opens smoothly and seals tightly when closed.
Reinforce Weak Points
Add corner braces or extra screws if the box feels wobbly. A sturdy box lasts longer and performs better.
Step 7: Install Ventilation and Fans
Proper ventilation keeps your dehumidifier cool and efficient.
Mount Mesh Vents
Attach mesh grilles over the intake and exhaust openings. Use screws or adhesive. Ensure the mesh is fine enough to block dust but allows air to pass.
Install Inline Fans (If Needed)
If your dehumidifier struggles with airflow inside the box, add fans. Mount an intake fan on the front or side and an exhaust fan on the top or back. Wire them to a power source or use a plug-in timer.
Test Airflow
Turn on the dehumidifier and fans (if used). Feel for air movement at the vents. If airflow seems weak, adjust fan placement or add larger vents.
Use Ducting for Exhaust (Optional)
In tight spaces, connect a flexible duct to the exhaust vent and route it to a window or vent. This helps expel moist air more effectively.
Step 8: Final Touches and Safety Checks
Before using your insulated box, complete these important steps.
Paint or Finish (Optional)
If desired, paint or stain the exterior. Use low-VOC or water-based products to avoid fumes. Let it dry completely before use.
Add Rubber Feet
Attach self-adhesive rubber feet to the bottom to protect floors and reduce vibration noise.
Label Access Points
Mark the door or panel with a label like “Open for Filter Access” to remind yourself during maintenance.
Perform a Safety Check
Before plugging in the dehumidifier:
- Ensure all vents are clear.
- Check that the unit fits without touching the sides.
- Verify that the box is stable and won’t tip.
- Confirm that no wires are pinched or exposed.
Step 9: Test and Monitor
Your insulated box is ready—now test it safely.
Run a Trial
Plug in the dehumidifier and let it run for 30–60 minutes. Monitor the temperature inside the box with an infrared thermometer. It should not exceed 10–15°F above room temperature.
Listen for Noise Reduction
Compare the sound level with and without the box. You should notice a significant decrease in noise.
Check for Overheating
If the box feels excessively hot or the dehumidifier shuts off, improve ventilation. Add more vents or upgrade fans.
Schedule Regular Maintenance
Open the access panel weekly to check the filter and water tank. Clean as needed to keep the unit running efficiently.
Troubleshooting Common Issues
Even with careful planning, problems can arise. Here’s how to fix them.
Issue: Dehumidifier Overheats
Cause: Poor ventilation or blocked vents.
Solution: Add more vents, install fans, or reduce insulation near vents. Ensure the unit isn’t touching the sides.
Issue: Noise Isn’t Reduced Enough
Cause: Gaps in insulation or low-quality materials.
Solution: Seal all seams with acoustic caulk. Add mass loaded vinyl or thicker foam.
Issue: Box Vibrates or Rattles
Cause: Loose panels or poor fit.
Solution: Tighten screws, add rubber padding between the dehumidifier and box, or use vibration-dampening mats.
Issue: Moisture Builds Up Inside the Box
Cause: Inadequate exhaust or condensation.
Solution: Improve airflow with better vents or a dehumidifier duct. Add a small desiccant pack inside the box if needed.
Issue: Access Is Difficult
Cause: Poorly designed door or panel.
Solution: Replace with a larger door or add quick-release latches for easier opening.
Conclusion: Enjoy a Quieter, More Efficient Dehumidifier
Building an insulated box around your dehumidifier is a smart, practical upgrade that pays off in comfort, efficiency, and peace of mind. By following this guide, you’ve created a custom solution that reduces noise, protects your unit, and fits seamlessly into your home.
Remember, the key to success is balancing insulation with ventilation. Never sacrifice airflow for silence—your dehumidifier needs to breathe. With regular maintenance and careful monitoring, your insulated box will serve you well for years.
Whether you’re silencing a noisy basement unit or improving air quality in a bedroom, this DIY project is a win. So plug in your dehumidifier, close the door, and enjoy the quiet.