
Discover how to check capacitor dehumidifier performance using simple tools and safety steps. This guide covers testing, troubleshooting, and maintenance to keep your unit running efficiently.
Quick Answers to Common Questions
Tip/Question?
Can I test a capacitor without a multimeter?
While possible using a continuity test or visual inspection, a multimeter with capacitance mode provides the most accurate diagnosis. Without it, you risk misdiagnosing the issue.
Tip/Question?
How often should I check my dehumidifier capacitor?
There’s no set schedule, but inspect it annually during routine maintenance or if you notice performance issues like weak airflow or failure to start.
Tip/Question?
Is it safe to touch a capacitor after unplugging the unit?
No—capacitors store charge even when unplugged. Always discharge them with an insulated tool before handling.
Tip/Question?
Can a bad capacitor damage other parts of the dehumidifier?
Yes. A failing capacitor can cause motors to overheat, draw excess current, and damage the compressor or control board.
Tip/Question?
What if my multimeter doesn’t have a capacitance setting?
You can test for continuity or resistance, but these methods are less reliable. Consider upgrading to a multimeter with capacitance capability for accurate results.
How to Check Capacitor Dehumidifier: A Complete Step-by-Step Guide
Is your dehumidifier making strange noises, not starting, or running inefficiently? One of the most common culprits behind these issues is a faulty capacitor. Capacitors play a vital role in your dehumidifier’s operation—they store and release electrical energy to help the compressor and fan motors start and run smoothly. When a capacitor fails, your unit may struggle to dehumidify, overheat, or stop working altogether.
In this comprehensive guide, you’ll learn how to check capacitor dehumidifier performance safely and effectively. We’ll walk you through identifying symptoms of a bad capacitor, gathering the right tools, testing the component, and interpreting results. Whether you’re a DIY enthusiast or a homeowner looking to save on repair costs, this guide will empower you to diagnose and fix capacitor issues with confidence.
Understanding the Role of a Capacitor in a Dehumidifier
Before diving into the testing process, it’s important to understand what a capacitor does in your dehumidifier. Think of it as a temporary battery that gives motors the extra jolt of power they need to start up. Dehumidifiers typically have two motors—one for the compressor and one for the fan—and each may have its own capacitor, or they may share one dual-run capacitor.
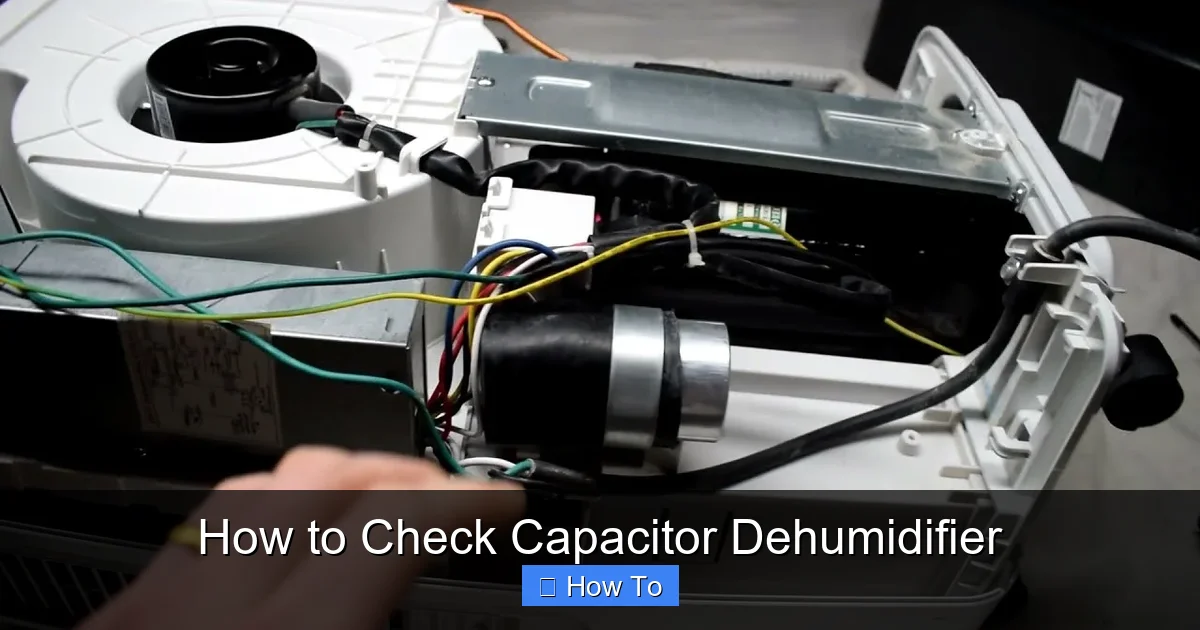
Visual guide about How to Check Capacitor Dehumidifier
Image source: i.ytimg.com
The capacitor stores electrical energy when the unit is powered on and releases it in a quick burst to help the motor overcome inertia and begin spinning. Without this boost, the motor may hum but fail to start, overheat, or draw excessive current, which can damage other components.
Over time, capacitors can degrade due to heat, age, or electrical surges. When they fail, your dehumidifier may exhibit symptoms like weak airflow, failure to start, or frequent cycling. Learning how to check capacitor dehumidifier health is a crucial skill for maintaining optimal performance and avoiding costly repairs.
Safety Precautions Before Testing
Working with electrical components can be dangerous if proper precautions aren’t taken. Capacitors store electrical charge even after the unit is unplugged, which can cause a painful or even fatal shock if mishandled. Follow these safety steps before beginning any testing:
1. Unplug the Dehumidifier
Always disconnect the unit from the power source. Don’t just turn it off—unplug it completely from the wall outlet. This ensures no electricity is flowing into the system while you work.
2. Wait Before Handling
Give the unit at least 10–15 minutes to cool down and allow any residual charge to dissipate. Even after unplugging, capacitors can retain a charge for several minutes.
3. Discharge the Capacitor
Never assume the capacitor is safe to touch. Use an insulated screwdriver with a rubber or plastic handle to carefully short the terminals. Place the metal tip across both terminals (or the common and hermetic terminals on a dual capacitor) to discharge any stored energy. You may hear a small pop or see a spark—this is normal.
4. Wear Protective Gear
Wear safety glasses and insulated gloves to protect yourself from accidental shocks or debris. Work in a dry, well-lit area to reduce the risk of slipping or misreading components.
5. Avoid Working on Wet Units
Never open a dehumidifier that has recently been in a damp environment or has water inside. Moisture increases the risk of electrical hazards.
By following these safety steps, you’ll minimize the risk of injury and ensure a safe testing environment.
Tools and Equipment Needed
To accurately test a dehumidifier capacitor, you’ll need a few essential tools. Most of these are affordable and widely available at hardware stores or online.
- Digital Multimeter with Capacitance Setting: This is the most important tool. Look for a multimeter that can measure capacitance in microfarads (µF). Many modern multimeters have a dedicated capacitance mode (usually marked with a “µF” or capacitor symbol).
- Insulated Screwdriver: Used to discharge the capacitor safely and remove access panels.
- Safety Glasses and Gloves: Protect your eyes and hands from electrical hazards and sharp edges.
- Flashlight: Helps illuminate tight spaces inside the unit.
- Needle-Nose Pliers (optional): Useful for disconnecting wire terminals if they’re tight or corroded.
If you don’t already own a multimeter, consider investing in a reliable model like the AstroAI DM6000AR or Klein Tools MM400. These are user-friendly and offer accurate capacitance readings, making them ideal for home diagnostics.
Step-by-Step Guide to Checking the Capacitor
Now that you’re prepared and equipped, let’s walk through the process of checking your dehumidifier’s capacitor. This step-by-step guide will help you identify whether the capacitor is functioning properly or needs replacement.
Step 1: Locate the Capacitor
The capacitor is usually found near the compressor and fan motor, often mounted on a bracket or clipped to the side of the unit. It’s a small, cylindrical or oval-shaped component with two or three wire terminals. Dual capacitors (used for both compressor and fan) have three terminals labeled “C” (common), “FAN,” and “HERM” (hermetic/compressor). Single capacitors have two terminals.
To access it, remove the outer cover or access panel. This typically involves unscrewing a few Phillips-head screws. Keep track of where each screw goes to make reassembly easier.
Step 2: Identify the Capacitor’s Specifications
Before testing, check the label on the capacitor. It will list important information such as:
- Capacitance value (e.g., 35 µF, 45 µF)
- Voltage rating (e.g., 370V, 440V)
- Tolerance (e.g., ±5%)
Write down these values—you’ll need them to compare with your multimeter reading. Never replace a capacitor with one that has a different µF rating, as this can damage the motor or cause overheating.
Step 3: Disconnect the Wires
Carefully disconnect the wires from the capacitor terminals. Use needle-nose pliers if needed, but avoid pulling on the wires themselves—grasp the connector caps instead. Take a photo or note the wire positions to ensure correct reconnection later.
Step 4: Discharge the Capacitor (Again)
Even if you discharged it earlier, it’s wise to do so again before testing. Use your insulated screwdriver to short the terminals. This ensures no residual charge interferes with your reading.
Step 5: Set Up the Multimeter
Turn on your multimeter and set it to the capacitance measurement mode (usually labeled “µF” or with a capacitor symbol). If your multimeter doesn’t have this feature, you can still test for continuity or resistance, but capacitance mode gives the most accurate diagnosis.
Step 6: Test the Capacitor
Place the multimeter probes on the capacitor terminals:
- For a single capacitor: Touch one probe to each terminal.
- For a dual capacitor: Test between “C” and “FAN,” then between “C” and “HERM.”
The multimeter will display the capacitance value. Compare this to the rated value on the capacitor label. A healthy capacitor should read within ±5–10% of its rated value. For example, a 40 µF capacitor should measure between 36 and 44 µF.
If the reading is significantly lower (e.g., 20 µF on a 40 µF cap), the capacitor is weak or failing. If the multimeter shows “OL” (open loop) or no reading at all, the capacitor is likely dead.
Step 7: Check for Physical Damage
While the capacitor is exposed, inspect it visually. Look for:
- Bulging or swollen casing
- Leaking oil or electrolyte
- Burnt or charred marks
- Corroded terminals
Any of these signs indicate the capacitor has failed and should be replaced immediately, even if the multimeter reading seems acceptable. Physical damage often precedes electrical failure.
Interpreting Test Results
Understanding your multimeter readings is key to diagnosing capacitor health. Here’s what different results mean:
- Reading Matches Rated Value (±5–10%): The capacitor is likely in good condition. If your dehumidifier still isn’t working, the issue may lie elsewhere (e.g., motor, thermostat, or control board).
- Reading is Significantly Lower: The capacitor has lost its ability to store charge and needs replacement.
- No Reading or “OL”: The capacitor is open and no longer functional.
- Fluctuating or Erratic Reading: Indicates internal damage or instability—replace the capacitor.
Keep in mind that capacitance can vary slightly with temperature and age, but a deviation of more than 10% is generally considered unacceptable.
Troubleshooting Common Capacitor Issues
Even with a working capacitor, your dehumidifier may still have performance issues. Here are some common problems and how to address them:
Motor Hums But Doesn’t Start
This is a classic sign of a weak or failing capacitor. The motor receives power but lacks the starting torque to spin up. Replace the capacitor and test again.
Unit Cycles On and Off Frequently
A faulty capacitor can cause erratic motor behavior, leading to short cycling. Check the capacitor and also inspect the humidistat and air filter for blockages.
Weak Airflow
If the fan motor is struggling, it may be due to a bad capacitor. Test the fan capacitor (if separate) and ensure the fan blades are clean and unobstructed.
Overheating or Burning Smell
This could indicate an overloaded motor due to a failed capacitor. Turn off the unit immediately and replace the capacitor. Also check for blocked coils or dirty filters.
Capacitor Replaced But Problem Persists
If replacing the capacitor doesn’t fix the issue, the problem may be with the motor windings, control board, or power supply. Consider consulting a professional technician.
How to Replace a Faulty Capacitor
If your tests confirm the capacitor is bad, replacement is straightforward. Follow these steps:
1. Purchase the Correct Replacement
Match the µF rating, voltage, and physical size of the original capacitor. You can find replacements at appliance parts stores or online retailers like Amazon or Repair Clinic. Always choose a capacitor with the same or higher voltage rating (e.g., 370V or 440V).
2. Disconnect the Old Capacitor
Remove the wires and unscrew or unclip the old capacitor from its mounting bracket.
3. Install the New Capacitor
Attach the new capacitor to the bracket and reconnect the wires to the correct terminals. Double-check your earlier photo or notes to ensure proper wiring.
4. Reassemble and Test
Replace the access panel, plug in the unit, and turn it on. Listen for smooth motor operation and check that the dehumidifier is running efficiently.
Replacing a capacitor typically costs $10–$25 and can extend the life of your dehumidifier by several years.
Preventive Maintenance Tips
To avoid future capacitor failures and keep your dehumidifier running smoothly, follow these maintenance practices:
- Clean the Air Filter Monthly: A dirty filter restricts airflow, causing the motor to work harder and stress the capacitor.
- Clean the Coils Annually: Use a soft brush or vacuum to remove dust from the evaporator and condenser coils.
- Check for Blockages: Ensure vents and drainage systems are clear.
- Inspect Wiring and Components: Look for frayed wires, loose connections, or signs of overheating.
- Run the Unit Regularly: Even in dry seasons, run the dehumidifier occasionally to keep components lubricated and prevent corrosion.
Regular maintenance not only protects the capacitor but also improves energy efficiency and indoor air quality.
When to Call a Professional
While checking and replacing a capacitor is a manageable DIY task, some situations require expert help:
- You’re uncomfortable working with electrical components.
- The dehumidifier still doesn’t work after capacitor replacement.
- You suspect a refrigerant leak or compressor failure.
- The unit is under warranty—opening it may void coverage.
A licensed HVAC technician has the tools and expertise to diagnose complex issues and ensure safe repairs.
Conclusion
Learning how to check capacitor dehumidifier performance is a valuable skill that can save you time, money, and frustration. By understanding the capacitor’s role, following safety procedures, and using the right tools, you can quickly diagnose and fix common issues. Regular maintenance and timely replacements will keep your dehumidifier running efficiently for years to come.
Remember: always prioritize safety, use accurate testing methods, and replace components with matching specifications. With this guide, you’re well-equipped to tackle capacitor problems and maintain a healthy, comfortable home environment.