

Keeping your dehumidifier drain clean is essential for optimal performance and preventing water damage. This guide walks you through simple, effective steps to remove clogs, clean components, and maintain proper drainage. Follow along to keep your dehumidifier running smoothly year-round.
Quick Answers to Common Questions
How often should I clean my dehumidifier drain?
Clean the drain every 1–3 months, depending on usage and water hardness. In humid environments or hard water areas, monthly cleaning is ideal.
Can I use bleach to clean the drain hose?
Avoid bleach—it can degrade plastic over time and leave harmful residues. Stick to vinegar or mild soap for safe, effective cleaning.
My dehumidifier has no drain hose. Do I still need to clean it?
Yes! Even tank-only models can develop mold in the water reservoir. Empty and wipe the tank weekly, and deep-clean monthly.
What if my drain hose is too short?
Use a compatible extension hose (check your manual for specs). Ensure it maintains a downward slope and doesn’t kink.
Why is my dehumidifier making gurgling sounds?
Gurgling often indicates a partial clog or airlock in the drain line. Clean the hose and ensure it’s fully submerged in the drain outlet.
How to Clean a Dehumidifier Drain: A Complete Step-by-Step Guide
If your dehumidifier isn’t draining properly, it’s likely due to a clogged or dirty drain line. Over time, mineral deposits, dust, mold, and algae can build up inside the drain hose or at the drain port, blocking water flow and reducing efficiency. Left unchecked, this can lead to overflowing tanks, water damage, or even unit shutdowns.
The good news? Cleaning your dehumidifier drain is easier than you think—and doing it regularly can save you money on repairs and extend the life of your appliance. In this guide, we’ll walk you through everything you need to know: from safety precautions and tools to step-by-step cleaning instructions, troubleshooting tips, and preventive maintenance.
Whether you’re a first-time user or a seasoned homeowner, this comprehensive guide will help you keep your dehumidifier running smoothly and your home dry and comfortable.
Why Cleaning Your Dehumidifier Drain Matters
Dehumidifiers work by pulling moisture from the air and collecting it in a water tank or sending it directly out through a drain hose. While many models come with auto-shutoff features when the tank is full, units with continuous drainage rely entirely on a clear, unobstructed drain line.
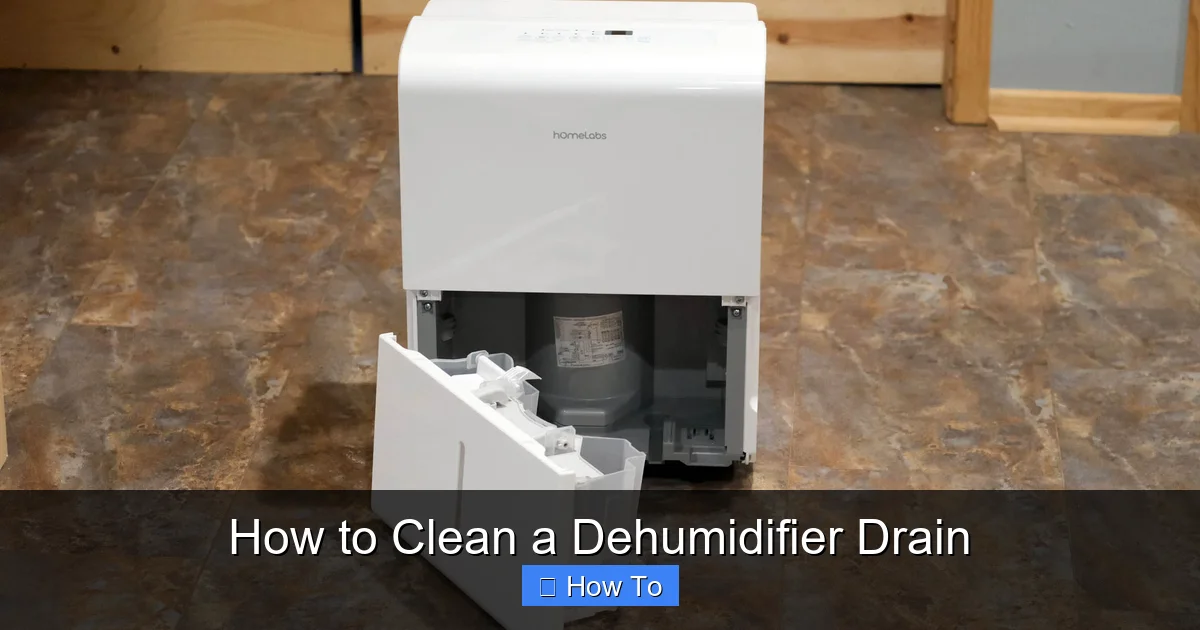
Visual guide about How to Clean a Dehumidifier Drain
Image source: cdn.mos.cms.futurecdn.net
When the drain becomes clogged, water backs up—either into the tank (causing overflow) or worse, into the internal components of the machine. This not only reduces efficiency but can also lead to:
- Increased humidity levels in your home
- Musty odors from stagnant water
- Mold or mildew growth inside the unit
- Premature wear on the compressor or fan
- Potential electrical hazards if water reaches internal circuits
Regular cleaning—every 1 to 3 months depending on usage and water hardness—keeps your dehumidifier working at peak performance and prevents these issues before they start.
Tools and Supplies You’ll Need
Before you begin, gather these basic supplies. Most are household items you likely already have:
- White vinegar or mild dish soap
- Soft-bristled brush (like an old toothbrush)
- Clean cloth or sponge
- Bucket or container for water
- Pipe cleaner, flexible brush, or thin wire (for stubborn clogs)
- Rubber gloves (optional, but recommended)
- Towels or rags (for spills)
- Replacement drain hose (if current one is cracked or damaged)
For hard-to-reach areas or persistent clogs, you might also consider a wet/dry vacuum or a drain snake—but these are usually only needed in extreme cases.
Step 1: Turn Off and Unplug the Dehumidifier
Safety first! Always disconnect your dehumidifier from the power source before performing any maintenance. This prevents accidental startup and reduces the risk of electric shock.
How to Safely Power Down
- Switch the unit off using the power button.
- Unplug the cord from the wall outlet—don’t just rely on the switch.
- If your model has a battery backup or smart features, remove batteries or disable connectivity temporarily.
Let the unit sit for 10–15 minutes to cool down if it’s been running recently. This also gives any residual water in the system time to settle.
Step 2: Locate the Drain Hose and Drain Port
Most dehumidifiers have one of two drainage setups:
- Gravity drain: A hose attached to the back or side that uses gravity to move water out (common in basements or laundry rooms).
- Pump-assisted drain: Includes a small internal pump to push water upward or over longer distances (often used in crawl spaces or upper floors).
Find the drain hose—it’s usually a clear or white plastic tube connected to the rear or bottom of the unit. Trace it to where it exits the dehumidifier (the drain port) and where it empties (e.g., floor drain, sink, or outside).
Tip: Label Your Hose
If you have multiple hoses or appliances, consider labeling the dehumidifier hose with a piece of tape. This avoids confusion during reassembly.
Step 3: Remove the Drain Hose
Gently disconnect the hose from the dehumidifier. Most models use a simple push-fit or threaded connection.
How to Detach the Hose
- Hold the base of the hose near the connection point to avoid stressing the port.
- Twist slightly (if threaded) or pull straight out (if push-fit).
- Have a towel ready—some water may drip out.
If the hose feels stuck, don’t force it. Wiggle it gently or use pliers with a cloth wrap to protect the plastic. For glued connections (rare), check your user manual—some require professional disassembly.
Step 4: Inspect the Hose for Clogs and Damage
Hold the hose up to a light source. Can you see through it? If it’s cloudy, discolored, or completely blocked, it needs cleaning.
Signs of a Clogged Hose
- Visible slime, algae, or white mineral crust
- Reduced or no water flow during operation
- Unpleasant odor coming from the hose
- Bubbling or gurgling sounds during drainage
Also check for physical damage: cracks, kinks, or brittleness. A damaged hose won’t seal properly and can leak, so replace it if necessary.
Step 5: Flush the Hose with Warm Water
Start with the simplest method: rinsing.
Basic Flushing Method
- Hold one end of the hose over a bucket.
- Pour warm (not hot) water through the other end.
- Let it flow through completely. Repeat 2–3 times.
This removes loose debris and soft buildup. If water flows freely, you’re done! If not, move to deeper cleaning.
Step 6: Deep Clean with Vinegar Solution
Vinegar is a natural descaler and disinfectant—perfect for breaking down mineral deposits and killing mold or bacteria.
DIY Cleaning Solution
- Mix equal parts white vinegar and warm water in a container.
- Submerge the hose completely, or pour the solution through it.
- Let it soak for 30–60 minutes.
For stubborn clogs, use undiluted vinegar and extend soaking time to 2 hours.
Alternative: Baking Soda + Vinegar
For extra fizzing action (great for breaking up gunk):
- Pour ½ cup baking soda into the hose.
- Follow with 1 cup vinegar.
- Cover the open end with your thumb to contain the reaction.
- Wait 15–20 minutes, then flush with water.
This combo is especially effective against organic buildup like algae.
Step 7: Scrub the Interior (If Needed)
If soaking doesn’t clear the clog, you’ll need mechanical cleaning.
Using a Pipe Cleaner or Brush
- Insert a flexible brush, pipe cleaner, or thin wire into the hose.
- Gently push and twist to dislodge residue.
- Work from both ends if possible.
- Rinse thoroughly after scrubbing.
A bottle brush or aquarium cleaning brush works well for wider hoses. Avoid sharp objects that could puncture the tubing.
Step 8: Clean the Drain Port on the Dehumidifier
The drain port (where the hose connects to the unit) can also collect gunk.
How to Clean the Port
- Dip a cotton swab or soft brush in vinegar solution.
- Gently scrub inside the port opening.
- Use a damp cloth to wipe away residue.
- Dry completely with a clean towel.
Be careful not to push debris further into the machine. If the port is recessed, a toothpick wrapped in cloth can help reach tight spots.
Step 9: Reassemble and Test the System
Once everything is clean and dry, it’s time to put it all back together.
Reconnection Steps
- Reattach the hose securely to the drain port.
- Ensure it’s fully seated and not kinked.
- Route the hose so it slopes downward toward the drain (gravity systems only).
- Plug the dehumidifier back in.
Test Run
- Turn on the unit and set it to continuous drain mode (if available).
- Let it run for 10–15 minutes.
- Check that water flows steadily through the hose and exits properly.
- Listen for unusual noises or leaks.
If water still doesn’t flow, double-check for kinks, loose connections, or internal blockages (see Troubleshooting below).
Troubleshooting Common Drain Issues
Even after cleaning, some problems may persist. Here’s how to handle them:
Water Still Not Draining?
- Check for kinks: A bent hose blocks flow. Straighten it completely.
- Verify slope: Gravity drains need a downward angle. Use a level to confirm.
- Inspect the pump (if applicable): Pump-assisted models may have a faulty pump. Listen for humming—if silent, it may need replacement.
- Clear internal filters: Some units have inline mesh filters that trap debris. Remove and clean them.
Foul Odor Persists?
- Run a second vinegar flush.
- Add a few drops of lemon juice or tea tree oil to the solution for freshness.
- Consider using a dehumidifier-safe disinfectant spray on external parts.
Hose Keeps Coming Loose?
- Ensure the connection is compatible with your model.
- Use a hose clamp for extra security (available at hardware stores).
- Replace with a longer or more flexible hose if needed.
Unit Shuts Off Unexpectedly?
- This may indicate a full tank sensor issue—even with a drain hose, some units monitor tank level as a backup.
- Clean the tank and float switch (usually located inside the bucket compartment).
- Reset the unit by unplugging for 5 minutes.
Preventive Maintenance Tips
Cleaning doesn’t have to be a chore—if you stay ahead of it.
Monthly Checks
- Empty the water tank (even if using a drain hose—as a backup).
- Wipe down the exterior with a damp cloth.
- Check hose connections for leaks or looseness.
Seasonal Deep Clean
- Every 3 months, perform the full cleaning routine outlined above.
- Inspect seals and gaskets for wear.
- Vacuum the air intake and exhaust grilles to maintain airflow.
Environmental Tips
- Keep the area around the dehumidifier clean and dust-free.
- Avoid placing the unit near sources of lint or pet hair.
- In hard water areas, consider using a water softener or distilled water in the tank (if applicable).
When to Call a Professional
Most drain issues can be resolved at home. But if you notice:
- Persistent leaks despite proper assembly
- Burning smells or smoke
- Electrical malfunctions
- Compressor failure (unit runs but doesn’t dehumidify)
…it’s time to contact a certified technician. Attempting complex repairs yourself could void your warranty or cause injury.
Conclusion
Cleaning your dehumidifier drain is a simple yet vital task that ensures efficient operation, prevents water damage, and keeps your home healthy. With just a few household items and 20–30 minutes of your time, you can clear clogs, eliminate odors, and extend the life of your appliance.
By following this guide—turning off the power, inspecting and cleaning the hose and port, testing the system, and maintaining a regular schedule—you’ll keep your dehumidifier working like new. Remember: a little prevention goes a long way. Make drain cleaning part of your seasonal home maintenance routine, and enjoy drier, more comfortable air all year long.