

Adding a dehumidifier to your HVAC system can improve indoor air quality, reduce allergens, and protect your home from moisture damage. This guide walks you through the entire process—from choosing the right unit to installation and maintenance—so you can enjoy a healthier, more comfortable living space.
Quick Answers to Common Questions
Tip/Question?
Can I install a dehumidifier myself?
It’s not recommended. HVAC dehumidifier installation involves electrical work, duct modifications, and system integration—best left to licensed professionals.
Tip/Question?
How often should I clean the filter?
Check the filter every 1–3 months. Clean it if it’s dirty to maintain airflow and efficiency.
Tip/Question?
Will a dehumidifier increase my energy bill?
It uses some electricity, but by reducing the load on your AC, it can actually lower overall energy costs.
Tip/Question?
Can I use a portable dehumidifier instead?
Portable units are fine for small spaces, but they don’t treat the whole house and require constant maintenance.
Tip/Question?
How long does installation take?
Most installations are completed in one day (4–8 hours), depending on system complexity.
How to Add a Dehumidifier to Your HVAC System
If you’ve ever walked into your home and felt that sticky, heavy air—even with the AC running—you’re not alone. High humidity can make your living space uncomfortable, promote mold growth, and even damage furniture and walls. While portable dehumidifiers help in small areas, they’re not practical for whole-home comfort. That’s where integrating a dehumidifier into your HVAC system comes in.
In this comprehensive guide, you’ll learn how to add a dehumidifier to your HVAC system the right way. Whether you’re tackling a damp basement, a muggy living room, or an entire house, we’ll walk you through every step—from assessing your needs to choosing the best unit, installing it safely, and maintaining it for long-term performance.
By the end of this guide, you’ll know exactly how to improve your indoor air quality, protect your home, and enjoy a more comfortable environment year-round.
Why Add a Dehumidifier to Your HVAC System?
Before diving into the installation process, it’s important to understand why integrating a dehumidifier with your HVAC system is a smart move.
Most central air conditioning systems remove some moisture from the air as a byproduct of cooling. However, in humid climates or during mild weather when the AC isn’t running full blast, this isn’t enough. The result? Stuffy air, condensation on windows, and that unmistakable “damp” smell.
A dedicated dehumidifier works alongside your HVAC system to actively pull excess moisture from the air. Unlike portable units that only treat one room, a whole-house dehumidifier connects directly to your ductwork, treating air as it circulates through your home.
Here are the top benefits:
- Improved comfort: Lower humidity makes the air feel cooler, so you can raise your thermostat and save energy.
- Healthier air: Mold, mildew, and dust mites thrive in high humidity. Reducing moisture levels helps prevent allergies and respiratory issues.
- Protects your home: Excess moisture can warp wood, damage drywall, and promote rust on metal fixtures.
- Energy efficiency: When your AC doesn’t have to work as hard to remove humidity, it uses less energy and lasts longer.
In short, adding a dehumidifier to your HVAC system isn’t just about comfort—it’s an investment in your home’s health and efficiency.
Step 1: Assess Your Home’s Humidity Levels
You can’t fix a problem you haven’t measured. The first step in adding a dehumidifier is determining whether you actually need one—and how much capacity you require.
Use a Hygrometer to Measure Humidity
A hygrometer is a simple, inexpensive device that measures relative humidity (RH) in your home. You can find digital hygrometers at hardware stores or online for under $20.
Place the hygrometer in the room where humidity is most noticeable—often the basement, laundry room, or main living area. Let it sit for at least 24 hours to get an accurate reading.
Ideal indoor humidity levels are between 30% and 50%. If your readings are consistently above 60%, it’s time to consider a dehumidifier.
Visual guide about How to Add a Dehumidifier to Your Hvac System
Image source: iororwxhqijjlk5q.ldycdn.com
Check for Signs of Excess Moisture
Even without a hygrometer, you can spot clues that your home is too humid:
- Condensation on windows or mirrors
- Musty odors, especially in basements or closets
- Peeling paint or wallpaper
- Warped wood floors or furniture
- Visible mold or mildew growth
If you notice any of these signs, a dehumidifier is likely needed.
Consider Your Climate and Home Size
Homes in humid regions—like the Southeast U.S., Gulf Coast, or Pacific Northwest—are more prone to moisture problems. Similarly, older homes with poor ventilation or basements with groundwater issues may need extra dehumidification.
Also, consider the square footage of the area you want to treat. Most whole-house dehumidifiers are rated by how many pints of moisture they can remove per day (e.g., 70 pints, 100 pints). Larger homes or those with high humidity may need a higher-capacity unit.
Step 2: Choose the Right Type of Dehumidifier
Not all dehumidifiers are created equal. For HVAC integration, you’ll want a whole-house model designed to work with ducted systems.
Whole-House Dehumidifiers vs. Portable Units
Portable dehumidifiers are great for single rooms but require constant emptying and don’t treat the entire home. They also take up floor space and can be noisy.
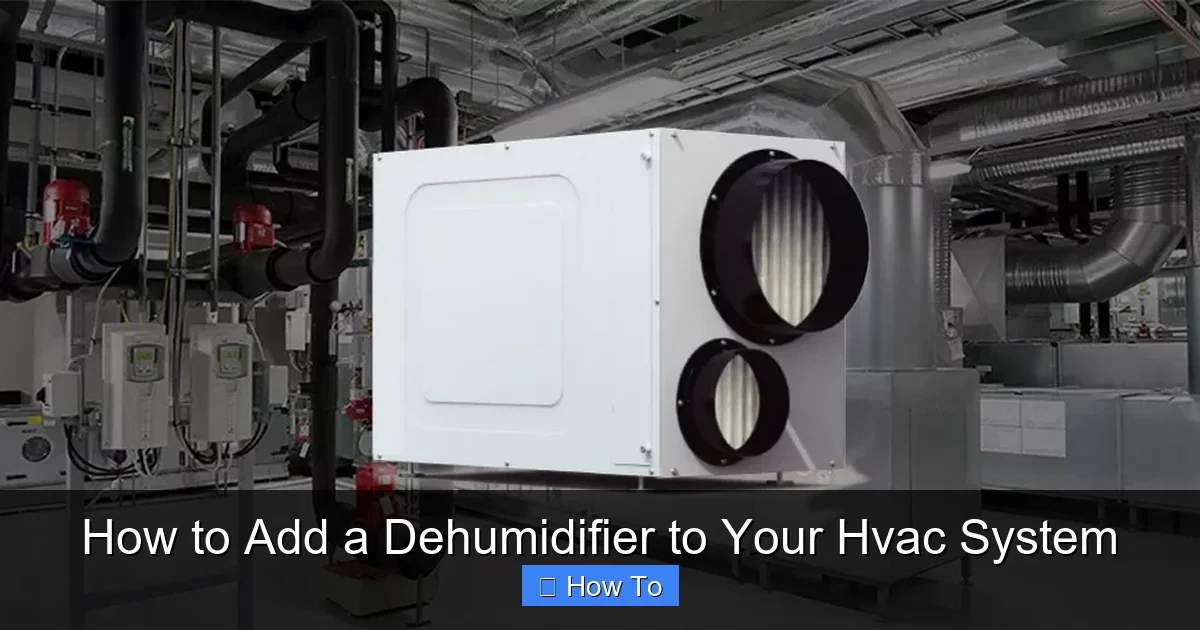
Whole-house dehumidifiers, on the other hand, are installed directly into your HVAC ductwork. They automatically remove moisture from air as it passes through the system, providing consistent, whole-home comfort.
Types of Whole-House Dehumidifiers
There are two main types to consider:
- Desiccant Dehumidifiers: Use a moisture-absorbing material (like silica gel) to pull water from the air. They work well in cooler temperatures and are ideal for basements or unconditioned spaces.
- Refrigerant Dehumidifiers: Cool the air to condense moisture, similar to an air conditioner. They’re more efficient in warm, humid environments and are commonly used in living areas.
Most residential HVAC-integrated systems use refrigerant-based dehumidifiers because they’re energy-efficient and effective in typical home conditions.
Key Features to Look For
When shopping for a whole-house dehumidifier, consider these features:
- Capacity: Measured in pints per day (PPD). Choose a unit that matches your home’s size and humidity level.
- Energy Efficiency: Look for ENERGY STAR-certified models to save on electricity.
- Built-in Humidistat: Allows you to set and maintain your desired humidity level automatically.
- Drainage Options: Most units include a condensate pump or gravity drain. Ensure it can connect to your home’s drainage system.
- Compatibility: Confirm the unit works with your HVAC system’s airflow and duct size.
Popular brands include AprilAire, Honeywell, Santa Fe, and Ultra-Aire. A licensed HVAC contractor can help you select the best model for your needs.
Step 3: Evaluate Your HVAC System and Ductwork
Before installing a dehumidifier, you need to ensure your HVAC system can support it.
Check Ductwork Condition and Size
The dehumidifier will be installed in your return or supply ductwork, so the ducts must be in good condition and properly sized. Leaky or undersized ducts can reduce efficiency and cause pressure imbalances.
An HVAC professional can inspect your ducts and recommend repairs or modifications if needed.
Assess Airflow and Static Pressure
Dehumidifiers add resistance to airflow, which can affect your HVAC system’s performance. If your system already struggles with airflow, adding a dehumidifier could make it worse.
Your contractor will measure static pressure and ensure the blower motor can handle the additional load. In some cases, a variable-speed blower or upgraded fan may be recommended.
Determine Installation Location
The dehumidifier is typically installed in the return duct, near the air handler. This allows it to treat air before it reaches the HVAC system.
Common installation locations include:
- Basement (near the furnace or air handler)
- Attic (if ductwork is accessible)
- Utility closet (with proper ventilation and drainage)
Avoid placing the unit in areas with extreme temperatures or poor ventilation, as this can affect performance.
Step 4: Hire a Licensed HVAC Professional
While some homeowners attempt DIY HVAC projects, installing a dehumidifier is not one of them.
Why Professional Installation Matters
Integrating a dehumidifier involves working with electrical systems, refrigerant lines (in some models), and ductwork. Mistakes can lead to:
- Electrical hazards
- Refrigerant leaks
- Reduced system efficiency
- Voided warranties
- Code violations
A licensed HVAC technician has the training, tools, and experience to install the unit safely and correctly.
What to Expect During Installation
Here’s a general overview of the installation process:
- Site Assessment: The technician evaluates your HVAC system, ductwork, and electrical setup.
- Duct Modifications: They cut into the return duct and install the dehumidifier unit, ensuring a tight seal.
- Electrical Connection: The unit is wired to your home’s electrical panel, often on a dedicated circuit.
- Drainage Setup: A condensate drain line is connected to a floor drain, sink, or condensate pump.
- System Integration: The dehumidifier is linked to your HVAC controls, often via a thermostat or humidistat.
- Testing and Calibration: The technician runs the system, checks for leaks, and sets the desired humidity level.
The entire process typically takes 4–8 hours, depending on complexity.
Cost Considerations
The cost of adding a dehumidifier to your HVAC system varies based on:
- Unit price ($800–$2,500)
- Installation labor ($500–$1,500)
- Duct modifications or electrical upgrades
- Permits (if required by local code)
On average, homeowners spend between $1,500 and $3,500 for a complete installation. While this is a significant investment, the long-term benefits in comfort, health, and energy savings make it worthwhile.
Step 5: Set Up and Test the System
Once the dehumidifier is installed, it’s time to configure and test it.
Configure the Humidistat
Most whole-house dehumidifiers come with a built-in humidistat or connect to your thermostat. Set your desired humidity level—typically between 40% and 50%.
Avoid setting it too low (below 30%), as this can cause overly dry air and increase energy use.
Run a Test Cycle
Turn on your HVAC system and let the dehumidifier run for several hours. Check for:
- Proper airflow through vents
- No unusual noises or vibrations
- Condensate draining correctly
- Humidity levels dropping as expected
If you notice issues—like water pooling or the unit not turning on—contact your installer immediately.
Monitor Performance
Use your hygrometer to track humidity levels over the next few days. Adjust the settings if needed. Most systems will cycle on and off automatically to maintain your set point.
Step 6: Maintain Your Dehumidifier
Regular maintenance keeps your dehumidifier running efficiently and extends its lifespan.
Clean or Replace Filters
Most units have a washable or replaceable air filter. Check it every 1–3 months and clean it with water or replace it as needed. A dirty filter restricts airflow and reduces performance.
Inspect the Condensate Drain
Ensure the drain line is clear and free of algae or mold. Flush it with a mixture of water and vinegar every few months to prevent clogs.
If your unit uses a condensate pump, test it monthly by pouring water into the reservoir to confirm it activates.
Check Coils and Components
Once or twice a year, have a technician inspect the evaporator and condenser coils for dirt or frost buildup. Clean coils improve efficiency and prevent system strain.
Also, check electrical connections and refrigerant levels (if applicable) during professional maintenance.
Schedule Annual HVAC Tune-Ups
Include your dehumidifier in your regular HVAC service. A professional can clean components, test controls, and ensure everything is working together smoothly.
Troubleshooting Common Issues
Even with proper installation, problems can arise. Here’s how to handle common issues:
Dehumidifier Won’t Turn On
- Check the power supply and circuit breaker.
- Ensure the humidistat is set correctly.
- Verify the thermostat or control system is communicating with the unit.
Not Removing Enough Moisture
- Clean or replace the air filter.
- Check for blocked vents or closed dampers.
- Ensure the unit is sized correctly for your home.
Water Leaking or Pooling
- Inspect the drain line for clogs or disconnections.
- Test the condensate pump (if equipped).
- Ensure the unit is level and draining properly.
Unusual Noises or Vibrations
- Tighten loose mounting brackets.
- Check for debris in the fan or coils.
- Contact your installer if the noise persists.
If troubleshooting doesn’t resolve the issue, don’t hesitate to call a professional. Attempting repairs yourself could void your warranty or cause further damage.
Conclusion
Adding a dehumidifier to your HVAC system is one of the best upgrades you can make for your home’s comfort, health, and efficiency. By controlling indoor humidity, you reduce allergens, prevent moisture damage, and help your air conditioner work smarter—not harder.
While the process involves several steps—from assessing your needs to professional installation and ongoing maintenance—the long-term benefits far outweigh the effort and cost.
Remember, this isn’t a DIY project. Always work with a licensed HVAC contractor to ensure safe, code-compliant installation. With the right unit and proper setup, you’ll enjoy fresher, cleaner, and more comfortable air throughout your home.
Take the first step today: measure your humidity, consult a professional, and start breathing easier tomorrow.