

This guide walks you through how to automatically drain your dehumidifier using a continuous hose, gravity drain, or condensate pump. You’ll save time, prevent overflow, and keep your space dry without constant manual emptying.
Quick Answers to Common Questions
Can I use a garden hose for auto-drain?
No—garden hoses aren’t food-safe and can leach chemicals. Use food-grade vinyl tubing designed for condensate drainage.
Do I need to empty the bucket if I auto-drain?
Most models still have a bucket as a backup. You don’t need to empty it daily, but check it occasionally in case the hose fails.
Can I drain my dehumidifier outside?
Yes, as long as the hose slopes downward and drains away from your foundation to prevent water damage.
How often should I clean the drain hose?
Clean it monthly with vinegar to prevent mold and clogs, especially in humid environments.
Will auto-draining use more electricity?
No—the dehumidifier uses the same amount of power. Only pump-assisted systems add a small energy draw (typically 10–50 watts).
Introduction: Why Automatically Drain Your Dehumidifier?
If you own a dehumidifier, you know the routine: check the water bucket, empty it, rinse it, and place it back. It’s simple—but it’s also easy to forget. And when you do, the machine shuts off, humidity builds up, and your comfort suffers. That’s why learning how to automatically drain your dehumidifier is a game-changer.
Automatic draining lets your dehumidifier run nonstop without human intervention. Whether you’re dealing with a damp basement, a humid laundry room, or a musty crawl space, this setup keeps moisture under control 24/7. You’ll reduce mold risk, protect your belongings, and breathe easier—literally.
In this guide, we’ll walk you through every step: from checking your model’s compatibility to installing a hose or pump. We’ll cover gravity drainage, pump-assisted systems, troubleshooting tips, and maintenance advice. By the end, you’ll have a reliable, hands-free dehumidifying system that works while you sleep, work, or travel.
Step 1: Check If Your Dehumidifier Supports Auto-Drain
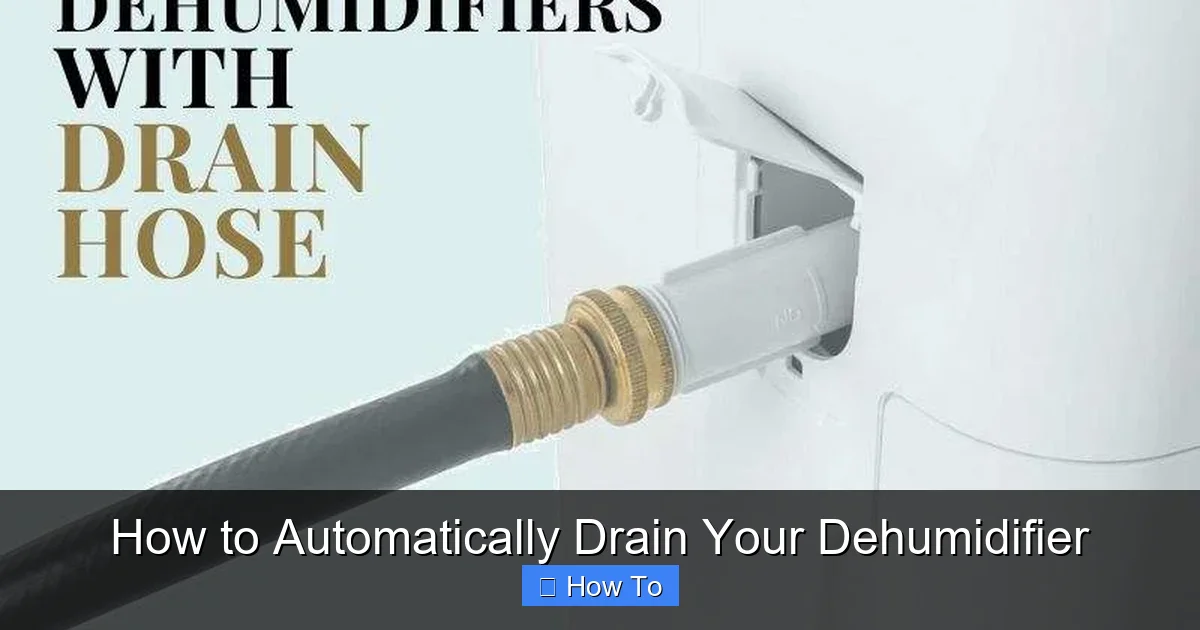
Visual guide about How to Automatically Drain Your Dehumidifier
Image source: evaporativehumidifiers.com
Before you buy hoses or pumps, confirm your dehumidifier can handle automatic draining. Not all models are built for it.
Look for a Drain Port
Most dehumidifiers designed for continuous use have a built-in drain port—usually a small threaded outlet on the back or side. It’s often labeled “Continuous Drain” or “Hose Outlet.” Check your user manual or inspect the unit carefully. If you see a rubber cap or plug, that’s likely where the hose connects.
Consult the User Manual
Your dehumidifier’s manual is the best source of truth. Search for terms like “continuous drain,” “auto-drain,” or “hose connection.” Some manuals even include diagrams showing how to attach a hose. If your model doesn’t mention draining, it may not support it—or may require an adapter.
Check Online Resources
If you’ve lost the manual, visit the manufacturer’s website. Search your model number and download the PDF. You can also check forums or YouTube for user experiences. Many people share photos and videos of their auto-drain setups, which can help you confirm compatibility.
Know the Limitations
Even if your dehumidifier has a drain port, it may still have a water bucket inside. That’s normal. The bucket acts as a backup in case the hose clogs or the power fails. Some models also require you to remove or disable the float switch (which shuts off the unit when full) to enable continuous draining. Always follow manufacturer instructions to avoid voiding your warranty.
Step 2: Choose the Right Drainage Method
There are two main ways to automatically drain your dehumidifier: gravity drain and pump-assisted drain. The best choice depends on your space and setup.
Gravity Drain (Most Common)
This method uses a hose to let water flow downhill by gravity. It’s simple, affordable, and requires no extra power. Ideal for basements with floor drains, utility sinks, or sump pits.
Pros:
– No electricity needed
– Low cost
– Easy to install
Cons:
– Requires a downward slope
– Limited by elevation
Pump-Assisted Drain
If your dehumidifier is below the drain point (like in a crawl space), you’ll need a condensate pump. These small, submersible pumps sit in a collection tray and push water through a hose to a higher elevation.
Pros:
– Works uphill
– Great for tight spaces
– Fully automatic
Cons:
– Requires power
– Higher cost
– Needs occasional maintenance
Hybrid Option: Gravity + Backup Pump
Some advanced setups use both methods—gravity as the primary drain and a pump as a backup. This is useful in areas prone to power outages or hose clogs.
Step 3: Gather the Right Tools and Materials
Before you start, make sure you have everything you need. Here’s a checklist:
- Dehumidifier with drain port
- Continuous drain hose (food-grade, kink-resistant)
- Hose clamps or fittings (if required)
- Condensate pump (if needed)
- Measuring tape
- Scissors or utility knife
- Duct tape or zip ties (for securing hose)
- Bucket or tray (for pump setup)
Choosing the Right Hose
Not all hoses are created equal. Avoid garden hoses—they’re not designed for continuous water flow and can leach chemicals.
Instead, use:
– Food-grade vinyl tubing: Safe, flexible, and resistant to mold.
– Inner diameter: Most dehumidifiers use 1/4″ or 3/8″ tubing. Check your drain port size.
– Length: Measure the distance from your dehumidifier to the drain. Add a few extra feet for flexibility.
You can find compatible hoses at hardware stores or online. Look for “condensate drain hose” or “dehumidifier drain tube.”
Optional: Use a Hose Adapter
Some dehumidifiers have threaded ports that require a barbed fitting. A simple adapter (like a 1/4″ barbed to threaded connector) can help secure the hose. Use Teflon tape on threaded connections to prevent leaks.
Step 4: Set Up Gravity Drain (Step-by-Step)
If your drain point is at or below the level of your dehumidifier, gravity drain is the easiest option.
Step 4.1: Position Your Dehumidifier
Place the unit on a stable, elevated surface if possible. Even a few inches of height helps water flow smoothly. Avoid placing it directly on the floor unless you have a floor drain.
Step 4.2: Attach the Hose
Remove the rubber cap from the drain port. Insert the hose into the port and secure it with a hose clamp if needed. Make sure the connection is snug to prevent leaks.
Step 4.3: Route the Hose
Run the hose from the dehumidifier to your drain point. Keep it as straight as possible, with a gentle downward slope. Avoid sharp bends or kinks—they can block water flow.
Use zip ties or duct tape to secure the hose to walls, baseboards, or joists. This prevents tripping hazards and keeps the hose in place.
Step 4.4: Test the Flow
Turn on the dehumidifier and let it run for 10–15 minutes. Watch the hose to ensure water flows steadily. If it drips or stops, check for kinks, clogs, or improper slope.
Step 4.5: Secure the End
Place the hose end into a floor drain, utility sink, or sump pit. If using a sink, make sure the hose doesn’t fall out during operation. You can use a hose clip or tape to hold it in place.
Step 5: Install a Condensate Pump (For Uphill Drainage)
When gravity won’t work, a condensate pump saves the day.
Step 5.1: Choose the Right Pump
Look for a pump rated for condensate or dehumidifier use. Key features:
– Capacity: Should handle at least 10–20 gallons per day (most dehumidifiers produce 15–50 pints daily).
– Head height: How high it can pump water (e.g., 10 ft, 20 ft).
– Automatic float switch: Turns the pump on when water rises.
– Alarm (optional): Alerts you if the pump fails.
Popular brands include Little Giant, Beckett, and DiversiTech.
Step 5.2: Set Up the Pump
Place the pump in a shallow tray or bucket near the dehumidifier. Connect the dehumidifier’s drain hose to the pump’s inlet. Then, attach another hose from the pump’s outlet to your drain point (e.g., sink, laundry tub, or outside).
Step 5.3: Power and Test
Plug the pump into a GFCI outlet for safety. Turn on the dehumidifier and let it run. The pump should activate when water collects in the tray. Listen for the motor and watch for water flow.
Step 5.4: Secure and Protect
Keep the pump on a flat, stable surface. Avoid placing it directly on concrete, which can cause vibration. Use rubber pads to reduce noise.
Step 6: Maintain Your Auto-Drain System
Automatic doesn’t mean maintenance-free. Regular care keeps your system running smoothly.
Clean the Hose Monthly
Over time, algae, mold, or mineral deposits can clog the hose. Disconnect it and flush with a mixture of water and vinegar (1:1 ratio). Use a bottle brush for stubborn buildup.
Check the Pump Quarterly
Remove the pump and clean the inlet screen and impeller. Look for debris or sludge. Rinse with water and reassemble.
Inspect Connections
Check hose fittings and clamps for leaks or wear. Tighten or replace as needed.
Monitor Performance
If your dehumidifier runs constantly but doesn’t seem to be drying the air, the drain may be clogged. Check the hose and pump for blockages.
Troubleshooting Common Issues
Even the best setups can run into problems. Here’s how to fix the most common ones.
Water Isn’t Draining
Possible causes:
– Hose is kinked or blocked
– Slope is too flat or uphill
– Drain port is clogged
Solution: Inspect the entire hose path. Straighten kinks, clear clogs, and ensure a downward slope. Use a pipe cleaner or compressed air to clear the drain port.
Pump Isn’t Working
Possible causes:
– Power outage or tripped GFCI
– Float switch is stuck
– Impeller is jammed
Solution: Check the outlet and reset the GFCI. Manually lift the float switch to test the pump. Clean the impeller if needed.
Leaks at the Connection
Possible causes:
– Hose isn’t seated properly
– Clamp is loose
– Threaded fitting isn’t sealed
Solution: Reattach the hose firmly. Use a hose clamp or Teflon tape. Replace damaged fittings.
Algae or Odor in Hose
Cause: Stagnant water and organic growth.
Solution: Flush the hose with vinegar or a mild bleach solution (10:1 water to bleach). Rinse thoroughly before reconnecting.
Safety Tips and Best Practices
Auto-draining is safe when done correctly, but a few precautions go a long way.
- Use GFCI outlets: Especially in basements or damp areas, to prevent electrical shock.
- Secure all hoses: Prevent tripping and water spills.
- Don’t drain into living spaces: Always direct water to a drain, sink, or outside.
- Monitor during first use: Stay nearby for the first few hours to catch leaks or malfunctions.
- Follow manufacturer guidelines: Don’t modify your dehumidifier in ways not approved by the maker.
Conclusion: Enjoy Hands-Free Dehumidification
Learning how to automatically drain your dehumidifier transforms a chore into a convenience. With the right setup—whether gravity-fed or pump-powered—you can keep your home dry, healthy, and comfortable without lifting a finger.
Start by checking your model’s compatibility, choose the best drainage method for your space, and install the hose or pump carefully. Maintain the system regularly to avoid clogs and ensure long-term performance.
Once it’s running, you’ll wonder how you ever lived without it. No more midnight bucket checks. No more musty smells. Just steady, silent moisture control—automatically.
Invest a little time now, and enjoy the peace of mind for years to come.