
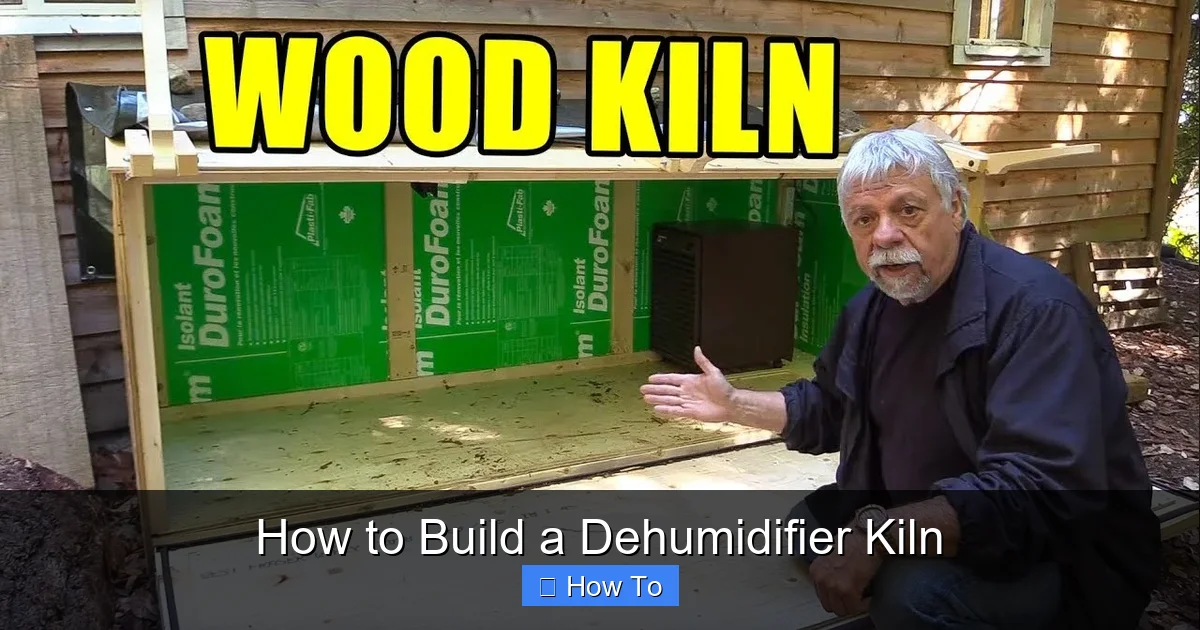
Building a dehumidifier kiln is a cost-effective way to dry wood at home without expensive equipment. This guide walks you through selecting materials, assembling the chamber, installing the dehumidifier, and monitoring moisture levels for safe, efficient drying.
Quick Answers to Common Questions
Can I use a mini dehumidifier for my kiln?
No, mini dehumidifiers don’t have enough capacity. Use a 30–50 pint residential unit for effective drying.
How long does it take to dry wood in a dehumidifier kiln?
Typically 1–3 weeks per inch of thickness, depending on species, temperature, and humidity.
Do I need a heater in my kiln?
Not always, but a small heater helps maintain optimal temperatures (90–120°F) for faster drying.
Can I dry firewood in a dehumidifier kiln?
Yes, but it’s more efficient for small batches. Larger quantities are better air-dried outdoors.
What’s the ideal humidity level for drying wood?
Aim for 40–60% relative humidity inside the kiln, depending on the wood species and target moisture content.
How to Build a Dehumidifier Kiln
If you’re a woodworker, carpenter, or DIY enthusiast, you know how important it is to work with properly dried wood. Wet or green wood can warp, crack, or shrink after you’ve built something, ruining your hard work. While commercial kilns are effective, they’re also expensive and not practical for most home users. That’s where a dehumidifier kiln comes in.
A dehumidifier kiln is a DIY drying chamber that uses a standard household dehumidifier to remove moisture from wood slowly and safely. It’s affordable, energy-efficient, and perfect for small-scale projects. In this guide, you’ll learn exactly how to build a dehumidifier kiln from start to finish—no prior experience required.
By the end of this guide, you’ll have a fully functional kiln that can dry lumber, firewood, or even specialty woods like walnut or maple. We’ll cover everything from choosing the right location and materials to setting up controls and monitoring progress. Let’s get started!
Why Build a Dehumidifier Kiln?
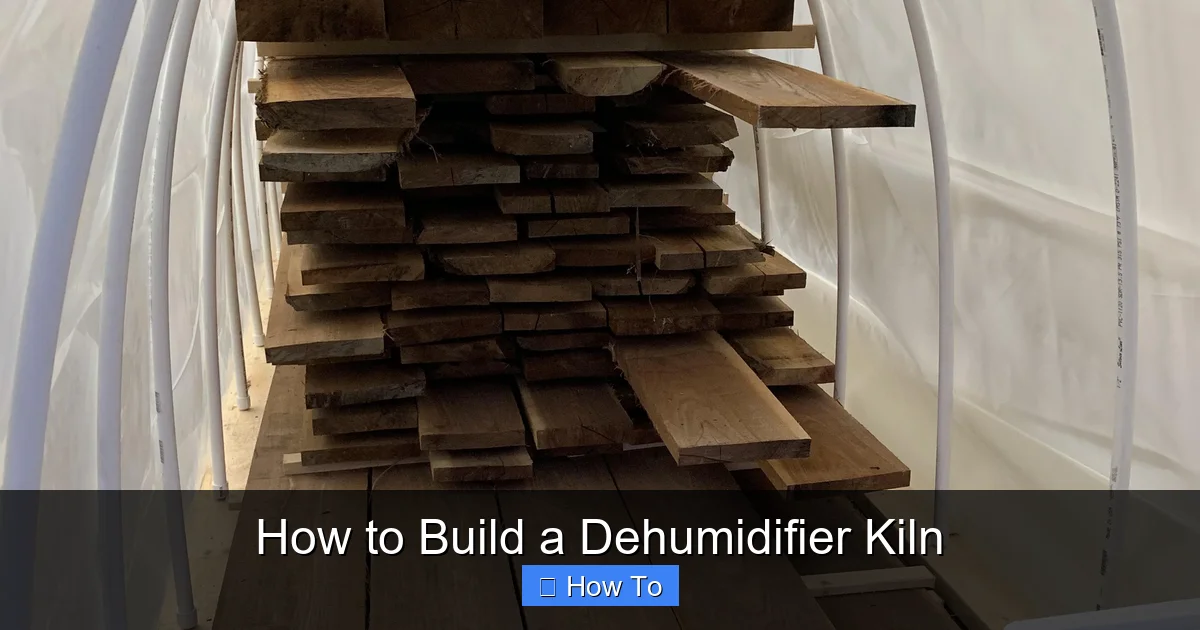
Visual guide about How to Build a Dehumidifier Kiln
Image source: i.redd.it
Before diving into the build, it’s worth understanding why a dehumidifier kiln is such a smart choice.
Traditional air-drying can take months or even years, depending on the wood species and thickness. Commercial kilns speed up the process but cost thousands of dollars. A dehumidifier kiln strikes the perfect balance—it’s fast, affordable, and controllable.
Here’s what makes it great:
– Cost-effective: You can build one for under $300 using common tools and materials.
– Energy-efficient: Dehumidifiers use less power than electric heaters or convection kilns.
– Precise control: You can adjust humidity and temperature to match the wood type.
– Compact: Fits in a closet, garage, or small shed.
– Safe: Lower risk of fire or overheating compared to open-flame or high-heat systems.
Whether you’re drying boards for furniture, slabs for tabletops, or firewood for your stove, a dehumidifier kiln gives you professional results at home.
Planning Your Kiln: Location and Size
The first step in building your kiln is choosing the right space. You need a sealed, insulated area where you can control temperature and humidity.
Choosing the Right Location
Look for a small, enclosed space such as:
– A walk-in closet
– A garden shed
– A corner of your garage (enclosed with walls or plastic sheeting)
– A spare bathroom (if well-ventilated)
Avoid areas with extreme temperature swings or high ambient humidity, like uninsulated basements or outdoor sheds without climate control.
Determining Kiln Size
The size of your kiln depends on how much wood you plan to dry at once. A typical DIY dehumidifier kiln holds 50–200 board feet.
For example:
– A 4′ x 4′ x 7′ closet can hold about 100 board feet of 1″-thick lumber.
– A 6′ x 6′ shed can handle up to 200 board feet.
Keep in mind: overcrowding slows drying. Leave at least 1–2 inches between boards for airflow.
Gathering Materials and Tools
You don’t need fancy equipment to build a dehumidifier kiln. Most items are available at hardware stores or online.
Essential Materials
- Dehumidifier: A 30–50 pint capacity unit (look for one with a built-in pump or continuous drain option).
- Insulation: Rigid foam board (R-10 or higher) or fiberglass batts.
- Plastic sheeting: 6-mil polyethylene for sealing gaps.
- Wood or plywood: For framing or reinforcing the structure (if needed).
- Weatherstripping: To seal doors and seams.
- Thermometer/hygrometer: To monitor temperature and humidity.
- Moisture meter: Essential for checking wood dryness.
- Fans: Two small box fans or computer fans for air circulation.
- Heater (optional): A small space heater or heat lamp to maintain temperature (90–120°F).
- Ducting or tubing: For routing the dehumidifier’s drain hose (if using continuous drain).
Tools You’ll Need
- Measuring tape
- Utility knife or saw
- Drill and screws
- Silicone caulk or foam sealant
- Scissors or utility knife
- Level
- Screwdrivers
Step-by-Step: Building the Kiln Chamber
Now it’s time to build your kiln. Follow these steps carefully to ensure a tight, efficient seal.
Step 1: Prepare the Space
Clear out the area and clean the walls, floor, and ceiling. Remove any debris or dust that could interfere with sealing.
If you’re using a closet, remove the door or modify it to create a tight seal. For sheds or garages, you may need to build a temporary wall or enclosure using plywood and 2x4s.
Step 2: Insulate the Walls, Ceiling, and Floor
Insulation keeps heat in and reduces energy use. Use rigid foam board for best results.
– Cut foam panels to fit walls, ceiling, and floor.
– Secure them with construction adhesive or screws.
– Seal all seams with foil tape or silicone caulk.
Tip: If insulating the floor isn’t practical, place a plastic sheet underneath the wood stack to prevent moisture wicking.
Step 3: Seal All Gaps and Cracks
Even small leaks can ruin your kiln’s efficiency. Use weatherstripping around doors and silicone caulk for cracks.
– Apply weatherstripping to the door frame.
– Seal around electrical outlets, vents, or pipes with expanding foam or caulk.
– Cover any vents or windows with plastic sheeting and tape.
Step 4: Install a Door Seal
The door is the weakest point in any kiln. Make sure it closes tightly.
– Use a solid-core door if possible.
– Install a door sweep at the bottom.
– Add a second layer of weatherstripping if needed.
Test the seal by closing the door and shining a flashlight around the edges. If light gets through, reseal those areas.
Setting Up the Dehumidifier
The dehumidifier is the heart of your kiln. It removes moisture from the air, which then draws moisture out of the wood.
Choosing the Right Dehumidifier
Look for these features:
– Capacity: 30–50 pints per day is ideal for small to medium kilns.
– Continuous drain: A hose attachment lets you drain water automatically.
– Auto-restart: Resumes operation after a power outage.
– Humidistat: Allows you to set target humidity (aim for 40–60% RH).
Avoid mini or “desiccant” dehumidifiers—they’re not powerful enough.
Installing the Dehumidifier
Place the dehumidifier inside the kiln, preferably on a small stand or platform to keep it off the floor.
– Position it near the center for even air circulation.
– If using a drain hose, route it through a small hole in the wall or under the door to a bucket or floor drain.
– Seal the hole with silicone to maintain the seal.
Tip: Use a drip tray under the dehumidifier as a backup in case the hose clogs.
Adding Air Circulation and Heat
Moisture removal works best when air moves freely around the wood. Stagnant air leads to uneven drying and mold.
Installing Fans
Use two fans:
– One to blow air across the wood stack (horizontal airflow).
– One to circulate air vertically (top to bottom).
Mount fans on shelves or hang them from the ceiling using hooks. Aim them so air flows between the boards, not just around the edges.
Adding Heat (Optional but Recommended)
Dehumidifiers produce some heat, but not enough to reach optimal drying temperatures (90–120°F). A small space heater can help.
– Use a 500–1000W ceramic heater with a thermostat.
– Place it away from the dehumidifier and wood.
– Never use open flames or unvented heaters.
Safety tip: Plug the heater into a GFCI outlet and never leave it unattended.
Loading the Wood
How you stack the wood affects drying speed and quality.
Preparing the Lumber
– Cut wood to final length if possible (reduces cracking).
– Seal end grain with wax or paint to slow moisture loss.
– Sort by species and thickness—dry similar woods together.
Stacking the Wood
Use these best practices:
– Place stickers (1×1 or 1×2 wood strips) between every layer to allow airflow.
– Stickers should be aligned vertically to prevent sagging.
– Leave 1–2 inches between boards.
– Stack evenly and avoid overhanging pieces.
Tip: Label each stack with species, thickness, and date loaded.
Monitoring and Controlling the Drying Process
Drying wood is a slow, careful process. Rushing it causes defects.
Setting Target Conditions
For most hardwoods:
– Temperature: 90–110°F
– Humidity: 40–60% RH
– Drying time: 1–3 weeks per inch of thickness
Softwoods dry faster; exotic woods may need lower temps.
Using a Thermometer and Hygrometer
Place one inside the kiln, away from direct fan or heater airflow. Check it daily.
Adjust the dehumidifier and heater as needed to maintain stable conditions.
Checking Moisture Content
Use a pin-type or pinless moisture meter to test wood regularly.
– Green wood: 20–30%+ moisture
– Air-dried: 12–18%
– Kiln-dried: 6–8% (ideal for indoor projects)
Test multiple boards in different locations. Stop drying when moisture content is consistent throughout.
Troubleshooting Common Problems
Even with careful planning, issues can arise. Here’s how to fix them.
Problem: Kiln isn’t drying fast enough
Possible causes:
– Dehumidifier too small
– Poor insulation or air leaks
– Low temperature
– Overloaded kiln
Solutions:
– Upgrade to a larger dehumidifier
– Reseal gaps and add insulation
– Increase heat (safely)
– Reduce load size
Problem: Mold or mildew appears
Caused by high humidity and poor airflow.
Solutions:
– Increase fan speed or add more fans
– Lower humidity setting on dehumidifier
– Remove affected boards and clean kiln
– Ensure wood wasn’t too wet when loaded
Problem: Wood is cracking or warping
Usually due to drying too fast or unevenly.
Solutions:
– Reduce temperature
– Increase humidity slightly
– Check sticker alignment and airflow
– Seal end grain more thoroughly next time
Problem: Dehumidifier keeps shutting off
Could be due to:
– Full water tank (if not using continuous drain)
– Dirty filter
– Overheating
Solutions:
– Empty tank or install drain hose
– Clean or replace filter
– Ensure proper ventilation around unit
Safety Tips and Best Practices
Safety should always come first.
– Never leave heaters unattended.
– Use GFCI outlets for all electrical devices.
– Keep a fire extinguisher nearby.
– Avoid overloading circuits—use a dedicated outlet if possible.
– Ventilate the area when entering the kiln after long periods.
Also, always wear a dust mask when handling dry wood or cleaning the kiln.
Maintaining Your Kiln
Regular maintenance keeps your kiln running smoothly.
– Clean the dehumidifier filter monthly.
– Check seals and insulation annually.
– Wipe down interior walls to prevent mold.
– Store moisture meter and hygrometer in a dry place.
With proper care, your kiln can last for years.
Conclusion
Building a dehumidifier kiln is a smart, affordable way to dry wood at home. With just a few tools and some basic materials, you can create a controlled environment that produces professional-quality results.
You’ve learned how to choose the right space, insulate and seal the chamber, install a dehumidifier and fans, load wood correctly, and monitor the drying process. You also know how to troubleshoot common issues and keep your kiln safe and efficient.
Whether you’re drying lumber for a bookshelf, slabs for a dining table, or firewood for winter, your DIY kiln will save you money and give you greater control over your materials.
So gather your supplies, follow the steps, and start drying like a pro. Your next woodworking project will thank you.