
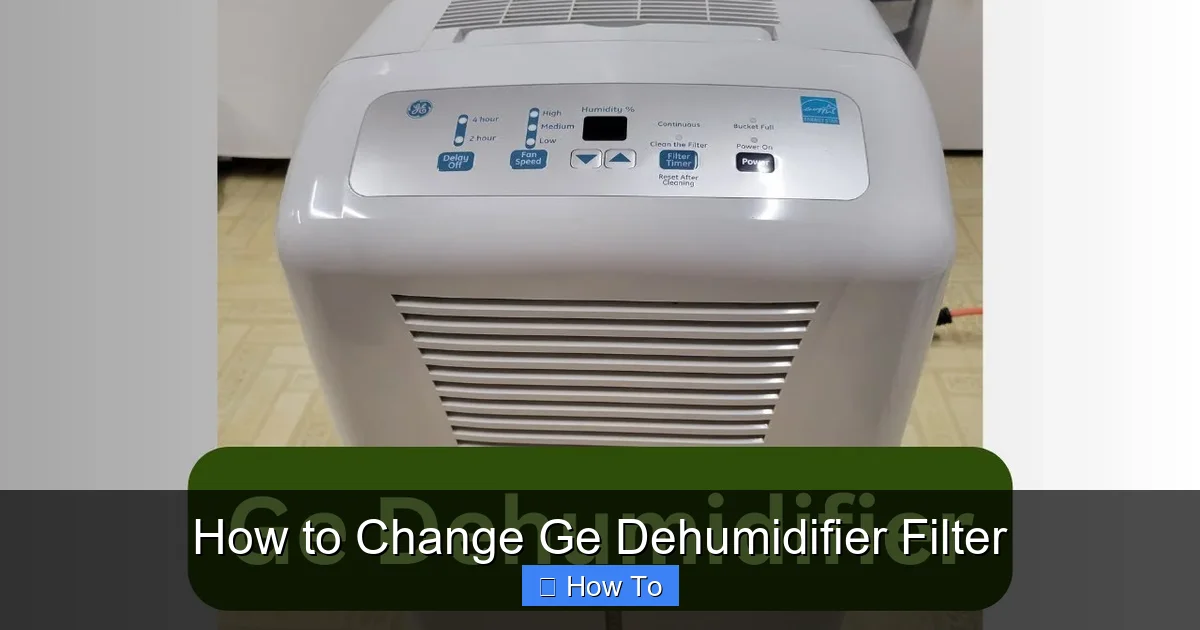
This guide walks you through how to change a GE dehumidifier filter safely and correctly. You’ll learn where the filter is located, how to replace it, and why regular maintenance matters for performance and air quality.
Quick Answers to Common Questions
How often should I check my GE dehumidifier filter?
Check the filter every 1–2 months, especially during humid seasons or if you have pets or allergies. Visual inspection is more reliable than waiting for the indicator light.
Can I wash and reuse a disposable filter?
No, disposable filters are not designed to be washed. Attempting to clean them can damage the material and reduce effectiveness. Always replace them when dirty.
What if my filter indicator light stays on after replacement?
Try unplugging the unit for 5 minutes, then plug it back in. If the light remains on, consult your user manual for a reset procedure or contact GE support.
Do I need to clean the coils when changing the filter?
Yes, it’s a good idea. Dust on the coils reduces efficiency. Use a vacuum with a brush attachment or a coil brush to gently clean them during filter changes.
Where can I find my GE dehumidifier model number?
The model number is usually on a label on the back or bottom of the unit. You can also find it in the user manual or on the original packaging.
Introduction: Why Changing Your GE Dehumidifier Filter Matters
If you own a GE dehumidifier, you already know how valuable it is in keeping your home comfortable, especially during humid seasons. But did you know that one of the simplest ways to keep your unit running efficiently is by regularly changing its air filter? Just like your HVAC system or vacuum cleaner, your dehumidifier relies on a clean filter to trap airborne particles and maintain optimal airflow.
Over time, the filter collects dust, pet dander, mold spores, and other debris. If left unchanged, a clogged filter forces the dehumidifier to work harder, which can lead to higher energy bills, reduced moisture removal, and even premature wear on internal components. In some cases, a dirty filter can cause the unit to overheat or trigger error codes.
In this comprehensive guide, we’ll walk you through how to change a GE dehumidifier filter step by step. Whether you’re a first-time owner or just need a refresher, you’ll learn everything from locating the filter to resetting the indicator light. We’ll also share practical tips, troubleshooting advice, and maintenance best practices to keep your dehumidifier in top shape year-round.
By the end of this guide, you’ll feel confident performing this essential maintenance task on your own—no technician required. Let’s get started!
Understanding Your GE Dehumidifier Filter
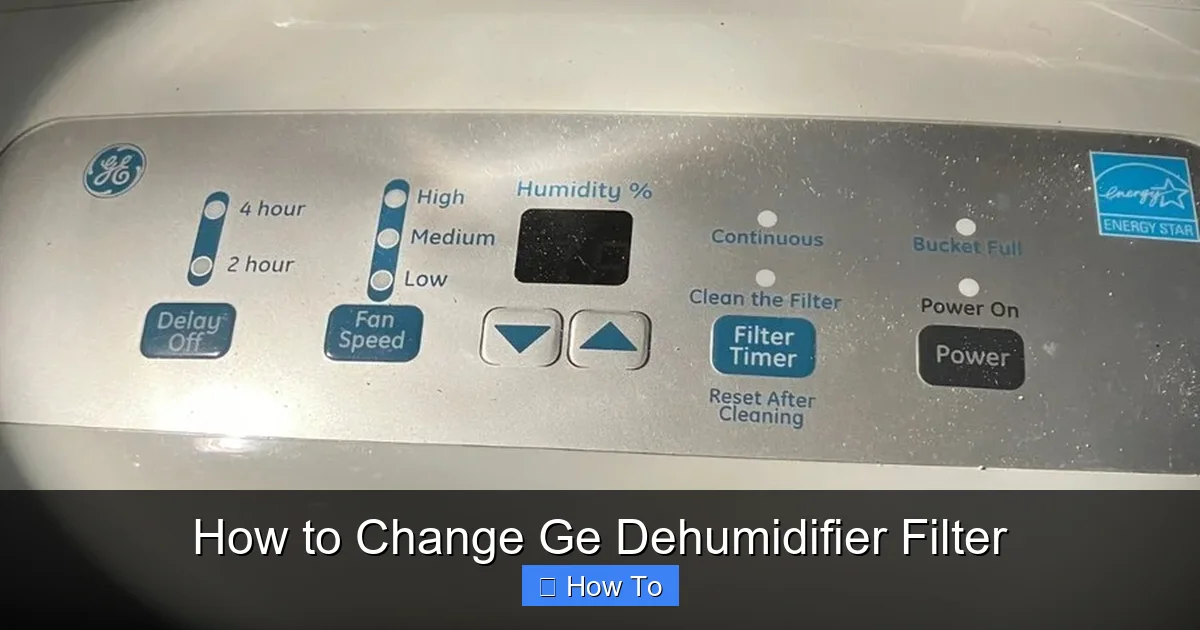
Visual guide about How to Change Ge Dehumidifier Filter
Image source: i.ebayimg.com
Before diving into the replacement process, it’s helpful to understand what the filter does and why it’s so important.
The air filter in your GE dehumidifier is typically a mesh or foam-based component located behind the front grille or access panel. Its primary job is to capture airborne contaminants as air is drawn into the unit. This not only protects the internal coils and fan but also improves the quality of the air being circulated back into your room.
Most GE dehumidifiers use a reusable or replaceable filter, depending on the model. Reusable filters can be washed and reused, while others require periodic replacement. Some newer models even feature a filter indicator light that alerts you when it’s time for a change.
Knowing your specific model is key. GE offers a wide range of dehumidifiers—from compact 20-pint units for small basements to heavy-duty 70-pint models for large spaces. While the general process for changing the filter is similar across models, the exact location and type of filter may vary.
To find your model number, check the label on the back or bottom of the unit. You can also refer to the user manual or visit GE’s official website for model-specific instructions.
Tools and Materials You’ll Need
One of the best things about changing a GE dehumidifier filter is that it requires minimal tools. Here’s what you’ll need:
- Replacement filter: Make sure it’s compatible with your GE model. Look for GE-branded filters or third-party options that specify compatibility.
- Soft cloth or microfiber towel: For wiping down the filter housing and exterior.
- Mild soap and water (optional): Only if you’re cleaning a reusable filter.
- Vacuum with brush attachment (optional): Useful for cleaning dust from the coils and vents.
- Screwdriver (if needed): Some models may require removing screws to access the filter.
Most of these items are household staples, so you likely won’t need to make a special trip to the store. Just double-check that your replacement filter is the right size and type before starting.
Step-by-Step Guide: How to Change a GE Dehumidifier Filter
Now that you’re prepared, let’s walk through the process of changing your GE dehumidifier filter. Follow these steps carefully to ensure a safe and effective replacement.
Step 1: Turn Off and Unplug the Unit
Safety is paramount when working with any electrical appliance. Before you begin, make sure your dehumidifier is completely powered off and unplugged from the wall outlet. This prevents accidental startup and reduces the risk of electric shock.
Even if the unit appears to be off, internal components may still hold a charge. Unplugging ensures full safety. If your dehumidifier has a water tank, consider emptying it before starting to avoid spills.
Step 2: Locate the Filter Access Panel
Next, find the filter compartment. On most GE dehumidifiers, the filter is located behind the front grille or a removable panel on the side or front of the unit.
Look for a latch, clip, or set of tabs that hold the panel in place. Some models have a simple push-and-pull mechanism, while others may require gently prying the panel open with your fingers or a flat tool.
If you’re unsure, consult your user manual or look for a small icon or label near the grille indicating “Filter” or “Air Intake.”
Step 3: Remove the Old Filter
Once the access panel is open, you’ll see the filter seated in a slot or frame. Carefully slide it out. Depending on how long it’s been since the last change, the filter may be visibly dirty—covered in dust, hair, or even mold.
Handle the old filter gently to avoid releasing trapped particles into the air. If it’s a reusable filter, you may choose to clean it instead of replacing it (more on that later). For disposable filters, dispose of the old one in a sealed bag to prevent contamination.
Step 4: Inspect the Filter Housing
With the old filter removed, take a moment to inspect the filter housing and surrounding area. Use a soft cloth or vacuum attachment to remove any dust or debris that may have accumulated.
Pay special attention to the evaporator coils behind the filter. Over time, dust buildup on the coils can reduce efficiency. If they’re dirty, gently clean them with a coil brush or vacuum. Avoid using water or harsh chemicals near electrical components.
Step 5: Install the New Filter
Now it’s time to install the new filter. Make sure it’s oriented correctly—most filters have an arrow or label indicating the direction of airflow. The arrow should point toward the unit (into the airflow path).
Slide the new filter into the slot until it sits securely in place. It should fit snugly without forcing. If it doesn’t fit, double-check that you have the correct model number and filter type.
Step 6: Reattach the Access Panel
Once the new filter is in place, carefully reattach the front grille or access panel. Make sure all clips or latches are fully secured. A loose panel can cause air leaks, reducing the unit’s efficiency.
Give the panel a gentle tug to confirm it’s locked in. If your model uses screws, tighten them evenly to avoid warping the plastic.
Step 7: Plug In and Test the Unit
With everything reassembled, plug the dehumidifier back into the wall outlet. Turn it on and let it run for a few minutes. Listen for unusual noises and check that air is flowing properly through the vents.
If your model has a filter indicator light, it should reset automatically or require a manual reset (see next section).
Resetting the Filter Indicator Light
Many GE dehumidifiers come equipped with a filter indicator light that alerts you when it’s time to change the filter. After replacing the filter, you’ll need to reset this light to ensure accurate future reminders.
The reset process varies slightly by model, but here’s a general guide:
- Press and hold the “Filter” or “Reset” button: On most models, this button is located on the control panel. Hold it for 3–5 seconds until the light turns off or changes color.
- Use the power cycle method: If there’s no dedicated button, try turning the unit off, unplugging it for 30 seconds, then plugging it back in.
- Check the user manual: For precise instructions, refer to your model’s manual or GE’s online support page.
Resetting the indicator ensures you won’t miss the next filter change. Some models also track usage hours, so a proper reset helps maintain accurate maintenance schedules.
Cleaning vs. Replacing: What’s the Difference?
Not all GE dehumidifier filters are the same. Some are designed to be washed and reused, while others are disposable and must be replaced.
Reusable Filters
Reusable filters are typically made of washable foam or mesh. They can be cleaned every 1–2 months, depending on usage. To clean:
- Remove the filter and rinse it under lukewarm water.
- Gently scrub with a soft brush or cloth if needed.
- Let it air dry completely before reinstalling.
Never use hot water or harsh detergents, as they can damage the filter material. Also, avoid wringing or twisting the filter, which can tear the mesh.
Disposable Filters
Disposable filters are made of non-washable materials like paper or synthetic fibers. These must be replaced when dirty—typically every 2–3 months, or sooner in high-humidity or dusty environments.
Always check your user manual to determine which type your model uses. Using the wrong filter can void your warranty or reduce performance.
How Often Should You Change the Filter?
The frequency of filter changes depends on several factors:
- Usage: If you run your dehumidifier daily, change the filter every 1–2 months.
- Environment: Homes with pets, smokers, or high dust levels may need more frequent changes.
- Humidity levels: In damp basements or during rainy seasons, filters can clog faster.
- Filter type: Reusable filters may last longer between cleanings than disposable ones.
As a general rule, check the filter every month. If it looks dirty or feels stiff, it’s time for a change. Don’t wait for the indicator light—visual inspection is often more reliable.
Troubleshooting Common Issues
Even with proper maintenance, you may encounter issues when changing your GE dehumidifier filter. Here are some common problems and solutions:
Filter Doesn’t Fit
If the new filter won’t slide into place, double-check the model number and filter compatibility. Some GE models have similar designs but different filter sizes. Measure the old filter and compare it to the new one.
Indicator Light Won’t Reset
If the filter light stays on after replacement, try unplugging the unit for 5 minutes, then plugging it back in. If that doesn’t work, consult the manual for a hard reset procedure.
Reduced Airflow After Replacement
This could mean the filter is installed backward. Check the airflow arrow and reinsert it correctly. Also, ensure the access panel is fully closed.
Unusual Noises
Rattling or grinding sounds may indicate the filter is loose or the fan is obstructed. Turn off the unit, recheck the filter placement, and inspect for debris.
Unit Won’t Turn On
If the dehumidifier doesn’t power up after filter replacement, verify that it’s plugged in and the circuit breaker hasn’t tripped. Also, check that the water tank is properly seated—some models won’t run if the tank is missing or misaligned.
Maintenance Tips for Long-Term Performance
Changing the filter is just one part of dehumidifier care. To keep your GE unit running smoothly, follow these additional tips:
- Clean the water tank weekly: Use a mild bleach solution to prevent mold and bacteria growth.
- Wipe the exterior monthly: Use a damp cloth to remove dust and fingerprints.
- Check the drain hose (if used): Ensure it’s not kinked or clogged.
- Keep the unit level: An uneven dehumidifier can cause water leakage or pump issues.
- Store properly during off-seasons: Clean the unit, remove the filter, and store in a dry place.
Regular maintenance not only extends the life of your dehumidifier but also ensures it operates at peak efficiency, saving you money on energy bills.
Where to Buy GE Dehumidifier Filters
You can purchase genuine GE dehumidifier filters from several sources:
- GE Appliances website: Offers OEM filters with guaranteed compatibility.
- Retailers like Home Depot, Lowe’s, and Best Buy: Carry popular GE models and filters.
- Online marketplaces (Amazon, Walmart.com): Convenient, but verify seller ratings and product descriptions.
- Local appliance repair shops: May stock filters or special-order them.
When buying, always confirm the model number matches your dehumidifier. Generic filters may be cheaper, but they often lack the precision fit and filtration efficiency of GE-approved parts.
Conclusion: Keep Your Dehumidifier Running Like New
Changing the filter in your GE dehumidifier is a quick, easy task that makes a big difference in performance and air quality. By following the steps in this guide, you can ensure your unit continues to remove excess moisture efficiently while protecting your home from allergens and mold.
Remember to check the filter monthly, replace or clean it as needed, and reset the indicator light after each change. Combine this with regular cleaning of the tank, coils, and exterior for optimal results.
With proper care, your GE dehumidifier will serve you well for years to come—keeping your basement dry, your air fresh, and your home comfortable no matter the season.