
This guide walks you through how to clean a clogged dehumidifier effectively and safely. You’ll learn essential maintenance steps, common causes of clogs, and how to prevent them in the future to keep your unit running smoothly.
Quick Answers to Common Questions
How often should I clean my dehumidifier?
Clean the air filter monthly, empty the water tank daily, and perform a full deep clean every 3–6 months to prevent clogs and maintain efficiency.
Can I use bleach to clean the water tank?
Avoid bleach—it can leave harmful residues. Use white vinegar or mild dish soap instead, as they’re effective and safe for regular use.
Why is my dehumidifier making a rattling noise?
A rattling noise often means the fan is hitting debris or the unit is unbalanced. Turn it off, check for obstructions, and ensure it’s on a flat surface.
Should I clean the coils even if they look fine?
Yes—dust can build up invisibly and reduce efficiency. Clean the coils during your seasonal deep clean to maintain optimal performance.
Can a clogged dehumidifier increase my energy bill?
Absolutely. A clogged unit has to work harder to remove moisture, using more electricity. Regular cleaning helps keep energy costs down.
How to Clean a Clogged Dehumidifier
If your dehumidifier isn’t pulling moisture from the air like it used to, or if it’s making strange noises, shutting off unexpectedly, or just feels sluggish, it might be clogged. Don’t worry—this is a common issue, and most clogs can be fixed with a little cleaning and maintenance. In this guide, you’ll learn exactly how to clean a clogged dehumidifier step by step, from identifying the problem to restoring full function.
We’ll cover everything from safety precautions to detailed cleaning techniques for filters, coils, tanks, and hoses. You’ll also get practical tips to prevent future clogs and troubleshoot stubborn issues. Whether you’re dealing with a basic home model or a heavy-duty unit, this guide will help you keep your dehumidifier running efficiently and your indoor air quality high.
Why Dehumidifiers Get Clogged
Visual guide about How to Clean a Clogged Dehumidifier
Image source: bhg.com
Before diving into the cleaning process, it helps to understand why dehumidifiers get clogged in the first place. Most clogs aren’t caused by a single issue but by a combination of factors that build up over time.
One of the most common culprits is a dirty or clogged air filter. The filter traps dust, pet dander, and other airborne particles to protect the internal components. But when it gets too dirty, it restricts airflow, forcing the unit to work harder and eventually leading to overheating or shutdown.
Another frequent issue is sludge or mold buildup in the water tank or drain hose. Standing water creates the perfect environment for bacteria and mildew, which can spread through the system and block airflow or damage parts.
In colder environments, ice can form on the evaporator coils, especially if the defrost function isn’t working properly. This ice buildup can mimic a clog by blocking airflow and reducing efficiency.
Finally, debris like lint, hair, or small particles can accumulate in the fan blades or intake vents, further restricting airflow and causing the unit to underperform.
Understanding these causes helps you target the right areas during cleaning and take preventive steps to avoid repeat problems.
Safety First: Preparing to Clean Your Dehumidifier
Cleaning a dehumidifier is generally safe, but it’s important to take a few precautions to protect yourself and your appliance.
Turn Off and Unplug the Unit
Always start by turning off the dehumidifier and unplugging it from the power outlet. This prevents accidental startup and reduces the risk of electric shock. Even if the unit appears to be off, residual power can still pose a danger.
Let the Unit Cool Down
If the dehumidifier has been running recently, give it at least 30 minutes to cool down. The coils and internal components can get quite hot during operation, and touching them too soon could result in burns.
Wear Protective Gear
Consider wearing gloves and a dust mask, especially if you’re sensitive to mold or dust. Cleaning can stir up particles that may irritate your skin or lungs.
Gather Your Cleaning Supplies
Before you begin, make sure you have everything you need. Here’s a quick checklist:
- Soft-bristled brush (like an old toothbrush)
- Mild dish soap or white vinegar
- Clean cloths or microfiber towels
- Bucket of warm water
- Vacuum with a brush attachment (optional)
- Replacement air filter (if needed)
- Screwdriver (if your model requires disassembly)
Having these items ready will make the process smoother and faster.
Step 1: Remove and Clean the Air Filter
The air filter is the first line of defense in your dehumidifier, and it’s also the most likely place for clogs to start.
Locate the Filter
Most dehumidifiers have a removable filter located behind a front or side grille. Look for a panel that slides out or lifts off. Some models have a filter indicator light that alerts you when it’s time to clean or replace it.
Remove the Filter
Gently pull the filter out of its housing. If it’s held in place by clips or screws, use a screwdriver to carefully release it. Be gentle—filters can be fragile, especially if they’re old or brittle.
Vacuum Loose Debris
Use a vacuum with a brush attachment to remove loose dust and dirt from the filter. This step helps prolong the life of the filter and makes washing more effective.
Wash the Filter
If your filter is washable (check the manufacturer’s instructions), rinse it under warm water. For stubborn grime, soak it in a mixture of warm water and mild dish soap for 10–15 minutes. Use a soft brush to gently scrub both sides, then rinse thoroughly.
Avoid using harsh chemicals or high-pressure water, as these can damage the filter material.
Let It Dry Completely
Place the filter on a clean towel and let it air dry completely—this may take several hours. Never reinstall a damp filter, as moisture can promote mold growth inside the unit.
Replace if Necessary
If the filter is torn, excessively dirty, or no longer effective, replace it with a new one. A clean filter ensures optimal airflow and protects internal components.
Step 2: Empty and Clean the Water Tank
The water tank collects moisture extracted from the air, but over time, it can become a breeding ground for mold, bacteria, and sludge.
Remove the Tank
Slide or lift the water tank out of the dehumidifier. Be careful—it may still contain water, so empty it into a sink or bucket first.
Rinse with Warm Water
Rinse the inside of the tank with warm water to remove loose residue. Avoid using hot water, as it can warp plastic components.
Scrub with Soap and Water
Add a few drops of mild dish soap to the tank, then use a soft brush or sponge to scrub the interior walls, corners, and spout. Pay special attention to areas with visible slime or discoloration.
Disinfect with Vinegar
For extra cleaning power, mix equal parts white vinegar and water and let it sit in the tank for 15–20 minutes. Vinegar is a natural disinfectant that kills mold and bacteria without harsh chemicals. After soaking, scrub again and rinse thoroughly.
Check the Tank Sensor
Some tanks have a float sensor or switch that tells the dehumidifier when the tank is full. Make sure this component moves freely and isn’t stuck or corroded. Clean it gently with a damp cloth.
Let It Dry
Allow the tank to air dry completely before reinserting it into the unit.
Step 3: Clean the Drain Hose (If Applicable)
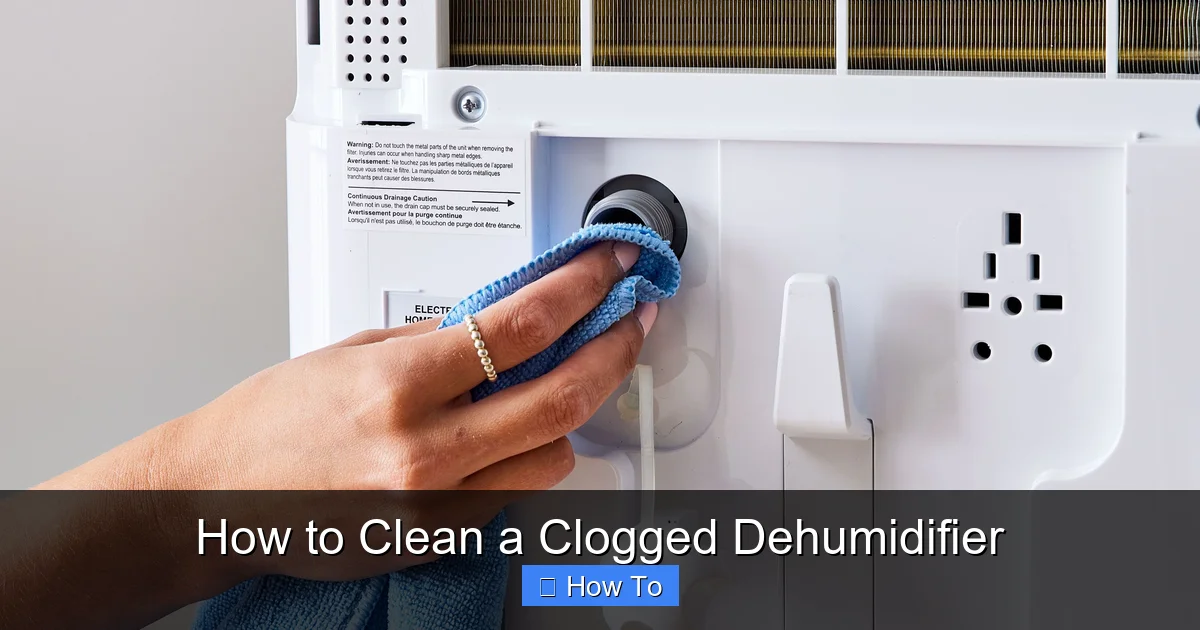
Many dehumidifiers come with a continuous drain hose that allows you to empty the tank automatically. Over time, this hose can become clogged with algae, mold, or mineral deposits.
Disconnect the Hose
Carefully detach the drain hose from the dehumidifier and the drain outlet. Have a bucket ready to catch any residual water.
Flush with Water
Run warm water through the hose to flush out loose debris. You can use a hose attachment or a sink faucet.
Use a Brush for Stubborn Clogs
If water doesn’t flow freely, use a flexible bottle brush or a wire hanger (with the end smoothed) to gently scrub the inside of the hose. Be careful not to puncture or damage the tubing.
Disinfect with Vinegar
Pour a cup of white vinegar into the hose and let it sit for 30 minutes to dissolve mineral buildup and kill bacteria. Then flush it thoroughly with water.
Reattach the Hose
Once clean and dry, reattach the hose securely to both the dehumidifier and the drain outlet. Make sure there are no kinks or bends that could restrict flow.
Step 4: Clean the Coils and Fan
The evaporator and condenser coils are essential for removing moisture from the air. When they’re clogged with dust or debris, the dehumidifier can’t function efficiently.
Access the Coils
Depending on your model, you may need to remove a front or side panel to access the coils. Use a screwdriver if necessary, and keep track of any screws.
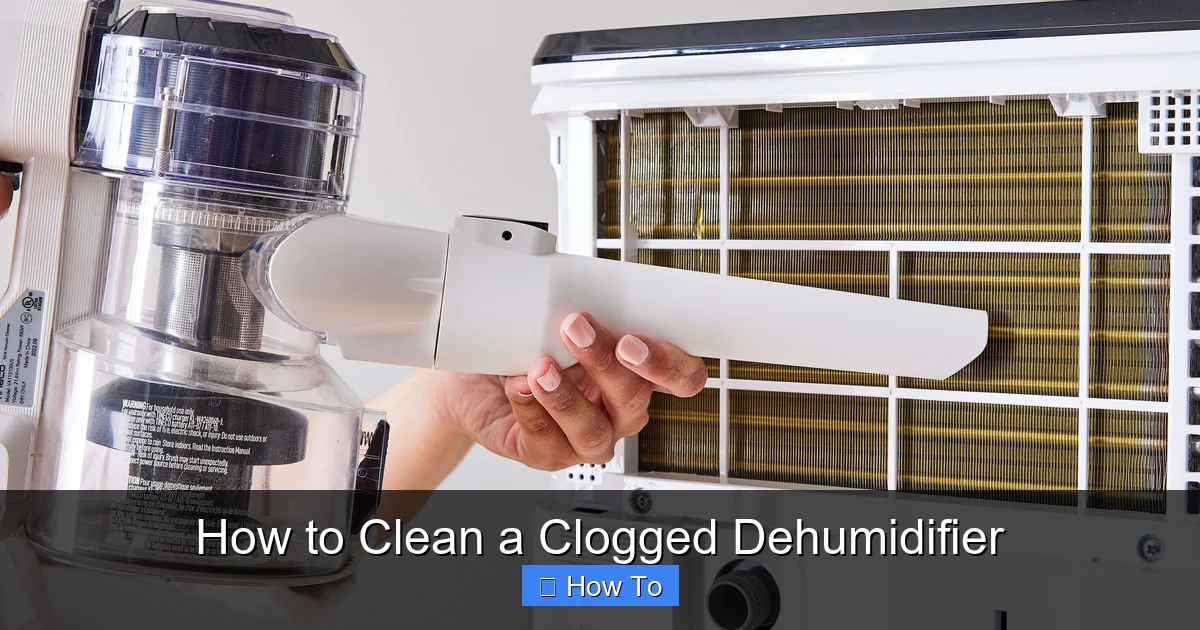
Vacuum the Coils
Use a vacuum with a brush attachment to gently remove dust and dirt from the coils. Be careful not to bend the delicate fins—these help transfer heat and can be easily damaged.
Use a Coil Cleaner (Optional)
For heavy buildup, consider using a commercial coil cleaner spray. Follow the manufacturer’s instructions and allow the cleaner to sit for the recommended time before rinsing or wiping off.
Clean the Fan Blades
The fan helps circulate air through the unit. Over time, dust and debris can accumulate on the blades, reducing efficiency. Use a soft brush or cloth to wipe each blade clean. If the fan is hard to reach, a can of compressed air can help blow out dust.
Check for Obstructions
Make sure nothing is blocking the fan or airflow paths, such as loose wires or foreign objects.
Step 5: Inspect for Ice Buildup (Cold Weather Models)
If you use your dehumidifier in a basement, garage, or other cool area, ice buildup on the coils can mimic a clog.
Check the Coils
Look for frost or ice on the evaporator coils. If present, the unit may be struggling to defrost properly.
Let It Defrost
Turn off the dehumidifier and let it sit for several hours to allow the ice to melt naturally. Do not use a hairdryer or heat gun, as this can damage components.
Clean the Defrost Sensor
Some models have a defrost sensor that detects ice buildup. Locate this sensor (usually near the coils) and clean it gently with a dry cloth. If it’s dirty or corroded, it may not function correctly.
Improve Airflow
Ensure the dehumidifier has adequate space around it for airflow. Avoid placing it near cold walls or in drafty areas that promote ice formation.
Step 6: Reassemble and Test the Unit
Once all components are clean and dry, it’s time to put everything back together.
Reinstall the Filter and Tank
Place the clean, dry filter back into its housing and reinsert the water tank. Make sure both are securely in place.
Reattach Panels and Hoses
If you removed any panels or hoses, reattach them carefully. Double-check that all connections are tight and secure.
Plug In and Turn On
Plug the dehumidifier back into the power outlet and turn it on. Set it to your desired humidity level.
Run a Test Cycle
Let the unit run for at least 30 minutes. Listen for unusual noises and check that air is flowing smoothly from the vents. If the unit shuts off unexpectedly or doesn’t seem to be working, refer to the troubleshooting section below.
Troubleshooting Common Issues
Even after cleaning, you might encounter problems. Here’s how to address some common issues:
Unit Won’t Turn On
- Check the power cord and outlet.
- Ensure the water tank is properly seated—many units won’t run if the tank is missing or not fully inserted.
- Look for a tripped internal fuse or reset button.
Weak Airflow
- Double-check that the filter is clean and properly installed.
- Inspect the fan and coils for blockages.
- Make sure the unit isn’t placed too close to walls or furniture.
Water Leaking
- Check the water tank for cracks or warping.
- Ensure the drain hose is securely attached and not kinked.
- Verify that the float sensor in the tank isn’t stuck.
Strange Odors
- Run a vinegar rinse through the tank and hose to eliminate mold or bacteria.
- Replace the air filter if it smells musty.
- Consider using an air purifier or dehumidifier with a charcoal filter.
Unit Freezes Up
- Move the dehumidifier to a warmer location (above 65°F).
- Clean the defrost sensor and coils.
- Reduce runtime in cold environments or use a model designed for low temperatures.
Preventing Future Clogs
Regular maintenance is the best way to keep your dehumidifier running smoothly and avoid clogs.
Clean the Filter Monthly
Make it a habit to check and clean the air filter every month, especially during high-use seasons.
Empty the Tank Daily
If you’re not using a continuous drain, empty the water tank daily to prevent mold and bacteria growth.
Use a Drain Hose
For continuous operation, install a drain hose to eliminate the need to manually empty the tank.
Keep the Area Clean
Dust and debris in the room can clog the filter faster. Regularly vacuum and dust the area around the dehumidifier.
Schedule Seasonal Deep Cleans
Every 3–6 months, perform a full cleaning of all components, including coils, fan, and hoses.
Replace Filters Annually
Even with regular cleaning, filters wear out over time. Replace them at least once a year, or more often if you have pets or allergies.
Conclusion
Cleaning a clogged dehumidifier doesn’t have to be complicated. By following these steps—starting with safety, cleaning the filter and tank, clearing the drain hose, and inspecting the coils and fan—you can restore your unit’s performance and extend its lifespan.
Regular maintenance not only prevents clogs but also improves air quality, reduces energy consumption, and saves you money on repairs or replacements. With just a little time and effort each month, you can keep your dehumidifier running like new.
Remember, a clean dehumidifier is an efficient dehumidifier. So don’t wait until it stops working—make cleaning part of your routine. Your home (and your lungs) will thank you.