

Keeping your dehumidifier bucket clean is essential for optimal performance and indoor air quality. This guide walks you through the entire cleaning process, from safety prep to reassembly, with expert tips to prevent mold, odors, and clogs.
Quick Answers to Common Questions
Tip/Question?
Can I use bleach to clean my dehumidifier bucket?
Yes, but only for severe mold or odor issues. Use a diluted solution (1 part bleach to 10 parts water), wear gloves, and rinse thoroughly. Never mix bleach with vinegar or ammonia.
Tip/Question?
How often should I clean the dehumidifier bucket?
Clean it every 1–2 weeks during heavy use, or monthly during lighter use. Watch for odors, slime, or reduced performance as signs it’s time.
Tip/Question?
What if my dehumidifier bucket is cracked?
Replace it immediately. A cracked bucket can leak, damage your floor, or cause the unit to malfunction. Check your manufacturer’s website for replacement parts.
Tip/Question?
Can I run vinegar through the whole dehumidifier?
Only pour vinegar into the bucket—not into the internal components. Let it sit, then empty and rinse. Never pour liquids into the air intake or coils.
Tip/Question?
Why does my dehumidifier smell even after cleaning?
The odor may be in the internal drain pan or coils. Run a vinegar soak in the bucket, or use a dehumidifier cleaner tablet to eliminate lingering smells.
Why Cleaning Your Dehumidifier Bucket Matters
If you’ve ever pulled out your dehumidifier bucket and noticed a slimy film, musty smell, or discolored water, you’re not alone. Over time, the bucket that collects moisture from the air becomes a breeding ground for mold, mildew, and bacteria. These contaminants don’t just smell bad—they can be released back into your home’s air when the unit runs, affecting indoor air quality and potentially triggering allergies or respiratory issues.
Beyond health concerns, a dirty bucket can interfere with your dehumidifier’s performance. Residue buildup may clog the drain hose or interfere with the float switch—a small device that signals the unit to shut off when the bucket is full. If this mechanism gets gummed up, your dehumidifier might overflow, leak onto your floor, or fail to turn on at all. In short, a clean bucket isn’t just about hygiene; it’s about keeping your appliance working efficiently and safely.
Fortunately, cleaning a dehumidifier bucket is simple, quick, and requires only basic household supplies. With regular maintenance—ideally every one to two weeks during humid seasons—you can prevent most problems before they start. This guide will walk you through the entire process, from preparation to reassembly, with practical tips to make the job easier and more effective.
When Should You Clean the Dehumidifier Bucket?
There’s no one-size-fits-all answer, but a good rule of thumb is to clean the bucket every 1–2 weeks if you’re running your dehumidifier daily. In high-humidity environments—like basements, laundry rooms, or coastal areas—you may need to clean it weekly. During drier months or if the unit runs infrequently, monthly cleaning might suffice.
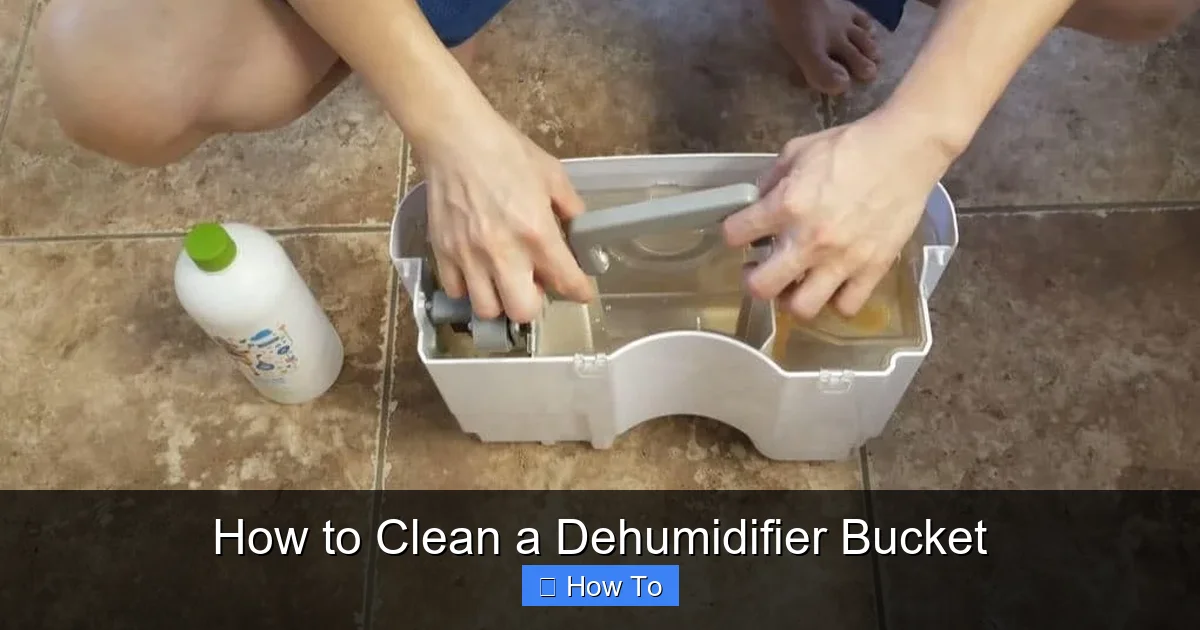
Visual guide about How to Clean a Dehumidifier Bucket
Image source: maidforyou.com.au
However, don’t wait for a schedule. Watch for these signs that it’s time to clean:
- A strong musty or sour odor coming from the unit
- Visible slime, film, or discoloration inside the bucket
- Water stains or residue around the bucket compartment
- The dehumidifier isn’t collecting as much water as usual
- You notice mold spots, especially near the drain hole or float mechanism
Even if the bucket looks clean, residual minerals from hard water can build up over time, creating a sticky surface where microbes thrive. So, regular cleaning isn’t just reactive—it’s preventive.
What You’ll Need to Clean a Dehumidifier Bucket
Before you start, gather these supplies. Most are likely already in your cleaning cabinet:
- Warm water
- Mild dish soap or all-purpose cleaner
- White vinegar or a diluted bleach solution (1 part bleach to 10 parts water)
- A soft sponge or cloth (avoid abrasive scrubbers)
- An old toothbrush (great for tight corners and the float mechanism)
- Rubber gloves (to protect your hands from cleaning agents and contaminants)
- A clean towel or paper towels
- Optional: Baking soda for extra scrubbing power on tough stains
You don’t need expensive specialty cleaners. In fact, harsh chemicals like ammonia or abrasive powders can damage plastic components or leave residues that affect performance. Stick to gentle, non-toxic options unless you’re dealing with severe mold.
Step-by-Step Guide to Cleaning Your Dehumidifier Bucket
Now that you’re prepared, let’s get into the actual cleaning process. Follow these steps carefully to ensure a thorough and safe clean.
Step 1: Turn Off and Unplug the Dehumidifier
Safety first! Always disconnect your dehumidifier from the power source before handling any internal components. This prevents electric shock and ensures the unit won’t accidentally turn on while you’re working. If your model has a “bucket full” indicator light, make sure it’s off before proceeding.
Let the unit sit for 10–15 minutes after unplugging. This allows any internal components to cool down, especially if the dehumidifier has been running recently.
Step 2: Remove the Bucket
Locate the bucket—usually at the front or bottom of the unit. Most models have a handle or release latch. Gently pull the bucket straight out. Be careful: it may still contain water, even if the float switch triggered a shutdown.
Tip: Place a small towel or shallow tray beneath the bucket as you remove it to catch any drips. If the bucket is heavy or full, empty it into a sink or drain before carrying it to your cleaning area.
Step 3: Empty and Rinse the Bucket
Pour out any remaining water. Then, rinse the bucket under warm running water to remove loose debris, sediment, or floating particles. This initial rinse makes the deep clean more effective.
Don’t skip this step—even if the water looks clear. Minerals and organic matter can cling to the sides and bottom, invisible to the naked eye.
Step 4: Prepare Your Cleaning Solution
For routine cleaning, mix a few drops of mild dish soap with warm water in a sink or basin. For tougher grime or mildew, use one of these natural solutions:
- Vinegar soak: Fill the bucket halfway with white vinegar and let it sit for 15–20 minutes. Vinegar is a natural disinfectant that kills mold and breaks down mineral deposits.
- Bleach solution: Mix 1 tablespoon of unscented bleach with 1 gallon of water. Use this only for severe mold or odor issues, and never mix bleach with vinegar or ammonia.
- Baking soda paste: For stubborn stains, make a paste with baking soda and water. Apply it to affected areas and let it sit for 10 minutes before scrubbing.
Always wear gloves when handling bleach or vinegar, and work in a well-ventilated area.
Step 5: Scrub the Bucket Thoroughly
Using your sponge or cloth, scrub the inside and outside of the bucket, paying special attention to:
- The bottom and corners where sludge tends to accumulate
- The rim and handle area, which often get overlooked
- The drain hole or spout (if your bucket has one)
- Any grooves or seams where dirt can hide
For tight spaces—like around the float mechanism or sensor contacts—use an old toothbrush. These small tools are perfect for getting into crevices without scratching the plastic.
If you’re using vinegar or bleach, let the solution sit for the recommended time before scrubbing. This gives it time to break down organic matter and disinfect surfaces.
Step 6: Clean the Float Mechanism and Sensor
The float is a small plastic piece that rises with the water level and triggers the shut-off switch. If it gets sticky or coated in residue, your dehumidifier may not turn on or could overflow.
To clean it:
- Gently remove the float (if detachable) or wipe it carefully in place.
- Use the toothbrush and soapy water to clean around its base and moving parts.
- Check for cracks or warping—damaged floats should be replaced.
- Ensure the float moves freely up and down without sticking.
Also, wipe down any sensor contacts or switches near the bucket compartment. These are often small metal prongs or plastic tabs that detect when the bucket is in place. Dust or residue here can cause false readings.
Step 7: Rinse and Dry Completely
After scrubbing, rinse the bucket thoroughly with clean water to remove all soap, vinegar, or bleach residue. Leftover cleaner can affect performance or leave odors.
Then, dry the bucket completely with a clean towel or let it air-dry upside down on a dish rack. Moisture left inside can promote mold growth, even after cleaning. Make sure the float mechanism and drain areas are dry too.
Never reassemble a damp bucket. Wait at least 30 minutes to ensure everything is fully dry.
Step 8: Clean the Bucket Compartment
While the bucket dries, take a moment to clean the area inside the dehumidifier where the bucket sits. Use a damp cloth to wipe away dust, water spots, or mildew. If you see mold or slime, apply a vinegar-soaked cloth and let it sit for 10 minutes before wiping clean.
Check the drain hose (if your model has one) for clogs. Blow through it gently or use a pipe cleaner to remove debris. A blocked hose can cause backups and leaks.
Step 9: Reassemble and Test
Once everything is dry, place the bucket back into the dehumidifier. Make sure it’s seated properly and clicks into place if your model has a latch.
Plug the unit back in and turn it on. Run it for 10–15 minutes and check for:
- Proper water collection in the bucket
- No leaks or unusual noises
- The “bucket full” light turning on when the bucket is nearly full
If everything works as expected, you’re all set! If not, double-check the float mechanism and sensor alignment.
Troubleshooting Common Issues
Even with regular cleaning, you might encounter problems. Here’s how to handle the most common ones:
Problem: Bucket Still Smells After Cleaning
If odors persist, the smell may be trapped in the unit’s internal coils or drain pan. Run a vinegar rinse through the system: pour a cup of white vinegar into the bucket, let it sit for an hour, then empty and rinse. You can also use a dehumidifier cleaner tablet (available online) designed to eliminate odors.
Problem: Water Leaks from the Bucket
Check for cracks in the bucket or a misaligned float. Also, ensure the drain hose (if used) isn’t kinked or clogged. Replace damaged parts immediately.
Problem: Dehumidifier Won’t Turn On
This is often due to a stuck float or dirty sensor. Clean the float mechanism and wipe the sensor contacts. If the issue continues, consult your user manual or contact the manufacturer.
Problem: White Residue in the Bucket
This is mineral buildup from hard water. Soak the bucket in vinegar for 30 minutes, then scrub. Consider using a water softener or filtered water if your area has very hard water.
Maintenance Tips for Long-Term Performance
Cleaning the bucket is just one part of dehumidifier care. Follow these tips to keep your unit in top shape:
- Clean the air filter monthly. A clogged filter reduces airflow and efficiency.
- Keep the unit away from walls and furniture. Allow at least 6 inches of clearance for proper ventilation.
- Use a drain hose for continuous drainage. This eliminates the need to empty the bucket and reduces cleaning frequency.
- Store the dehumidifier properly during off-seasons. Clean it thoroughly, remove the bucket, and cover it to prevent dust buildup.
- Check for recalls or manufacturer updates. Some models have known issues with bucket design or sensors.
Conclusion
Cleaning your dehumidifier bucket is a small task with big benefits. It improves air quality, prevents malfunctions, and helps your unit run efficiently for years. By following this guide, you’ll keep your dehumidifier in peak condition with minimal effort.
Remember: consistency is key. Set a reminder on your phone or calendar to clean the bucket every one to two weeks during humid months. Your home—and your health—will thank you.