
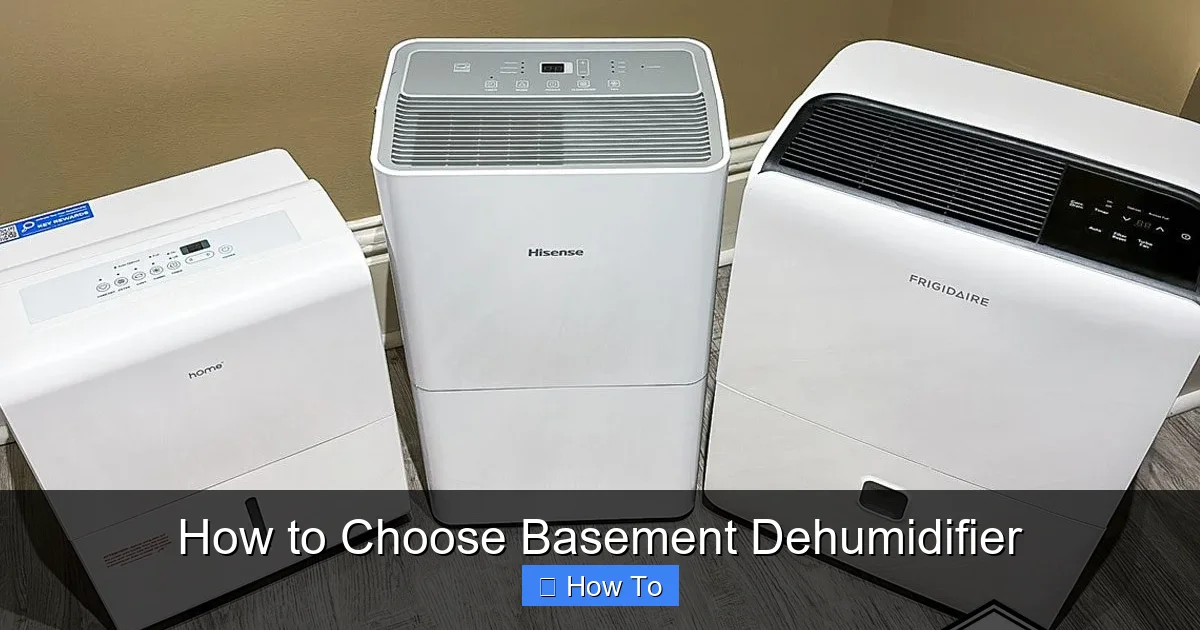
Choosing the right basement dehumidifier can prevent mold, musty odors, and structural damage. This guide walks you through key factors like capacity, size, drainage, and smart features to help you pick the perfect unit for your space.
Quick Answers to Common Questions
What size dehumidifier do I need for a 1,000 sq. ft. basement?
For a 1,000 sq. ft. basement, choose a 50–70 pint dehumidifier if it’s very damp, or 30–50 pints if moderately damp. Always consider humidity level, not just square footage.
Should I get a dehumidifier with a pump?
Yes, if your basement lacks a floor drain or is below ground level. A built-in pump lets you drain water upward to a sink or window, eliminating daily bucket emptying.
How often should I clean my dehumidifier filter?
Clean the filter every 4–6 weeks during heavy use, or monthly in humid climates. A dirty filter reduces efficiency and can cause odors.
Can I run a dehumidifier in winter?
Yes, but only if the basement stays above 65°F. Below that, frost can form on coils. Look for models with auto-defrost for cold-weather use.
Is a more expensive dehumidifier always better?
Not necessarily. Focus on features that match your needs—like capacity, drainage, and energy efficiency—rather than price alone. Mid-range models often offer the best value.
How to Choose Basement Dehumidifier: A Complete Step-by-Step Guide
If your basement feels damp, smells musty, or shows signs of mold, a dehumidifier can be a game-changer. But with so many models on the market, how do you pick the right one? Don’t worry—this guide will walk you through everything you need to know to choose the best basement dehumidifier for your home.
Whether you’re dealing with a small, occasionally damp space or a large, chronically wet basement, the right dehumidifier can improve air quality, protect your belongings, and even boost your home’s overall comfort. In this guide, you’ll learn how to assess your needs, compare features, and make a smart, long-term investment.
We’ll cover capacity, size, drainage options, energy efficiency, noise levels, and smart features—plus tips for placement and maintenance. By the end, you’ll feel confident choosing a dehumidifier that keeps your basement dry, healthy, and mold-free.
Step 1: Assess Your Basement’s Size and Humidity Level
Visual guide about How to Choose Basement Dehumidifier
Image source: thespruce.com
Before buying a dehumidifier, you need to understand your basement’s unique conditions. Two key factors matter most: square footage and humidity level.
Measure Your Basement’s Square Footage
Start by measuring the length and width of your basement. Multiply these numbers to get the total square footage. For example, a 20-foot by 30-foot basement is 600 square feet.
Why does size matter? Dehumidifiers are rated by how much moisture they can remove per day—measured in pints. A unit too small for your space won’t keep up, while an oversized one may cycle too quickly and waste energy.
Use this general guideline:
– Up to 500 sq. ft.: 20–30 pint capacity
– 500–1,000 sq. ft.: 30–50 pint capacity
– 1,000–1,500 sq. ft.: 50–70 pint capacity
– Over 1,500 sq. ft.: 70+ pint capacity
Determine the Humidity Level
Next, assess how damp your basement really is. You can do this in a few ways:
– Use a hygrometer (a small, inexpensive device that measures humidity). Ideal indoor humidity is between 30% and 50%.
– Look for signs: condensation on walls or windows, peeling paint, rust on metal, or a persistent musty smell.
– Check for standing water, leaks, or flooding after rain.
Based on your findings, categorize your basement:
– Moderately damp: Occasional dampness, slight odor, humidity around 50–60%. A 30–50 pint unit should suffice.
– Very damp: Frequent moisture, noticeable odor, humidity 60–70%. Opt for a 50–70 pint model.
– Wet or flood-prone: Standing water, high humidity (70%+), or recent flooding. Choose a 70+ pint dehumidifier with a pump.
Pro tip: If your basement has poor ventilation or is below ground level, it’s likely more humid. Consider a higher-capacity unit even if the space is small.
Step 2: Choose the Right Capacity and Size
Dehumidifier capacity is measured in pints per day (PPD)—the amount of moisture removed in 24 hours. But bigger isn’t always better. Here’s how to find the sweet spot.
Match Capacity to Your Needs
Use your square footage and humidity level to guide your choice. For example:
– A 500 sq. ft. basement with moderate dampness: 30–50 pint unit
– A 1,200 sq. ft. basement that’s very damp: 50–70 pint unit
– A 2,000 sq. ft. basement with frequent leaks: 70+ pint unit with a built-in pump
Avoid going too small. A 20-pint dehumidifier in a large, wet basement will run constantly and still fail to keep up. Conversely, an oversized unit may short-cycle (turn on and off too quickly), reducing efficiency and lifespan.
Consider Physical Size and Portability
Dehumidifiers come in different shapes and weights. Most basement models are freestanding and range from 30 to 70 pounds.
Ask yourself:
– Do you need to move it often? Look for models with handles and wheels.
– Is space limited? Measure the area where you’ll place it—some units are tall and narrow, others wide and low.
– Will it be in a finished basement or utility room? Aesthetics may matter.
Many modern dehumidifiers are designed to blend in, with sleek finishes and compact footprints. Some even look like small refrigerators.
Step 3: Evaluate Drainage Options
One of the biggest hassles with dehumidifiers is emptying the water bucket. Fortunately, there are smarter ways to handle drainage.
Manual Bucket vs. Continuous Drainage
Most dehumidifiers come with a built-in bucket that collects water. When full, you must empty it—usually every 12 to 24 hours in humid conditions.
But if you don’t want to deal with this chore, look for models with:
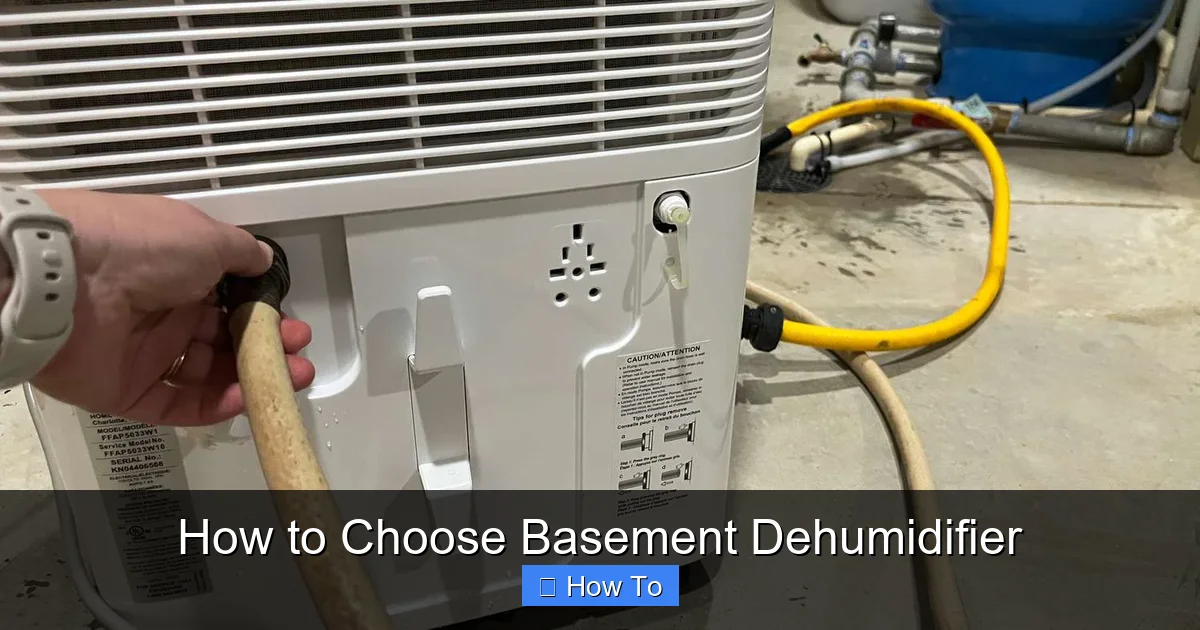
– A continuous drain hose: Attach a garden hose to the outlet and route it to a floor drain, sump pump, or outside. This allows 24/7 operation without intervention.
– A built-in pump: Essential for basements without floor drains. The pump pushes water upward through a hose, even to a sink or window. This is a must-have if your basement is below ground level.
Pro tip: Even with continuous drainage, keep the bucket in place. Most units automatically switch to bucket mode if the hose clogs or disconnects.
Auto-Shutoff and Alerts
Look for models with:
– Auto-shutoff: Turns off when the bucket is full to prevent overflow.
– Full-bucket indicator: A light or alarm alerts you when it’s time to empty.
– Hose-ready design: Easy-to-attach drain ports with leak-proof fittings.
These features save time and prevent water damage.
Step 4: Check Energy Efficiency and Operating Costs
Dehumidifiers run for hours each day, so energy use adds up. Choosing an efficient model saves money and reduces environmental impact.
Look for Energy Star Certification
The U.S. Environmental Protection Agency’s Energy Star label means the unit meets strict efficiency guidelines. Energy Star dehumidifiers use 15–30% less energy than standard models.
For example:
– A standard 50-pint dehumidifier might use 500 watts.
– An Energy Star model uses around 350–400 watts.
Over a year, that can save $20–$50 on electricity, depending on usage and local rates.
Calculate Operating Costs
To estimate costs:
1. Find the wattage on the label or manual.
2. Multiply by hours used per day.
3. Multiply by your electricity rate (in kWh).
4. Divide by 1,000 to convert watts to kilowatts.
Example:
– 400 watts × 12 hours = 4,800 watt-hours
– 4,800 ÷ 1,000 = 4.8 kWh
– 4.8 kWh × $0.12/kWh = $0.58 per day
– $0.58 × 30 = $17.40 per month
Compare models to find the most cost-effective option.
Humidity-Sensing Technology
Advanced models use humidistats to monitor air moisture and adjust operation automatically. This prevents over-drying and saves energy.
Some even have:
– Auto-defrost: Prevents ice buildup in cold basements (below 65°F).
– Variable speed fans: Adjust airflow based on need.
These features improve efficiency and comfort.
Step 5: Consider Noise Levels
If your basement is a living space—like a home gym, office, or playroom—noise matters. Dehumidifiers produce sound from fans and compressors, typically ranging from 45 to 60 decibels (dB).
What’s Acceptable?
– Under 50 dB: Quiet, like a whisper or refrigerator hum. Ideal for bedrooms or quiet spaces.
– 50–55 dB: Moderate noise, like a conversation. Fine for utility rooms or garages.
– Over 55 dB: Noticeable and potentially disruptive.
Check product specs for noise ratings. Some brands highlight “quiet operation” or “low-noise design.”
Placement Tips to Reduce Noise
– Place the unit on a rubber mat to dampen vibrations.
– Keep it away from walls or furniture that can amplify sound.
– Use in a corner with good airflow but minimal foot traffic.
If noise is a top concern, consider a basement dehumidifier with a “sleep mode” or variable fan speeds.
Step 6: Explore Smart Features and Controls
Modern dehumidifiers offer features that make operation easier and more effective.
Digital Controls and Humidistat
Look for:
– Digital display: Shows current humidity, settings, and alerts.
– Adjustable humidistat: Set your ideal humidity level (e.g., 45%). The unit maintains it automatically.
– Timer: Schedule on/off times to match your routine.
These features give you precise control without constant monitoring.
Wi-Fi and App Connectivity
Some high-end models connect to your home Wi-Fi, allowing you to:
– Monitor humidity remotely via smartphone app.
– Receive alerts when the bucket is full or maintenance is needed.
– Adjust settings from anywhere.
Great for vacation homes or busy households.
Auto-Restart and Memory Function
If the power goes out, an auto-restart feature turns the unit back on at the last setting. This ensures continuous protection during storms or outages.
Step 7: Think About Maintenance and Durability
A dehumidifier is a long-term investment. Choose one that’s easy to maintain and built to last.
Filter Maintenance
Most units have a washable or replaceable air filter that traps dust and allergens. Check it monthly and clean it with soap and water.
Some models have:
– Filter cleaning indicator: Alerts you when it’s time to clean.
– HEPA or antimicrobial filters: Better for allergy sufferers.
Coil and Internal Cleaning
Over time, moisture and dust can build up on internal coils. Some units have:
– Self-cleaning modes: Use high heat or airflow to reduce mold and bacteria.
– Easy-access panels: Simplify cleaning and servicing.
Regular maintenance prevents odors and keeps efficiency high.
Build Quality and Warranty
Look for:
– Sturdy construction: Metal casing over plastic.
– Corrosion-resistant parts: Especially important in damp environments.
– Long warranty: At least 2–5 years. Some brands offer extended coverage.
Read customer reviews to see how units hold up over time.
Step 8: Compare Brands and Read Reviews
Not all dehumidifiers are created equal. Research brands known for reliability and performance.
Top Brands to Consider
– Frigidaire: Reliable, Energy Star models with good value.
– hOmeLabs: Popular for basements, strong pumps, and smart features.
– GE: Durable units with excellent customer support.
– Keystone: Affordable options for small to mid-sized spaces.
– AprilAire: Whole-home systems, great for large basements.
Read Real User Reviews
Check reviews on Amazon, Home Depot, or Consumer Reports. Look for comments on:
– Noise level
– Ease of setup
– Drainage reliability
– Long-term performance
Avoid models with frequent complaints about leaks, breakdowns, or poor customer service.
Step 9: Make the Purchase and Set It Up
Once you’ve chosen your dehumidifier, it’s time to buy and install.
Where to Buy
– Home improvement stores: Lowe’s, Home Depot, Menards—great for in-person inspection.
– Online retailers: Amazon, Walmart, Best Buy—often better prices and reviews.
– Manufacturer websites: May offer exclusive models or warranties.
Installation Tips
– Place the unit in a central location with at least 6–12 inches of clearance on all sides.
– Avoid placing near heat sources or in direct sunlight.
– Use a dedicated outlet—don’t plug into extension cords.
– If using a drain hose, secure it with clips to prevent kinks or leaks.
First Run
– Let the unit sit upright for 24 hours after delivery (if shipped on its side).
– Plug it in and set your desired humidity level.
– Monitor for the first few days to ensure it’s working properly.
Troubleshooting Common Issues
Even the best dehumidifiers can have problems. Here’s how to fix common issues:
Unit Isn’t Removing Moisture
– Check the filter—clean or replace if dirty.
– Ensure proper airflow (no blocked vents).
– Verify the humidistat is set correctly.
– Make sure the room isn’t too cold (below 65°F can cause frost).
Water Leaking or Overflowing
– Empty the bucket if full.
– Check the drain hose for clogs or improper routing.
– Ensure the unit is level—tilting can cause leaks.
Unusual Noise or Vibration
– Place on a flat, stable surface.
– Check for loose parts or debris in the fan.
– Use a rubber mat to reduce vibration.
Unit Won’t Turn On
– Check the power outlet and circuit breaker.
– Ensure the bucket is properly seated.
– Look for error codes on the display.
Conclusion
Choosing the right basement dehumidifier doesn’t have to be overwhelming. By assessing your basement’s size and humidity, selecting the right capacity, and prioritizing features like drainage, energy efficiency, and smart controls, you can find a unit that keeps your space dry and healthy for years.
Remember: a good dehumidifier is an investment in your home’s air quality, structural integrity, and comfort. Take the time to compare models, read reviews, and choose one that fits your lifestyle and budget.
With the right dehumidifier in place, you’ll say goodbye to musty smells, mold growth, and dampness—and hello to a cleaner, more comfortable basement.