
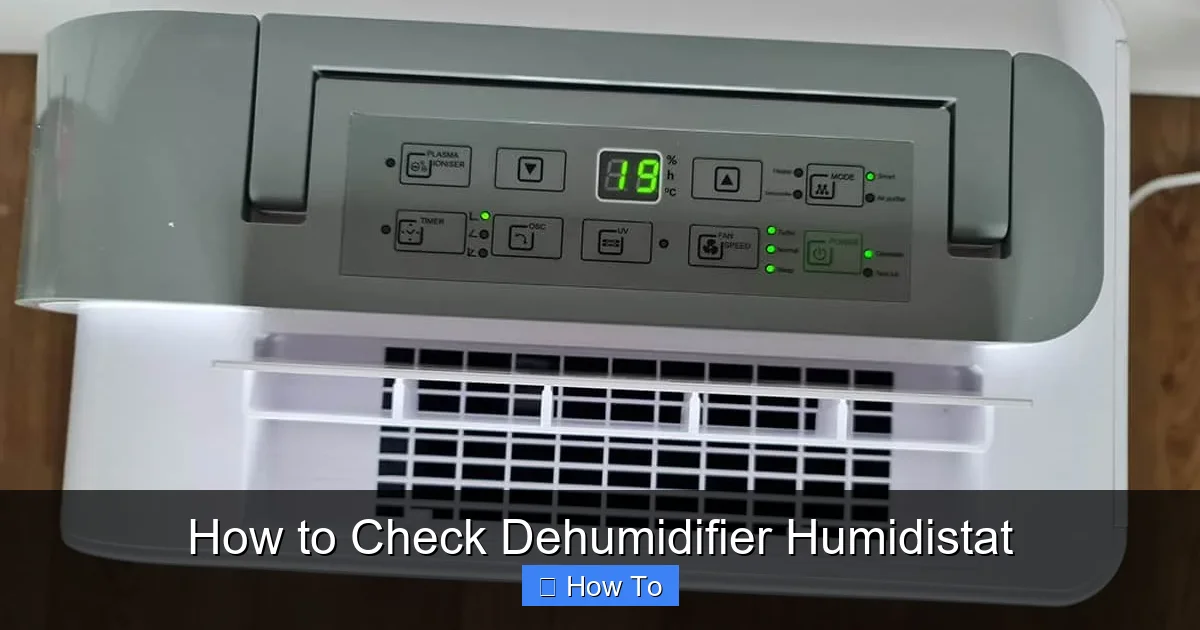
Learn how to check dehumidifier humidistat to ensure your unit is maintaining the right indoor humidity levels. This guide walks you through testing, calibrating, and troubleshooting your humidistat for accurate performance and a healthier home environment.
Quick Answers to Common Questions
Tip/Question?
How often should I check my dehumidifier humidistat?
Check it every 3–6 months, or whenever you notice changes in performance, such as constant running or failure to start.
Tip/Question?
Can I use my smartphone to measure humidity instead of a hygrometer?
Some apps claim to measure humidity using phone sensors, but they’re often inaccurate. A dedicated digital hygrometer is far more reliable.
Tip/Question?
What’s the ideal indoor humidity level?
Most experts recommend keeping indoor humidity between 30% and 50%. Below 30% can dry out air; above 50% encourages mold growth.
Tip/Question?
Should I unplug the dehumidifier before checking the humidistat?
Yes, always unplug the unit before cleaning or adjusting internal components to avoid electric shock.
Tip/Question?
Can a faulty humidistat cause mold?
Yes. If the humidistat fails to turn on the dehumidifier when needed, excess moisture can lead to mold and mildew growth.
How to Check Dehumidifier Humidistat: A Complete Guide
Maintaining the right humidity level in your home isn’t just about comfort—it’s about health, safety, and efficiency. Too much moisture can lead to mold, mildew, and musty odors, while too little can dry out your skin, furniture, and even your respiratory system. That’s where your dehumidifier comes in, and at the heart of its operation is a small but powerful component: the humidistat.
In this comprehensive guide, you’ll learn how to check dehumidifier humidistat to ensure it’s working accurately. We’ll walk you through what a humidistat does, why it’s important, and step-by-step instructions to test, calibrate, and troubleshoot it. Whether you’re dealing with a damp basement, a humid crawl space, or just want to improve indoor air quality, this guide will help you get the most out of your dehumidifier.
What Is a Dehumidifier Humidistat?
The humidistat is the control center of your dehumidifier. It’s a built-in sensor that measures the relative humidity (RH) in the air and signals the unit to turn on or off based on your set humidity level. For example, if you set your dehumidifier to maintain 50% humidity, the humidistat continuously monitors the air. When humidity rises above 50%, it triggers the dehumidifier to start. Once the air reaches 50% or below, it shuts off.
Visual guide about How to Check Dehumidifier Humidistat
Image source: hvacseer.com
Think of it like a thermostat, but for moisture instead of temperature. Without a properly functioning humidistat, your dehumidifier might run nonstop, never turn on, or shut off too early—leading to wasted energy, poor air quality, or damage to your home.
How the Humidistat Works
Most modern dehumidifiers use an electronic capacitive or resistive sensor. These sensors detect changes in electrical resistance or capacitance caused by moisture in the air. The data is then processed by the dehumidifier’s control board, which decides whether to activate the compressor and fan.
Some older models use mechanical humidistats with a thin metal strip that expands or contracts with humidity changes. While less precise, they still serve the same basic function.
Why the Humidistat Matters
A faulty or inaccurate humidistat can cause several problems:
- Over-drying: The unit runs constantly, lowering humidity too much and drying out your home.
- Under-drying: The dehumidifier doesn’t turn on when needed, allowing mold and mildew to grow.
- Higher energy bills: Inefficient operation means the unit uses more electricity than necessary.
- Shortened lifespan: Constant running or frequent cycling can wear out components faster.
That’s why checking your dehumidifier humidistat regularly is a smart maintenance step—like changing filters or cleaning coils.
Tools You’ll Need to Check the Humidistat
Before you begin, gather these tools and materials:
- Digital hygrometer: This is the most important tool. It measures humidity independently so you can compare it to your dehumidifier’s reading. Look for one with ±2% accuracy or better.
- Soft cloth or microfiber towel: For cleaning the sensor.
- Compressed air (optional): Helps remove dust from hard-to-reach areas.
- Screwdriver (if needed): Some models require opening a panel to access the humidistat.
- User manual: Always refer to your dehumidifier’s manual for model-specific instructions.
You can find digital hygrometers at hardware stores, online retailers, or even in some smart home devices like thermostats or air quality monitors.
Step-by-Step Guide to Checking Your Dehumidifier Humidistat
Step 1: Prepare the Testing Environment
For accurate results, test the humidistat in the same room where the dehumidifier normally operates. Avoid testing right after showering, cooking, or using humidifiers, as these activities can temporarily spike humidity.
Let the room sit for at least 30 minutes with doors and windows closed to allow humidity levels to stabilize. This ensures you’re measuring the true ambient humidity, not a temporary fluctuation.
Step 2: Set Your Dehumidifier to a Known Humidity Level
Turn on your dehumidifier and set the desired humidity level—say, 50%. Make sure the unit has been running long enough to reach that level. Most dehumidifiers take 1–2 hours to stabilize in a typical room.
Once the unit cycles off (meaning it believes the target humidity has been reached), note the current humidity reading displayed on the dehumidifier’s control panel. This is the reading you’ll compare to your hygrometer.
Step 3: Use a Digital Hygrometer to Measure Actual Humidity
Place your digital hygrometer in the same room, at least 3 feet away from the dehumidifier and any walls. Avoid placing it near vents, windows, or heat sources, as these can affect readings.
Wait 5–10 minutes for the hygrometer to stabilize, then record the humidity level it displays. This is your baseline measurement.
Step 4: Compare the Readings
Now, compare the dehumidifier’s displayed humidity with the hygrometer’s reading.
- If both readings are within 3–5% of each other, your humidistat is likely accurate.
- If the difference is more than 5%, your humidistat may be miscalibrated or faulty.
For example, if your dehumidifier shows 50% but the hygrometer reads 58%, there’s an 8% discrepancy—too large to ignore.
Step 5: Test at Different Humidity Levels
To ensure consistency, repeat the test at different humidity settings. Try setting the dehumidifier to 45%, let it run, then compare again. Then try 55%. This helps you determine if the error is consistent across the range or only at certain levels.
If the error grows larger at higher or lower settings, the sensor may be degrading.
How to Calibrate Your Dehumidifier Humidistat
If you find a discrepancy, the next step is calibration. Not all dehumidifiers allow user calibration, but many do. Here’s how to proceed.
Check the User Manual
Start by consulting your dehumidifier’s user manual. Look for a section on “humidistat calibration,” “sensor adjustment,” or “accuracy check.” Some models have a built-in calibration mode, while others require manual tweaking.
Use Built-in Calibration (If Available)
Some dehumidifiers have a calibration feature in the settings menu. For example:
- Press and hold the “Humidity” or “Settings” button for 5 seconds.
- Use the up/down arrows to adjust the offset (e.g., +3% or -2%).
- Save the setting and retest.
This effectively tells the dehumidifier to “trust” the hygrometer more than its own sensor.
Manual Calibration (Advanced)
On some models, you may need to access the humidistat sensor directly. This usually involves:
- Unplugging the dehumidifier for safety.
- Removing the front or side panel (use a screwdriver if needed).
- Locating the humidistat sensor—often a small circuit board or metal probe near the air intake.
- Adjusting a small potentiometer (trimmer) with a screwdriver. Turn it slightly clockwise or counterclockwise to increase or decrease sensitivity.
Caution: Only attempt this if you’re comfortable with electronics. Incorrect adjustments can damage the unit. When in doubt, contact the manufacturer or a technician.
Recheck After Calibration
After making adjustments, wait 1–2 hours for the system to stabilize, then repeat the comparison test with your hygrometer. Aim for a difference of less than 3%.
Cleaning the Humidistat Sensor
Dust, pet hair, and debris can accumulate on the humidistat sensor, causing inaccurate readings. Cleaning it is simple and often overlooked.
Turn Off and Unplug the Unit
Safety first. Always disconnect power before cleaning internal components.
Locate the Sensor
The sensor is usually near the air intake grille. It may look like a small metal plate, a mesh-covered opening, or a circuit board with tiny components.
Gently Clean the Sensor
Use a soft, dry cloth to wipe away dust. For stubborn grime, lightly dampen the cloth with water—never spray liquid directly on the sensor. Alternatively, use a can of compressed air to blow away debris.
Avoid using abrasive materials or cleaning solutions, as they can damage sensitive components.
Reassemble and Test
Once clean, reattach any panels and plug the unit back in. Run a test cycle and compare readings again. Often, a simple cleaning resolves accuracy issues.
Troubleshooting Common Humidistat Problems
Even after calibration and cleaning, you might still encounter issues. Here are common problems and solutions.
Dehumidifier Won’t Turn On
If the unit never starts, the humidistat might think the air is already dry. Check the following:
- Is the humidity setting too low? Try setting it to 60% to see if it activates.
- Is the sensor dirty or blocked? Clean it as described above.
- Is the hygrometer reading much higher than the dehumidifier’s display? The sensor may be faulty.
Dehumidifier Runs Constantly
If the unit never shuts off, it may believe humidity is still too high. Possible causes:
- The humidistat is misreading high humidity due to a dirty or damaged sensor.
- The dehumidifier is undersized for the space.
- There’s a constant source of moisture (e.g., a leak or poor ventilation).
Test with your hygrometer. If the air is actually dry (below 40%), the humidistat is likely malfunctioning.
Humidity Fluctuates Wildly
If the dehumidifier cycles on and off too frequently, the humidistat may be overly sensitive or poorly calibrated. Try:
- Adjusting the calibration to reduce sensitivity.
- Ensuring the unit is placed in a stable location, away from drafts or heat sources.
- Checking for air leaks around windows or doors that could let in moist air.
Display Shows Error Codes
Some models display error codes related to sensor issues (e.g., “E1” or “Sensor Fault”). Refer to your manual for specific meanings. Often, this indicates a failed humidistat that needs professional repair or replacement.
When to Replace the Humidistat
If calibration, cleaning, and troubleshooting don’t resolve the issue, the humidistat may be beyond repair. Signs it’s time to replace it include:
- Consistent inaccuracies despite multiple calibration attempts.
- Visible damage to the sensor (corrosion, cracks, burnt components).
- The dehumidifier is over 5–7 years old and showing other signs of wear.
Replacement humidistats are available for some models through the manufacturer or third-party suppliers. However, in many cases, it’s more cost-effective to replace the entire unit—especially if it’s an older model.
Preventative Maintenance Tips
To keep your humidistat accurate and your dehumidifier running smoothly, follow these best practices:
- Check the humidistat every 3–6 months. Make it part of your seasonal home maintenance routine.
- Clean the air filter monthly. A dirty filter restricts airflow, which can affect sensor readings.
- Empty the water tank regularly. A full tank can cause the unit to shut off prematurely, giving false humidity readings.
- Keep the area around the dehumidifier clear. Allow at least 6–12 inches of space on all sides for proper airflow.
- Use a hygrometer in multiple rooms. Humidity can vary significantly between basement, bathroom, and living areas.
Conclusion
Knowing how to check dehumidifier humidistat is a valuable skill that can save you money, improve indoor air quality, and extend the life of your appliance. By using a digital hygrometer, comparing readings, and performing regular maintenance, you can ensure your dehumidifier is working as intended.
Remember, the humidistat is the brain of your dehumidifier. If it’s not accurate, the whole system suffers. Don’t wait for mold to grow or your energy bills to spike—take a few minutes every few months to verify your humidistat is doing its job. With the steps in this guide, you’ll have a healthier, more comfortable home and a dehumidifier that works smarter, not harder.